


![[Laser cut and engrave] Laser Engraved Middle Earth Map Wooden Coaster](https://storage-us.atomm.com/resource/xtool/community/attachment/xtool-community/18917a95-db0e-49c8-9cb2-962dfc2d697b.png?x-oss-process=image/resize,w_1200,h_900,limit_0/interlace,1/format,webp/auto-orient,1)
![[Laser cut and engrave] Laser Engraved Middle Earth Map Wooden Coaster](data:image/png;base64,iVBORw0KGgoAAAANSUhEUgAAAAoAAAAKCAYAAACNMs+9AAAAAXNSR0IArs4c6QAAABdJREFUKFNjZCASMBKpjmFUId6QIjp4AAppAAuXjCs4AAAAAElFTkSuQmCC)
![[Laser cut and engrave] Laser Engraved Middle Earth Map Wooden Coaster](https://storage-us.atomm.com/resource/xtool/community/attachment/xtool-community/18917a95-db0e-49c8-9cb2-962dfc2d697b.png?x-oss-process=image/resize,w_200,h_150,limit_0/interlace,1/format,webp/auto-orient,1)
![[Laser cut and engrave] Laser Engraved Middle Earth Map Wooden Coaster](https://storage-us.atomm.com/resource/xtool/community/attachment/xtool-community/a36b7774-6d9f-4b01-ae4f-897780d17e07.jpg?x-oss-process=image/resize,w_200,h_150,limit_0/interlace,1/format,webp/auto-orient,1)
![[Laser cut and engrave] Laser Engraved Middle Earth Map Wooden Coaster](https://storage-us.atomm.com/resource/xtool/community/attachment/xtool-community/db1231a7-ce82-465a-8160-6528371ddc74.jpg?x-oss-process=image/resize,w_200,h_150,limit_0/interlace,1/format,webp/auto-orient,1)
![[Laser cut and engrave] Laser Engraved Middle Earth Map Wooden Coaster](https://storage-us.atomm.com/resource/xtool/community/attachment/xtool-community/73c15437-8d8e-42ec-a91b-3eed2bd3ab9d.png?x-oss-process=image/resize,w_200,h_150,limit_0/interlace,1/format,webp/auto-orient,1)
Laser Engraved Middle Earth Globe Style Wooden Decoration
 Instruction
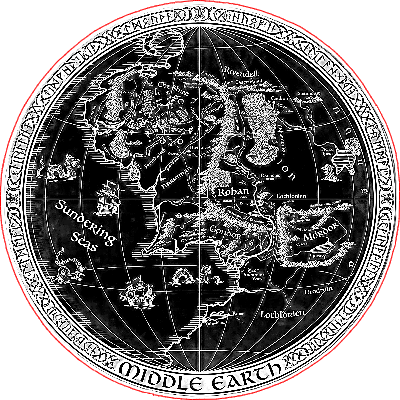


Information
      This project was born out of my deep appreciation for J.R.R. Tolkien and the incredible world he built. Having read The Lord of the Rings and thoroughly enjoyed every page—as well as being a huge fan of all the movies—I wanted to bring a piece of Middle Earth into the physical world.

I designed this piece to look like an ancient cartographer's globe projection, but rather than a flat print, I wanted tactile depth. Using the grayscale capabilities of the xTool S1, I created a relief sculpture where the mountains rise and the oceans sink, giving the map a texture you can actually feel. It’s my tribute to the lore that has inspired so many of us.

Production Settings (xTool S1 40W)
Material: 1/4" (6mm) Plywood

Processing Mode: Grayscale (Bi-directional)

Power: 50%

Speed: 300 mm/s

Passes: 1

Lines per cm: 200 (High density for smooth detail)
Instruction
Step1: The Cartographer's Protocol: Forging Middle Earth

Step 1: Material Prep & Software Configuration
Title: Prepare the Map & Settings Description: Start with a clean piece of 1/4" (6mm) Technological Plywood (often listed as Basswood or Craft Plywood). Sand the surface smooth with 220-grit sandpaper to ensure a clean engrave.
Import the grayscale height map into xTool Creative Space.
Resize: Scale the image to fit your material (ensure it is centered).
Processing Mode: Set to Grayscale. This is critical for 3D relief; the laser modulates power based on pixel darkness to create depth.
Settings (xTool S1 40W):
Power: 50%
Speed: 300 mm/s
Pass: 1
Lines per cm: 120 - 140 (Recommended).
Note: I ran my test at 300 lines/cm for extreme detail, but 120 lines/cm provides an excellent result in half the time.
Step 2: Machine Setup & Execution
Title: Laser Operations & Engraving Description:
Focus: Use the distance sensor to focus the laser module exactly on the top surface of the plywood.
Framing: Run the framing operation to ensure your design is perfectly centered on the round blank.
Air Assist: Turn Air Assist to MAXIMUM. Deep engraving generates significant smoke and debris; strong air flow is required to keep the lens clean and ensure the laser cuts deeply rather than just scorching the surface.
Execution: Start the job. Monitor the process closely—safety first!
Step 3: Post-Processing & Finishing
Title: Cleaning & Sealing the Artifact Description: Once the engraving is complete, the piece will have a layer of soot in the deep crevices.
Scrub: Use a soft-bristle brush (like an old toothbrush) and a small amount of water or Isopropyl Alcohol to gently scrub the engraved areas. This removes loose charcoal and reveals the light wood grain underneath.
Dry: Let the plywood dry completely to avoid warping.
Finish (Optional): Apply a light wood stain, mineral oil, or clear coat to seal the wood and increase the visual contrast between the mountains and the valleys.
![[US Only for xTool S1] xTool Fire Safety Set: Auto Fire Detection, Fire Extinguishing](https://image-res.xtool.com/resource/xtool/community/accessories/20231018-183509.webp)


