


![[Laser cut and engrave] Laser Engraved Bamboo Cutting Board with Dog Vet Testing Quote](https://storage-us.atomm.com/resource/xtool/community/attachment/xtool-community/ed473b3a-14fd-4b44-9166-191f72c4a25a.png?x-oss-process=image/resize,w_1200,h_900,limit_0/interlace,1/format,webp/auto-orient,1)
![[Laser cut and engrave] Laser Engraved Bamboo Cutting Board with Dog Vet Testing Quote](data:image/png;base64,iVBORw0KGgoAAAANSUhEUgAAAAoAAAAKCAYAAACNMs+9AAAAAXNSR0IArs4c6QAAABdJREFUKFNjZCASMBKpjmFUId6QIjp4AAppAAuXjCs4AAAAAElFTkSuQmCC)
![[Laser cut and engrave] Laser Engraved Bamboo Cutting Board with Dog Vet Testing Quote](https://storage-us.atomm.com/resource/xtool/community/attachment/xtool-community/ed473b3a-14fd-4b44-9166-191f72c4a25a.png?x-oss-process=image/resize,w_200,h_150,limit_0/interlace,1/format,webp/auto-orient,1)
![[Laser cut and engrave] Laser Engraved Bamboo Cutting Board with Dog Vet Testing Quote](https://storage-us.atomm.com/resource/xtool/community/attachment/xtool-community/2cb8a60d-cb7e-4104-84cb-cd839787aa68.jpg?x-oss-process=image/resize,w_200,h_150,limit_0/interlace,1/format,webp/auto-orient,1)
Lab Testing
 Instruction
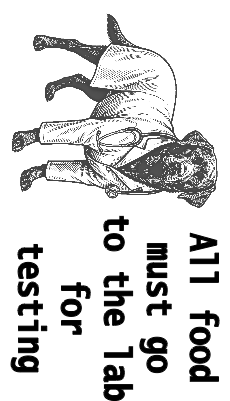
Information
Anyone that knows me knows that my wife and I love animals. We incorporate animals into our daily lives in any way possible. We have 3 dogs and 16 birds and spend the majority of our time pampering and caring for them. When I was working up cutting boards recently, my wife asked me to do this one and I loved it so much I decided to share it with my laser friends here.
Instruction
Step1: Before you begin
I have been creating cutting boards for a long time. I started simple with just quotes and phrases suited for the kitchen. Then I started to get into the silly and humerous. Then I found that pictures add a lot of depth to the quotes. I started to put my own designs up online and found that people really liked them.
My wife is someone that I bounce ideas off of constantly and she will come to me with ideas as well. One day, while working on my batch of Highland Cow cutting boards, she comes to me and asks about making one with a Labrador Retriever and the quote “All food must be sent to the lab for testing”. I loved the idea and set about creating it. I used AI to generate the image of a Labrador and when I had one I liked, I added the lab coat and stethascope. While I generally do a lot of my own artwork, AI has eased the stress of getting just the right art out of my head. AI made the process less time consuming and for those times that the AI did not come out the exact way I wanted, I would move it into my art program and used those art skills I possessed to erase what needed to be erased and add what needed to be added.
The cutting boards I used are pretty easy to engrave. Keep in mind that I use the P2 for this so if you use a different machine you may need to sacrifce a board or two to find the correct settings to get these dark colors, but you should be able to without a problem. I found these boards on Amazon at the following link: https://www.amazon.com/dp/B0CJJBLQWV?ref_=ppx_hzsearch_conn_dt_b_fed_asin_title_2&th=1
These boards are 11x5 and the design included with this project is set to fit on that size board.
NOTE: When doing bitmap images on Bamboo then the grain work can cause dimming of parts of the bitmap image. There really is no way around that as this is a natural occurance of the different densities of a bamboo cutting board. It is also an occurance of cutting boards that have been constructed of different woods like a lot of custom cutting boards are.
I used the honeycomb for this but you could very well do this with the slats of the P2 as well.
I hope you enjoy this board and if you do, please leave a like on it and a comment that you would like to see more and I will try to post them up.
Step2: Engraving your board

Adjust your engraving to the size of your board. Make sure to measure your laser height and then set your engraving to align with your board. Use the close up camera to help center the engrave. Once that is done, key in your settings or use the ones above and run your engrave. Using the settings listed here, will work out to about 16 minutes engrave time.
Once finished, you may have overburn, espcially along the lettering. Run 80 to 120 grit sanding paper over the surface until the overburn is gone then run 200 grit to smooth out the face. Blow out the engraving to remove all dust. Be careful when running the lower grit sandpaper over the vector image as it can take out some of the details. I just ran the 200 over that part.
Coat the board with your choice of finish.
Step3: Tips and Tricks


Here are a few things that may help you with engraving cutting boards.
Once you have your board in place, draw a rectangle that is roughly the size of your board then set that rectangle to a different color from your engraving. Select the rectangle and then in the upper right corner, change the output to off so that it does not engrave. Line the rectangle up with your board with the camera (using close camera to line the edges). Once you drop in your engraving, you can use this rectangle to help center your design by selecting both your rectangle and the engraving and using the “Center” function under the “Align” drop down.
To help ensure that your board is perfectly straight in your machine, take a perfectly square item and place it agains the inside front of your machine. (I use a machinest block Such as seen in photo 3). Set your board against this item so that it is perpendicular to the front of your machine. Remove the item you used slowly so as to not disturb where you placed your board. This will help to ensure that your engrave goes on evenly across the board.
While most boards will not move due to their weight, there have been times where a board got shifted slightly. To prevent this, you can take painters tape / masking tape and create a loop with the adhesive side out. and put this on the back of your board. Place this down on your slats/honeycomb to help provide a bit more hold to your boards. (In the attached photo, I show that I cut this on the slats but now I strictly use the honeycomb as it is easier to attach the tape too and provides a more stable surface for cutting boards to sit on)
I recommend a label of some sort be place on or attached to the board that states “This board is for decorative purposes only and not recommended for use as a serving or cutting board.”
Step4: Final Notes
I love doing these and I hope to bring you more. Again, if you would like to see more, let me know in the comments.
I do have other cutting board faces available. Some are free and others are premium products but they are very well recieved and people love them. I also have plans in my free section for a cutting board stand that is made specifically for these cutting boards from Amazon. You can check these and other of my products out (Most are free) at the following link: https://www.atomm.com/profile/15190?utm_source=Social_Share
Give me a follow at the above link so you will be alerted when I post new projects. I hope you like them.
Happy Crafting


