


Report
![[Laser cut and engrave] Laser Cut Wooden Pig Clover Leaf Decorative Pins](https://storage-us.atomm.com/resource/xtool/community/attachment/xtool-community/e0e499a0-2955-4f6d-8031-5eafabf92b7b.JPG?x-oss-process=image/resize,w_1200,h_900,limit_0/interlace,1/format,webp/auto-orient,1)
Cute little pig tokens - hand painted engraved wood design
 Instruction
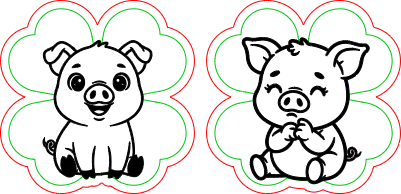
Lucky_pig_tokens
.xcs
Application scenario
Laser processing
Machine & module
xTool M1
10WCompatibles · 9
Material used

1/8"(3mm) Pine Ponderosa Plywood
4
14
Instruction
1
Step1: Engrave and cut

Preview
Use my settings with an M1 10W machine, or update it for your machine. You can resize it, if you want smaller or bigger version.
2
Step2: Paint

Preview

Preview

Preview
(You can sand the tokens a bit if you want first)
I am using Ohuhu acrylic paint markers to paint these tokens. Green four-leaf clover, and a pink pig - only a few colors needed. Wait until it dries
3
Step3: Varnish

Preview

Preview

Preview
To make it last forever, add a layer of varnish on bot sides and the edges. Once it dries, you are ready to hand over, or keep with you.
Comments


