


![[Laser cut and engrave] Laser Cut Wooden Reindeer Xmas Table Decoration](https://storage-us.atomm.com/resource/xtool/community/attachment/xtool-community/078711cb-8fca-42da-94a7-e1ec97fc824c.jpeg?x-oss-process=image/resize,w_1200,h_900,limit_0/interlace,1/format,webp/auto-orient,1)
![[Laser cut and engrave] Laser Cut Wooden Reindeer Xmas Table Decoration](data:image/png;base64,iVBORw0KGgoAAAANSUhEUgAAAAoAAAAKCAYAAACNMs+9AAAAAXNSR0IArs4c6QAAABdJREFUKFNjZCASMBKpjmFUId6QIjp4AAppAAuXjCs4AAAAAElFTkSuQmCC)
![[Laser cut and engrave] Laser Cut Wooden Reindeer Xmas Table Decoration](https://storage-us.atomm.com/resource/xtool/community/attachment/xtool-community/078711cb-8fca-42da-94a7-e1ec97fc824c.jpeg?x-oss-process=image/resize,w_200,h_150,limit_0/interlace,1/format,webp/auto-orient,1)
![[Laser cut and engrave] Laser Cut Wooden Reindeer Xmas Table Decoration](https://storage-us.atomm.com/resource/xtool/community/attachment/xtool-community/7ba591e6-7692-4fe1-a7fb-716c33796c1c.png?x-oss-process=image/resize,w_200,h_150,limit_0/interlace,1/format,webp/auto-orient,1)
Reindeer Xmas Table Decoration
 Instruction
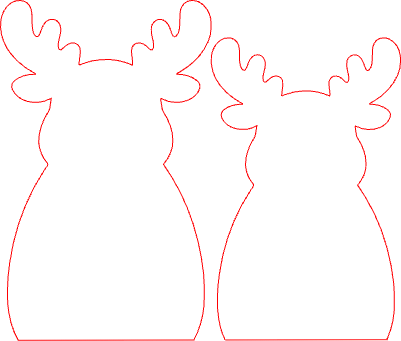

Information
      This decoration was created as a festive and creative design piece for the Christmas season.
The goal was to design an easy-to-produce object using laser-cut MDF that can be assembled quickly and used as a decorative element or small gift.
Instruction
Step1: Before
Before starting, the decoration is produced using three different materials: MDF, felt, and glitter cardboard.
These materials are processed one after another in the following steps.
Step2: Cutting the MDF

In the first step, 3 mm MDF is cut using the given laser cutter settings.
Before cutting, measure the distance and mark the position of the material, as different materials are used throughout the process.
After laser cutting, the blackened edges of the MDF should be cleaned, preferably with a magic eraser, to avoid leaving black marks later.
Step3: Cutting the Felt

Next, laser cut the felt.
Before cutting, measure the distance and select the marked cutting area again.
The felt is cut in two different colors:
In the first color, cut one large reindeer and one small reindeer
In the second color, repeat the process with one large and one small reindeer
Make sure to adjust the distance and marked area for each felt color individually.
Step4: Laser Cutting the Glitter Cardboard

After that, laser cut the glitter cardboard.
Before cutting, measure the distance and select the marked cutting area.
Pay special attention to fire safety when working with glitter cardboard.
Step5: Assembling the Parts


Lay out all parts and glue the felt reindeer onto the MDF board.
The arrangement on the board is free to choose.
Three marked areas are provided as a guideline. Each of these areas is approximately the length of a small reindeer, giving an indication of where to place the figures.
These markings can be adjusted if desired and will not be visible later, as they are covered during assembly.
Step6: Attaching the Letters

Glue the MDF letters onto the board, making sure they are centered and aligned in one straight line.
Step7: Attaching the Ears

Then attach the ears made of glitter cardboard.
Step8: Attaching the Glitter-Letters

Then glue the glitter cardboard letters onto the MDF letters.
Step9: Final Assembly

Finally, glue the entire element onto the base plate.
Press firmly while holding it in place to ensure that it stands straight and stable.
The decoration is now finished and can be placed as a Christmas decoration.


