


![[Laser cut and engrave,Other] Christmas ball](https://storage-us.atomm.com/resource/xart/result/261880/36db903b-325e-45d2-baef-ba2e3f4f7ca0.png?x-oss-process=image/resize,w_1200,h_900,limit_0/interlace,1/format,webp/auto-orient,1)
Christmas ball
 Instruction
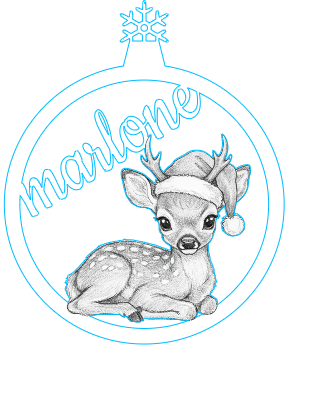

Information
Instruction
Step1
Manufacturing Process (Step-by-Step)
Step 1: Substrate Preparation
The key to the success of this project is the preparation of the surface before the laser.
Action: Apply the gold spray paint to the white wood.
Drying time: Minimum 12 hours.
Important note: This long drying time is crucial. If the paint is not perfectly dry, the heat of the laser may cause it to "bubble" or create toxic and sticky vapors that would spoil the engraving.
Step 2: Laser Setting
Here are the specific settings used to achieve this sharp contrast with minimal burning on the wood.
| Affected Area | Speed< | th style="border-style:solid;border-width:1px;">Power<th style="border-style:solid;border-width:1px;">Objective|||
|---|---|---|---|---|
| Engraving | The Fawn (drawing) | 180 mm/s | 30% | Removing the gold paint only to reveal white. |
| Cut | Outline, first name, snowflake | 10 mm/s< | td style="border-style:solid;border-width:1px;">60%Clean cut of the wood support. |
Step 3: Finishes
Cleaning: After cutting, smoke or soot deposits (black marks) may appear on the edges or on the engraving.
Action: Gently clean the surface.
Tip: Use a slightly damp microfiber cloth or a brush with very soft bristles so as not to scratch the remaining gold paint.


