


![[Laser cut and engrave] Laser Engraved Christmas Tree Globe with Wooden Base Light](https://storage-us.atomm.com/resource/xtool/community/attachment/xtool-community/91cb348f-4d2c-4db5-9b69-a07ec023f5fe.png?x-oss-process=image/resize,w_1200,h_900,limit_0/interlace,1/format,webp/auto-orient,1)
![[Laser cut and engrave] Laser Engraved Christmas Tree Globe with Wooden Base Light](data:image/gif;base64,R0lGODlhAQABAAAAACH5BAEKAAEALAAAAAABAAEAAAICTAEAOw==)
[How To] 3D Inner Engraved Christmas Tree Crystal Ball with LED Light
 Instruction
Information
      Get ready to transform your holidays into a shimmering, share-worthy moment with our Christmas Tree Crystal Ball!
This dazzling ornament captures the magic of the season: a finely etched evergreen glowing from within, casting warm, festive radiance across any room.
Whether you’re cozying up by the fireplace or hosting your holiday guests, this crystal ball doubles as a captivating conversation piece.

Snap it, and spread the glow!
Instruction
Step1: Let's first take a look at the beautiful finished project!
Hi everyone, this is the result I achieved. Now let me show you how to get the result step-by-step.😄
Step2: About Glass Spheres Inner Engraving
Step3: Material preparation: K9 Glass & Oil
Material and Containers:
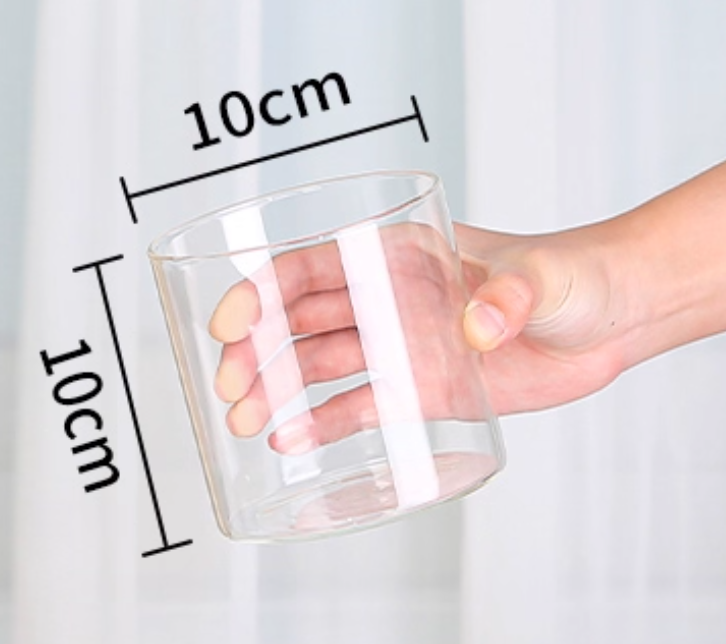
It is still K9 Glass, but in a spherical shape, with a recommended diameter of 7-8 cm.
For the inner engraved oil container, it is recommended to use a cylindrical straight glass container with a diameter of 10×10 cm and a certain height.
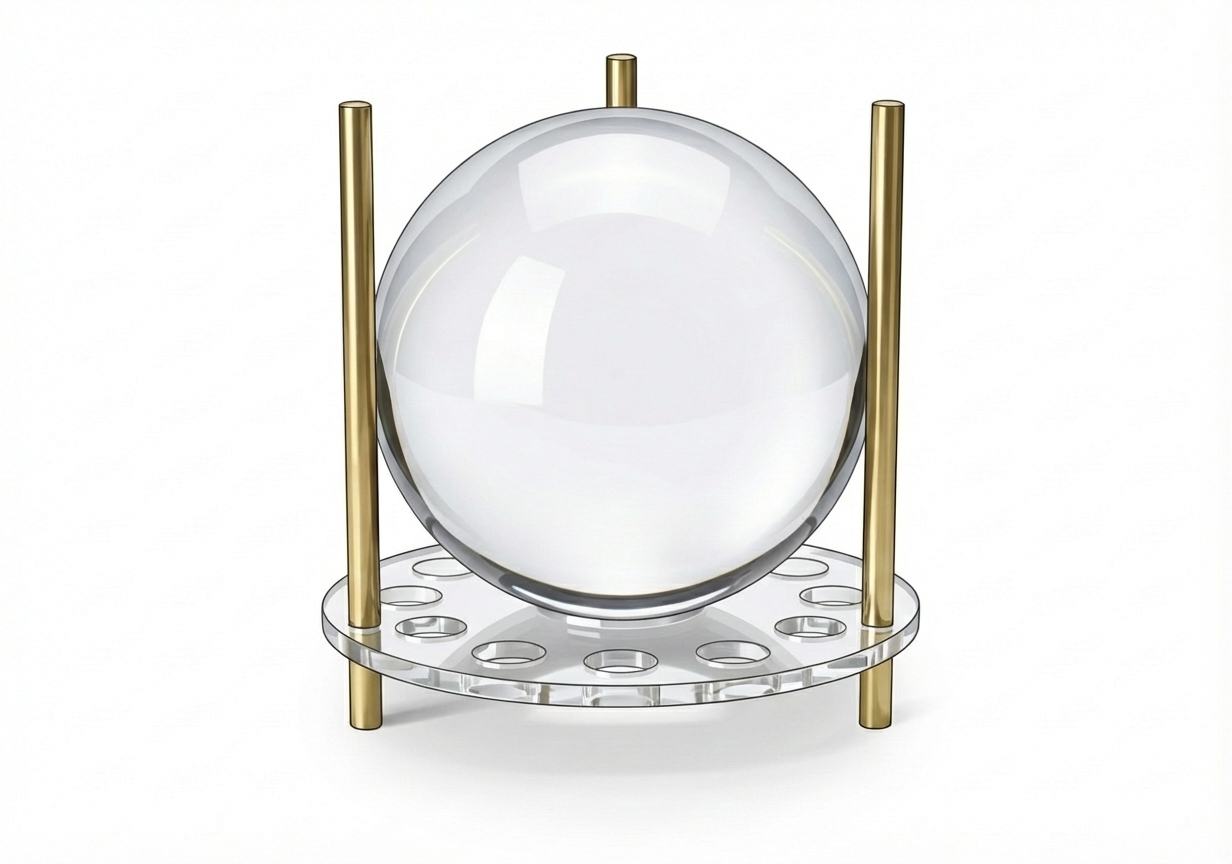
Crystal Ball Base:
Convenient for placing after processing, beautiful and suitable for taking photos.
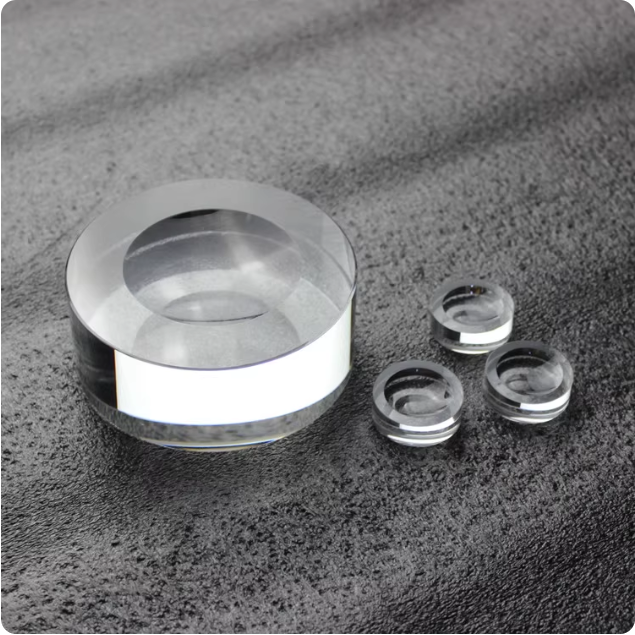
Alternatively, you can also prepare a crystal ball stand, which will be used during processing and can also be used for final display. This depends on personal preference and is not mandatory. Like this ⬇️
The Special Inner Engraving Oil:

Ps: We expect to launch a complete set of supporting consumables in January, including:
• Engraving Oil
• Special Fixture
• Crystal Ball
Before the official fixture is officially launched, we have already released the corresponding tutorial article for you! https://support.xtool.com/article/2888#h2_aea9a374-9810-40d7-971c-59d9077bb044
This article will guide you on how to make a simple fixture by yourself, and also provide guidance on purchasing engraving oil (Criteria for Liquid Selection), allowing you to start creating inner engravings on crystal balls immediately!
Other Items:
You may also need (non-slip) gloves, rags, and a basin
Step4: Preparations before processing - Machine
Steps:
- Replace the inner engraving lens
- Install the riser to facilitate subsequent Inner Engraving Work Area Calibration and material placement.
- Prepare 3D project files: STL, OBJ, AMF, 3MF, GLB, PLY
Step5: Preparations before processing - Materials
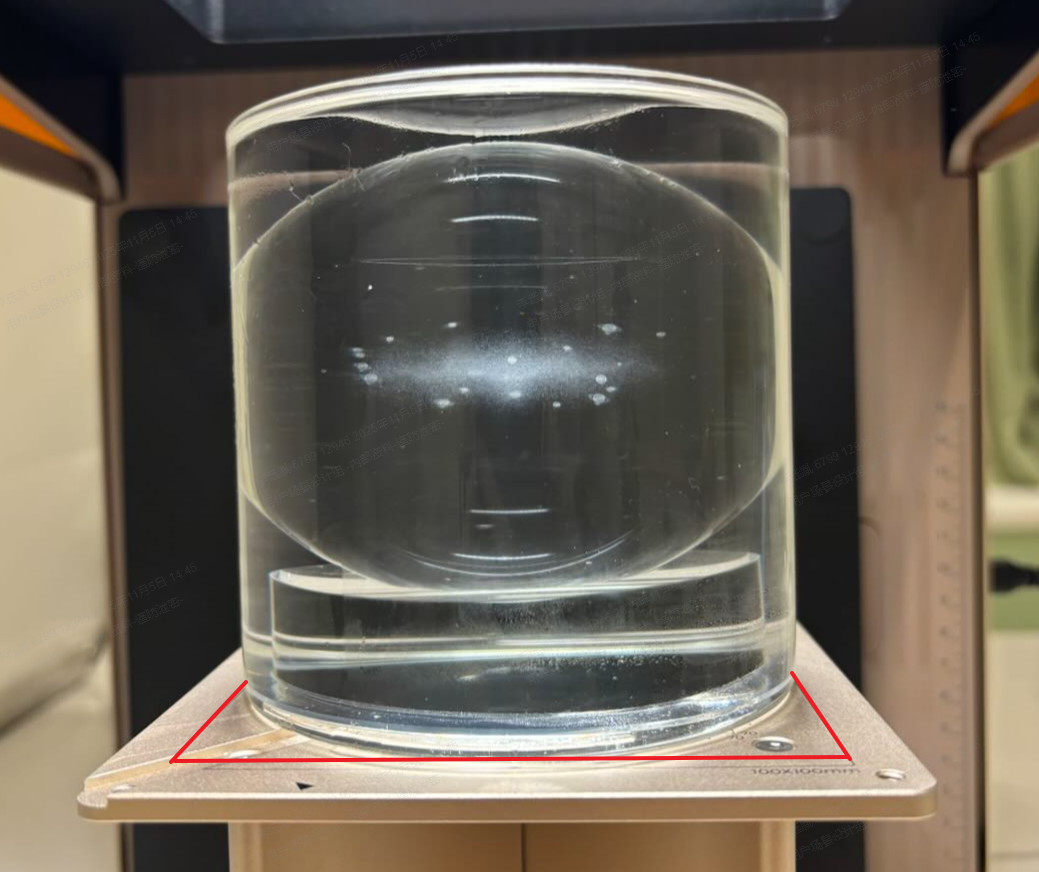
Place the entire cup on the elevation platform, and align the bottom of the cup centrally with the elevation platform with reference to the 100*100mm marking line.
Steps:
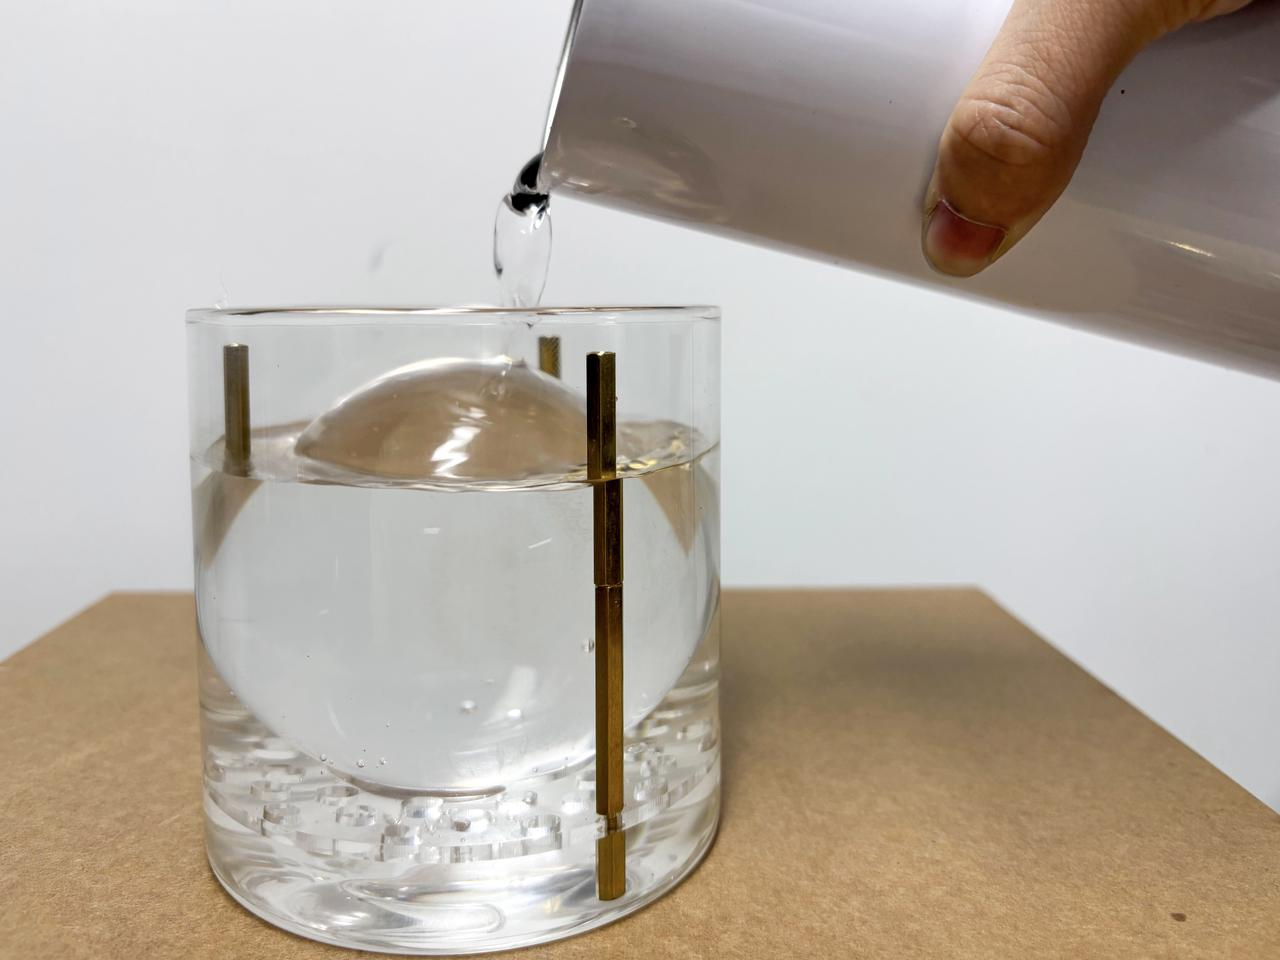
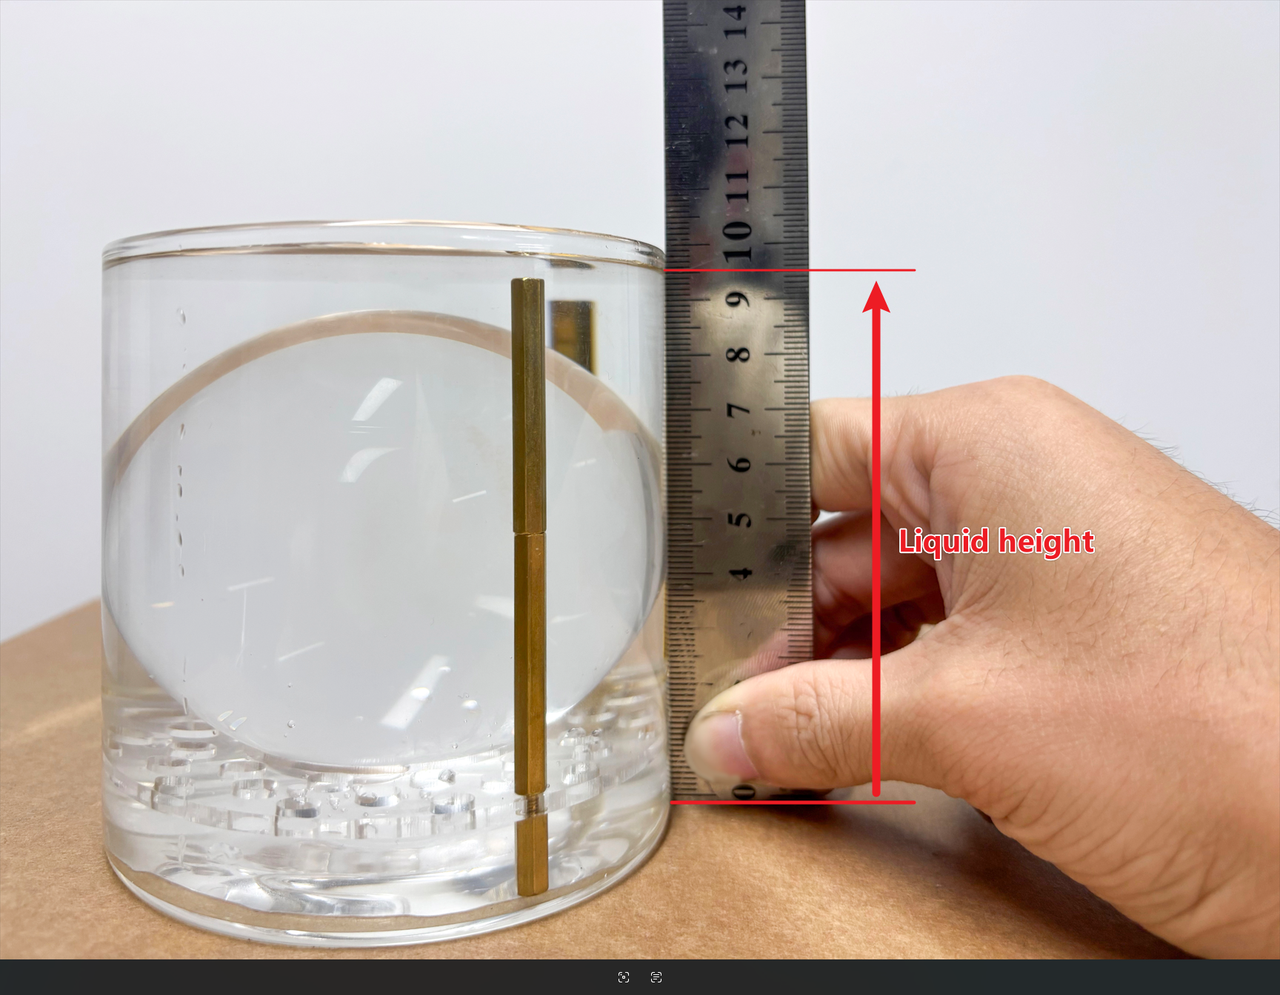
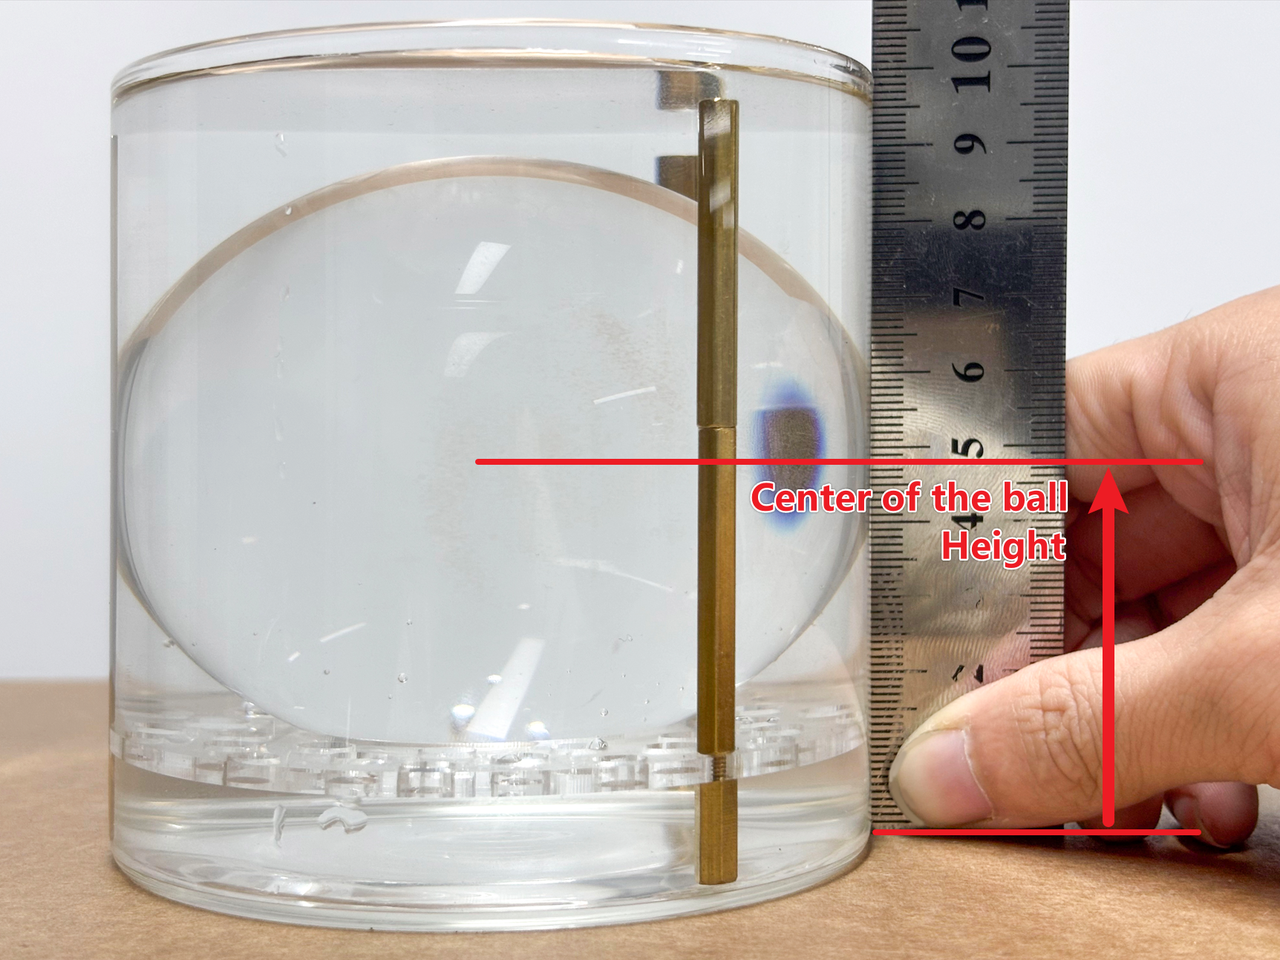
Pour the inner engraving oil slowly to prevent foaming. It is sufficient that the inner engraving oil completely submerges the crystal ball (a horizontal water surface needs to be formed). Then measure the height of the liquid surface with a ruler.
Place the entire cup on the riser platform, and align the bottom of the cup centrally with the riser platform with reference to the 100*100mm marking line.
Step6: Open xTool Studio
In the Select Processing Mode menu, choose Inner Engraving to access the Inner Engraving Settings.
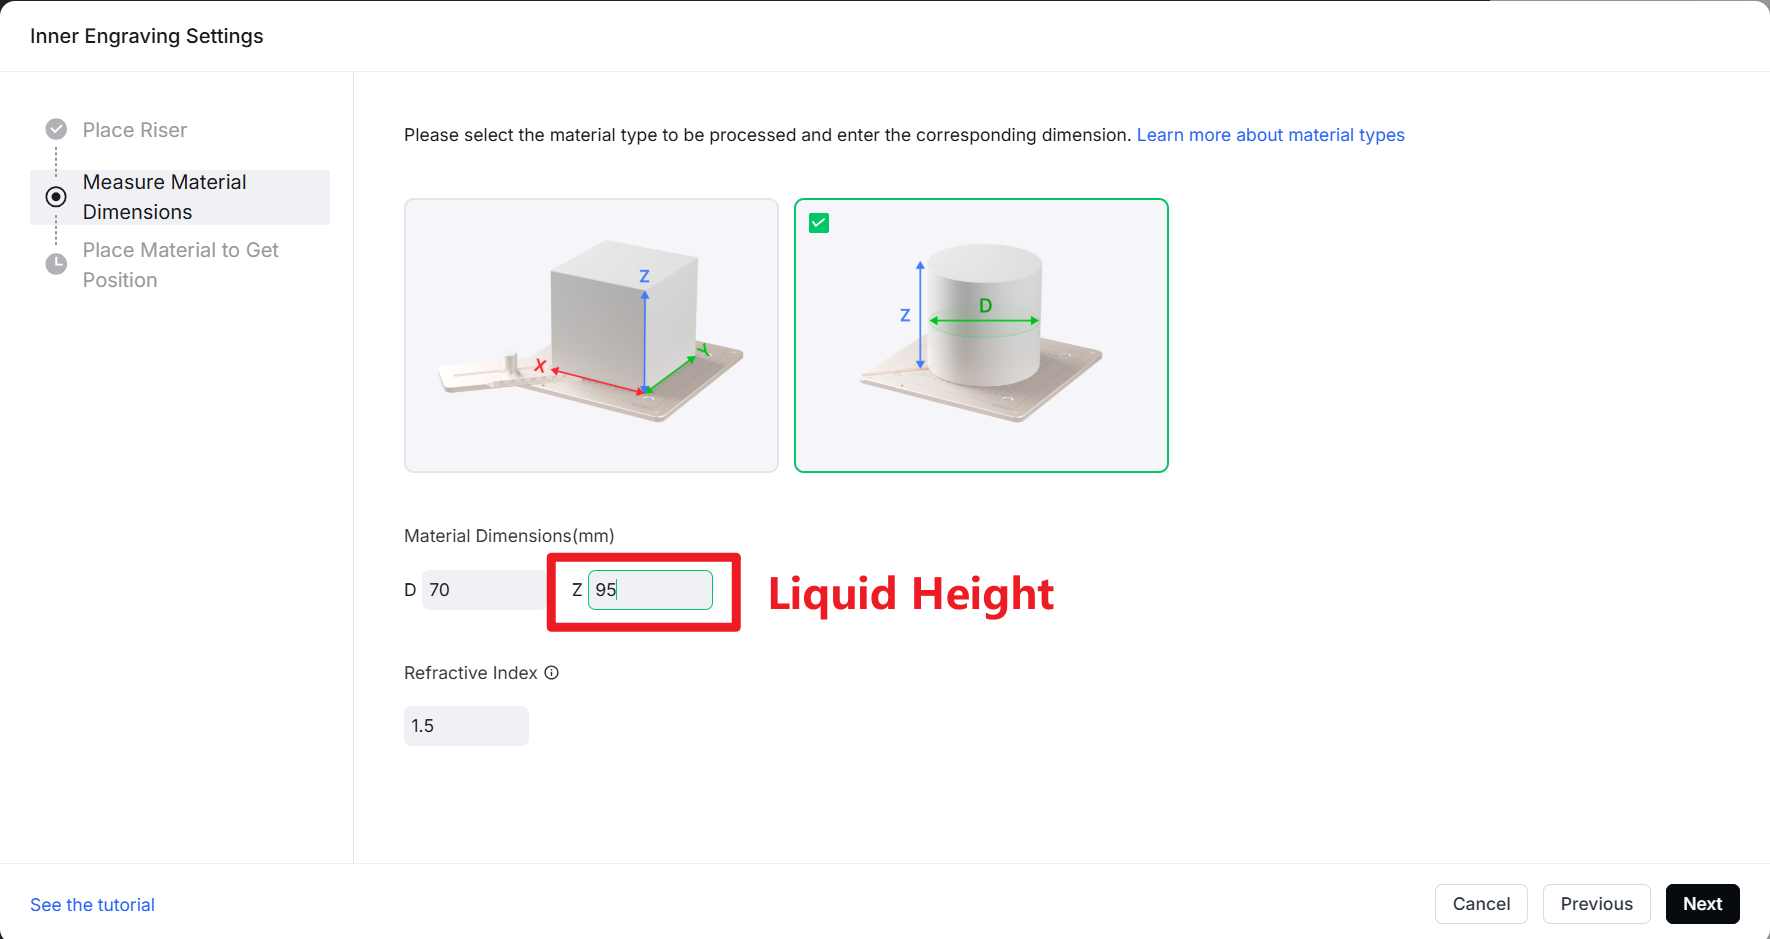
Enter the inner engraving settings, change the object to a cylinder, input the sphere diameter in the D diameter field, and input the measured liquid height in the Z height field (this is very important; the liquid level height determines the refraction incident height, which will affect the quality and position of the inner engraving).
After all material settings are completed, enter the canvas preview and import all prepared 3D model files into Studio.
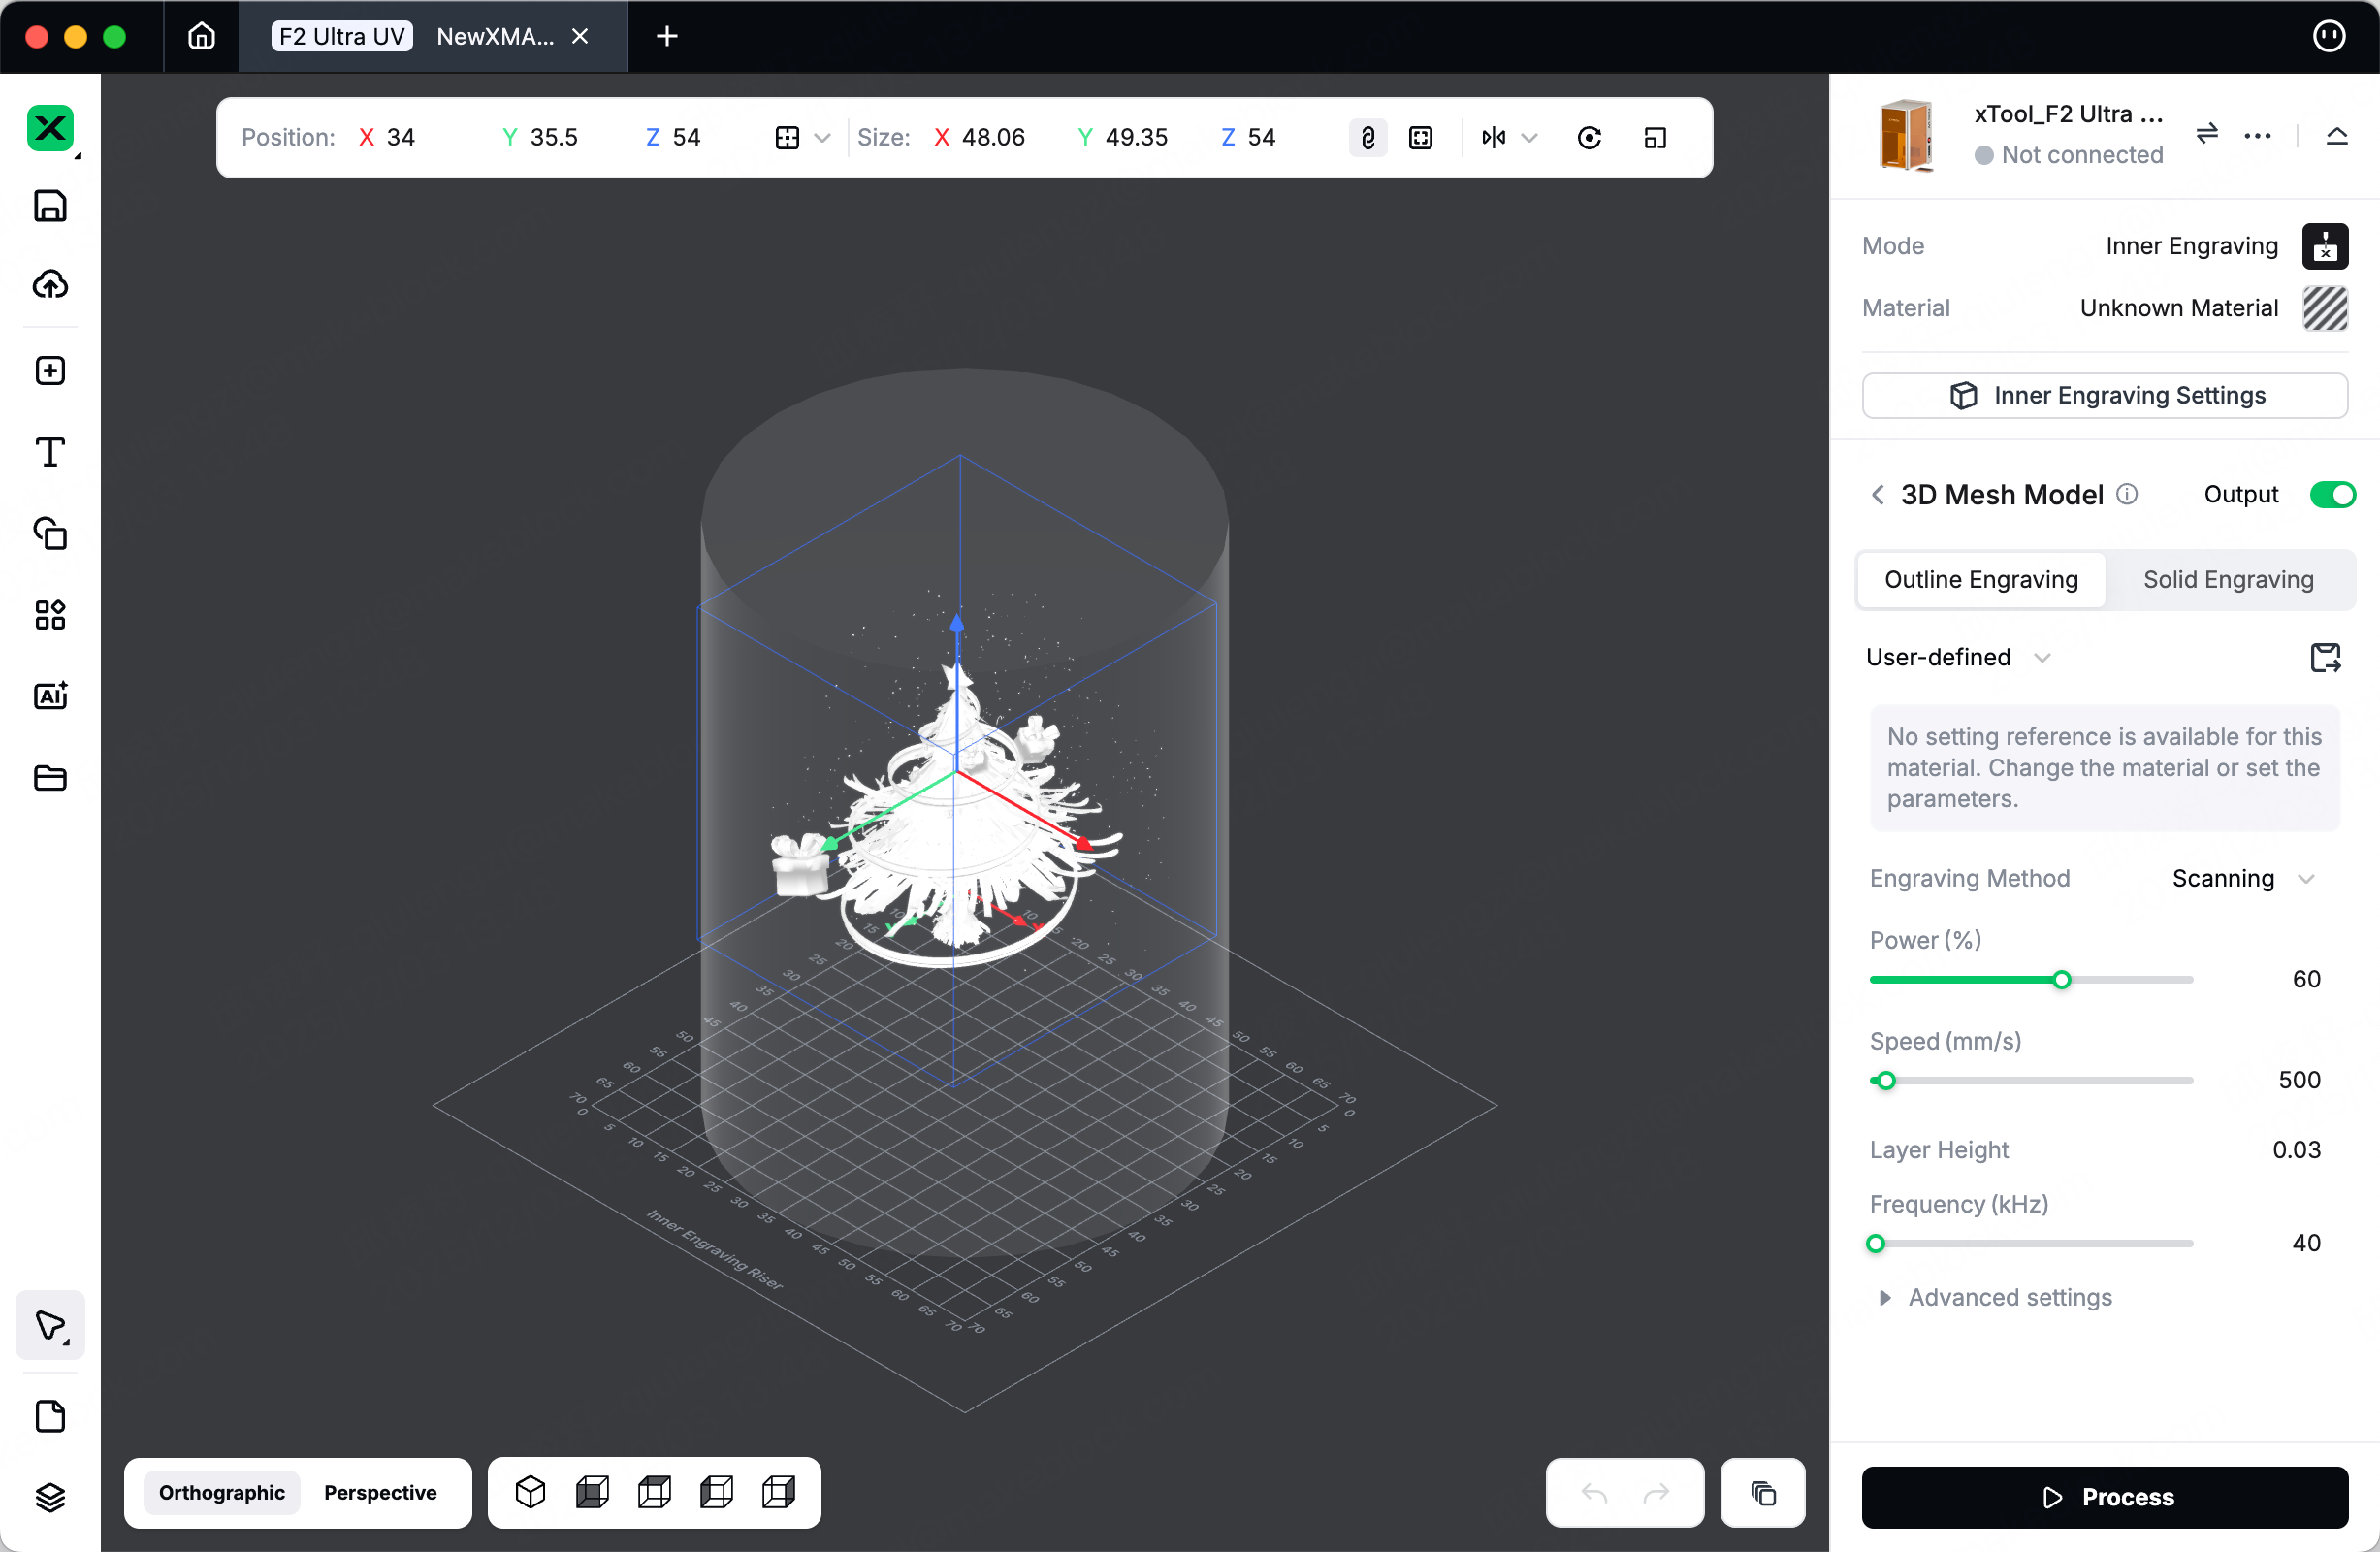
Measure the distance from the center of the sphere to the riser platform manually, and input it in the Z-axis height to ensure that the engraved object is at the center of the sphere.
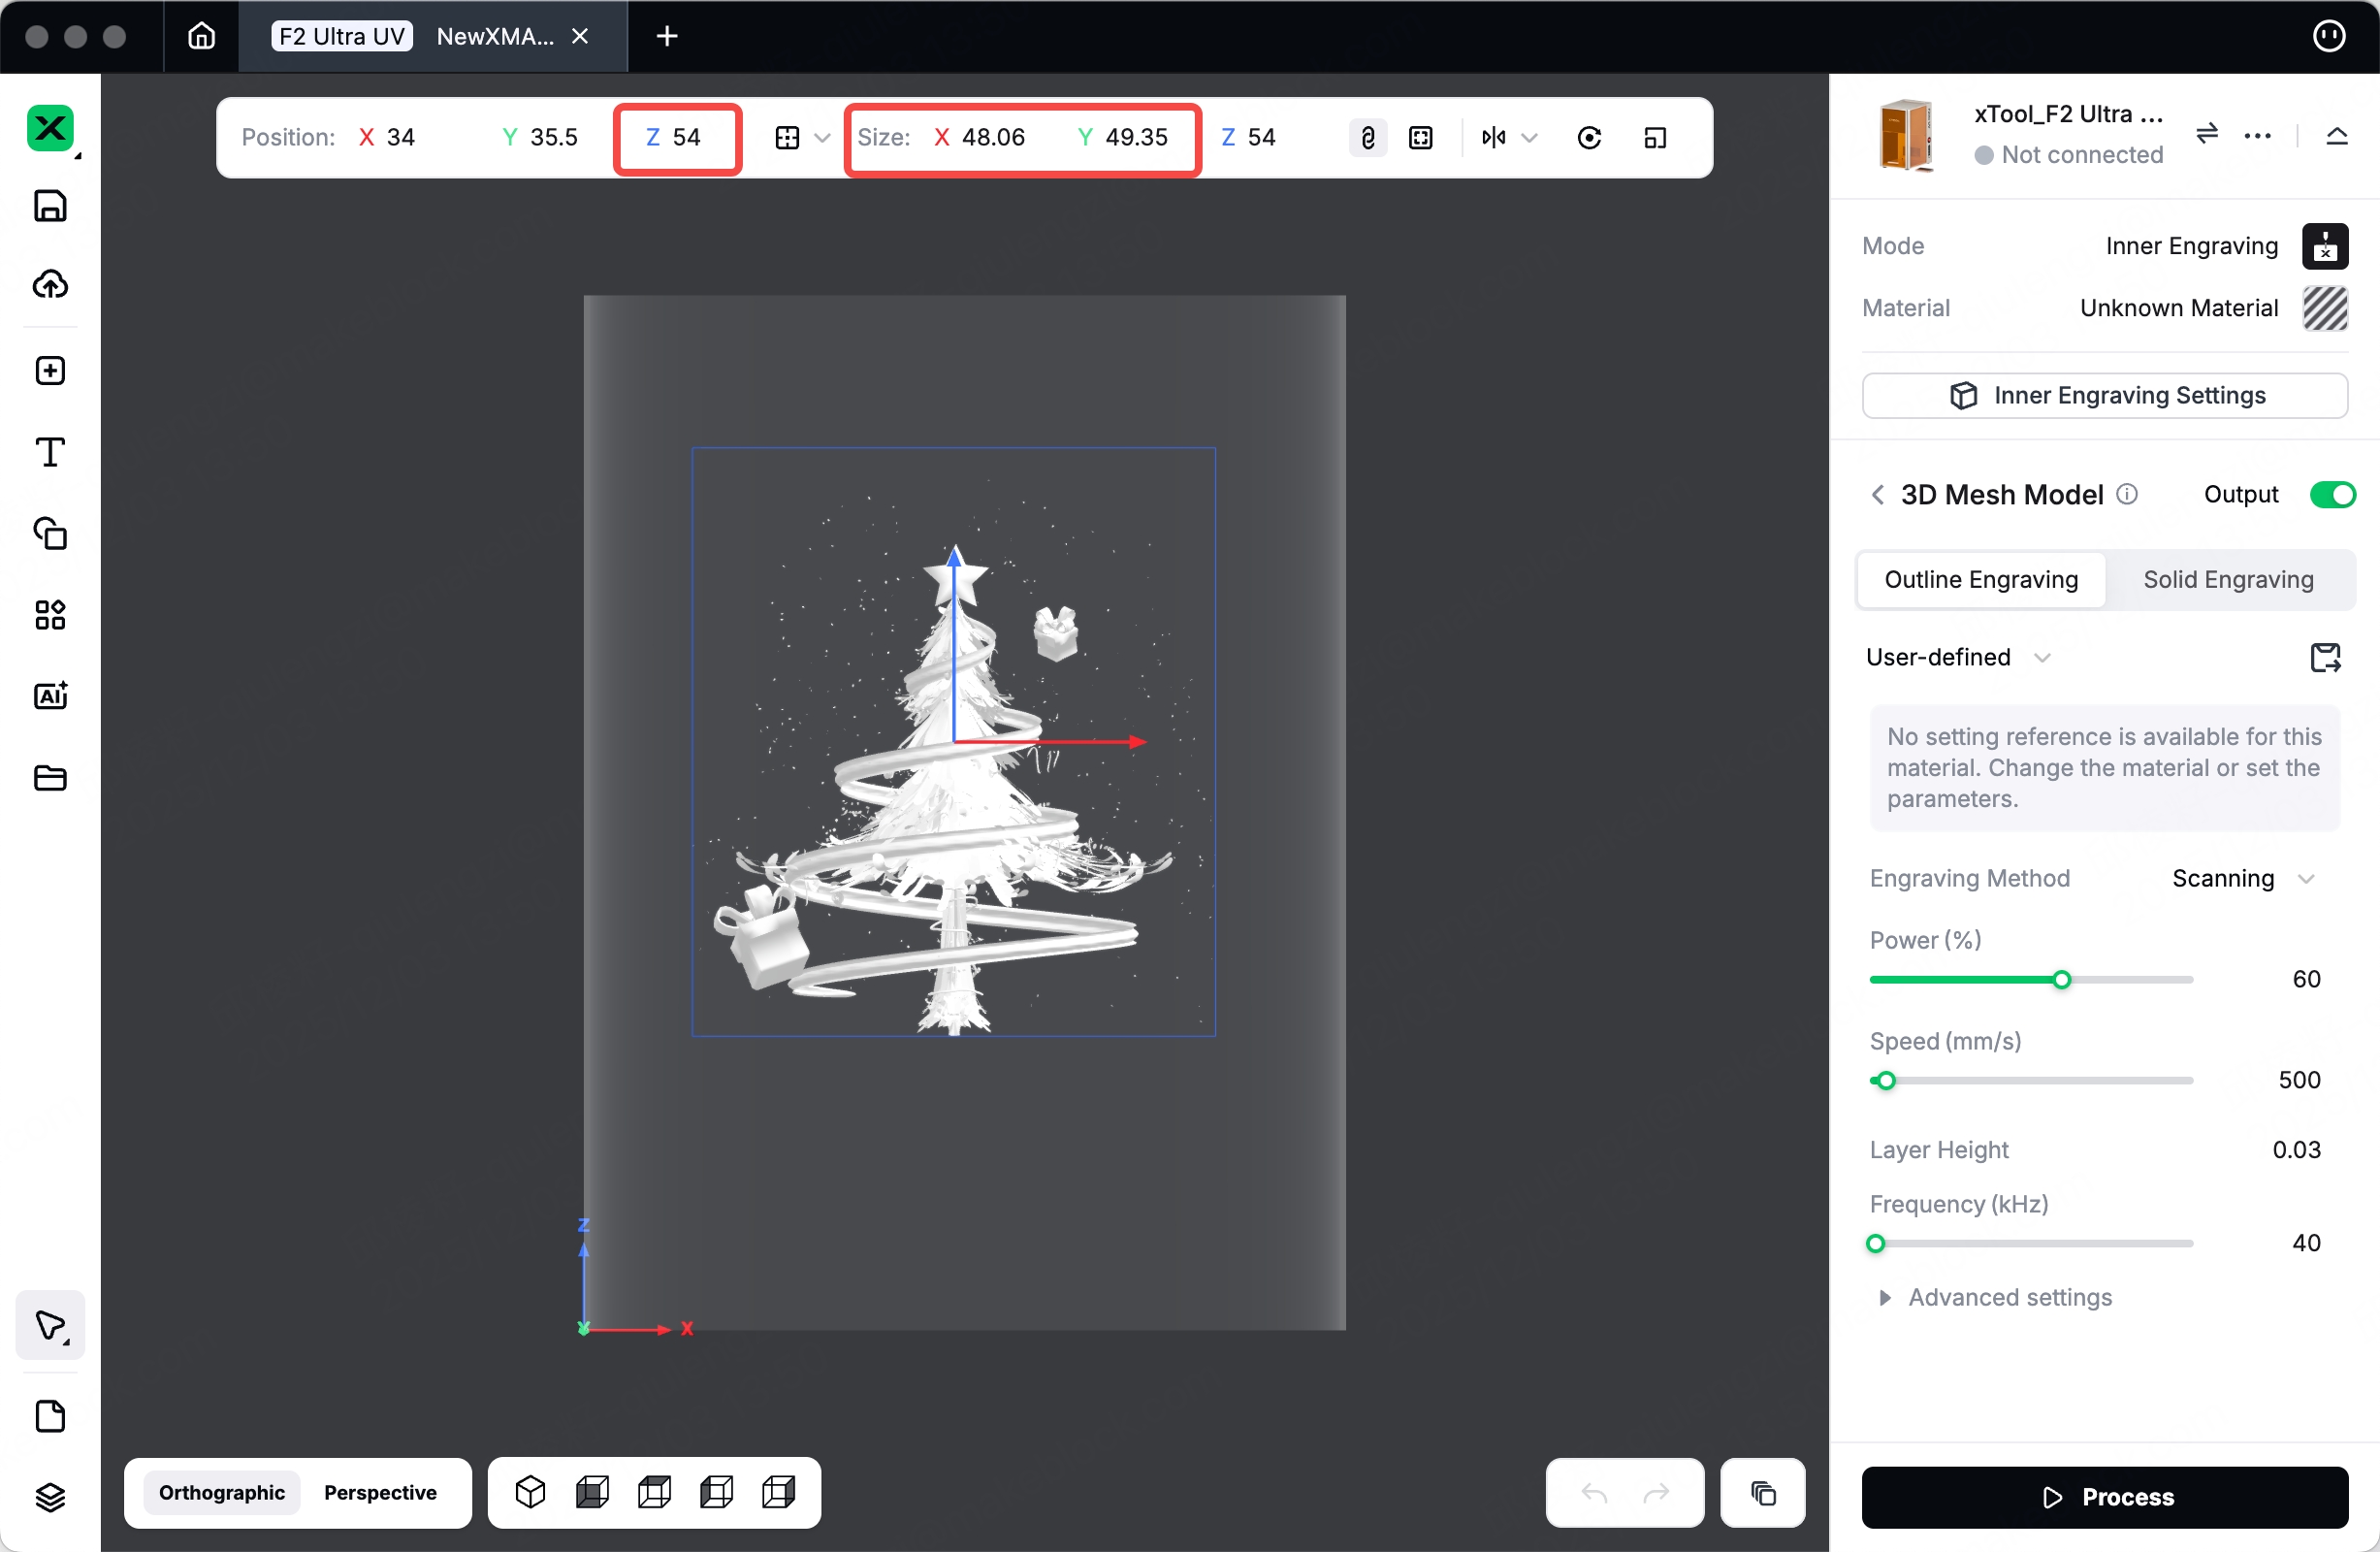
📌 Due to the refraction of the sphere, the engraved object will be magnified. Therefore, when setting the size of the object, it needs to be slightly smaller than the diameter of the sphere. For example, the sphere I use has a diameter of 70mm, and the size of the engraved object is set to 50mm.
Step7: Processing

After adjusting the processing parameters, you can start processing.
After processing is completed, pour the inner engraving oil into a clean container, take out the ball, wash it, and place it on the base for display, and you're done!
💡 Inner engraving oil can be reused multiple times. Please keep the liquid clean, free from coloring and dust contamination.
Step8: Success!
Kindly follow the steps and choose the right materials. I know this might be a bit challenging, but please try with patience, and there will definitely be satisfying results!
The official xTool materials are recommended!

