![[Laser cut and engrave] [How To] Laser Cut Glass Relief Seahorse Pendant](https://storage-us.atomm.com/resource/xtool/community/attachment/xtool-community/2b72142e-dd9d-46fd-81e7-b02d2552fc4b.jpg?x-oss-process=image/resize,w_1200,h_900,limit_0/interlace,1/format,webp/auto-orient,1)
![[Laser cut and engrave] [How To] Laser Cut Glass Relief Seahorse Pendant](data:image/png;base64,iVBORw0KGgoAAAANSUhEUgAAAAoAAAAKCAYAAACNMs+9AAAAAXNSR0IArs4c6QAAABdJREFUKFNjZCASMBKpjmFUId6QIjp4AAppAAuXjCs4AAAAAElFTkSuQmCC)
![[Laser cut and engrave] [How To] Laser Cut Glass Relief Seahorse Pendant](https://storage-us.atomm.com/resource/xtool/community/attachment/xtool-community/2b72142e-dd9d-46fd-81e7-b02d2552fc4b.jpg?x-oss-process=image/resize,w_200,h_150,limit_0/interlace,1/format,webp/auto-orient,1)
![[Laser cut and engrave] [How To] Laser Cut Glass Relief Seahorse Pendant](https://storage-us.atomm.com/resource/xtool/community/attachment/xtool-community/10c96b58-d227-45ee-8c25-6cba6f4da6a3.jpeg?x-oss-process=image/resize,w_200,h_150,limit_0/interlace,1/format,webp/auto-orient,1)
[How To] Laser Cut Glass Relief Seahorse Pendant
 Instruction

Information
      Make a splash with this laser-cut seahorse pendant necklace—precision-etched from translucent glass to reveal intricate floral details.
Suspended on a sleek silver chain, it’s lightweight, durable, and irresistibly whimsical—perfect for adding a touch of oceanic charm to any outfit.
Instruction
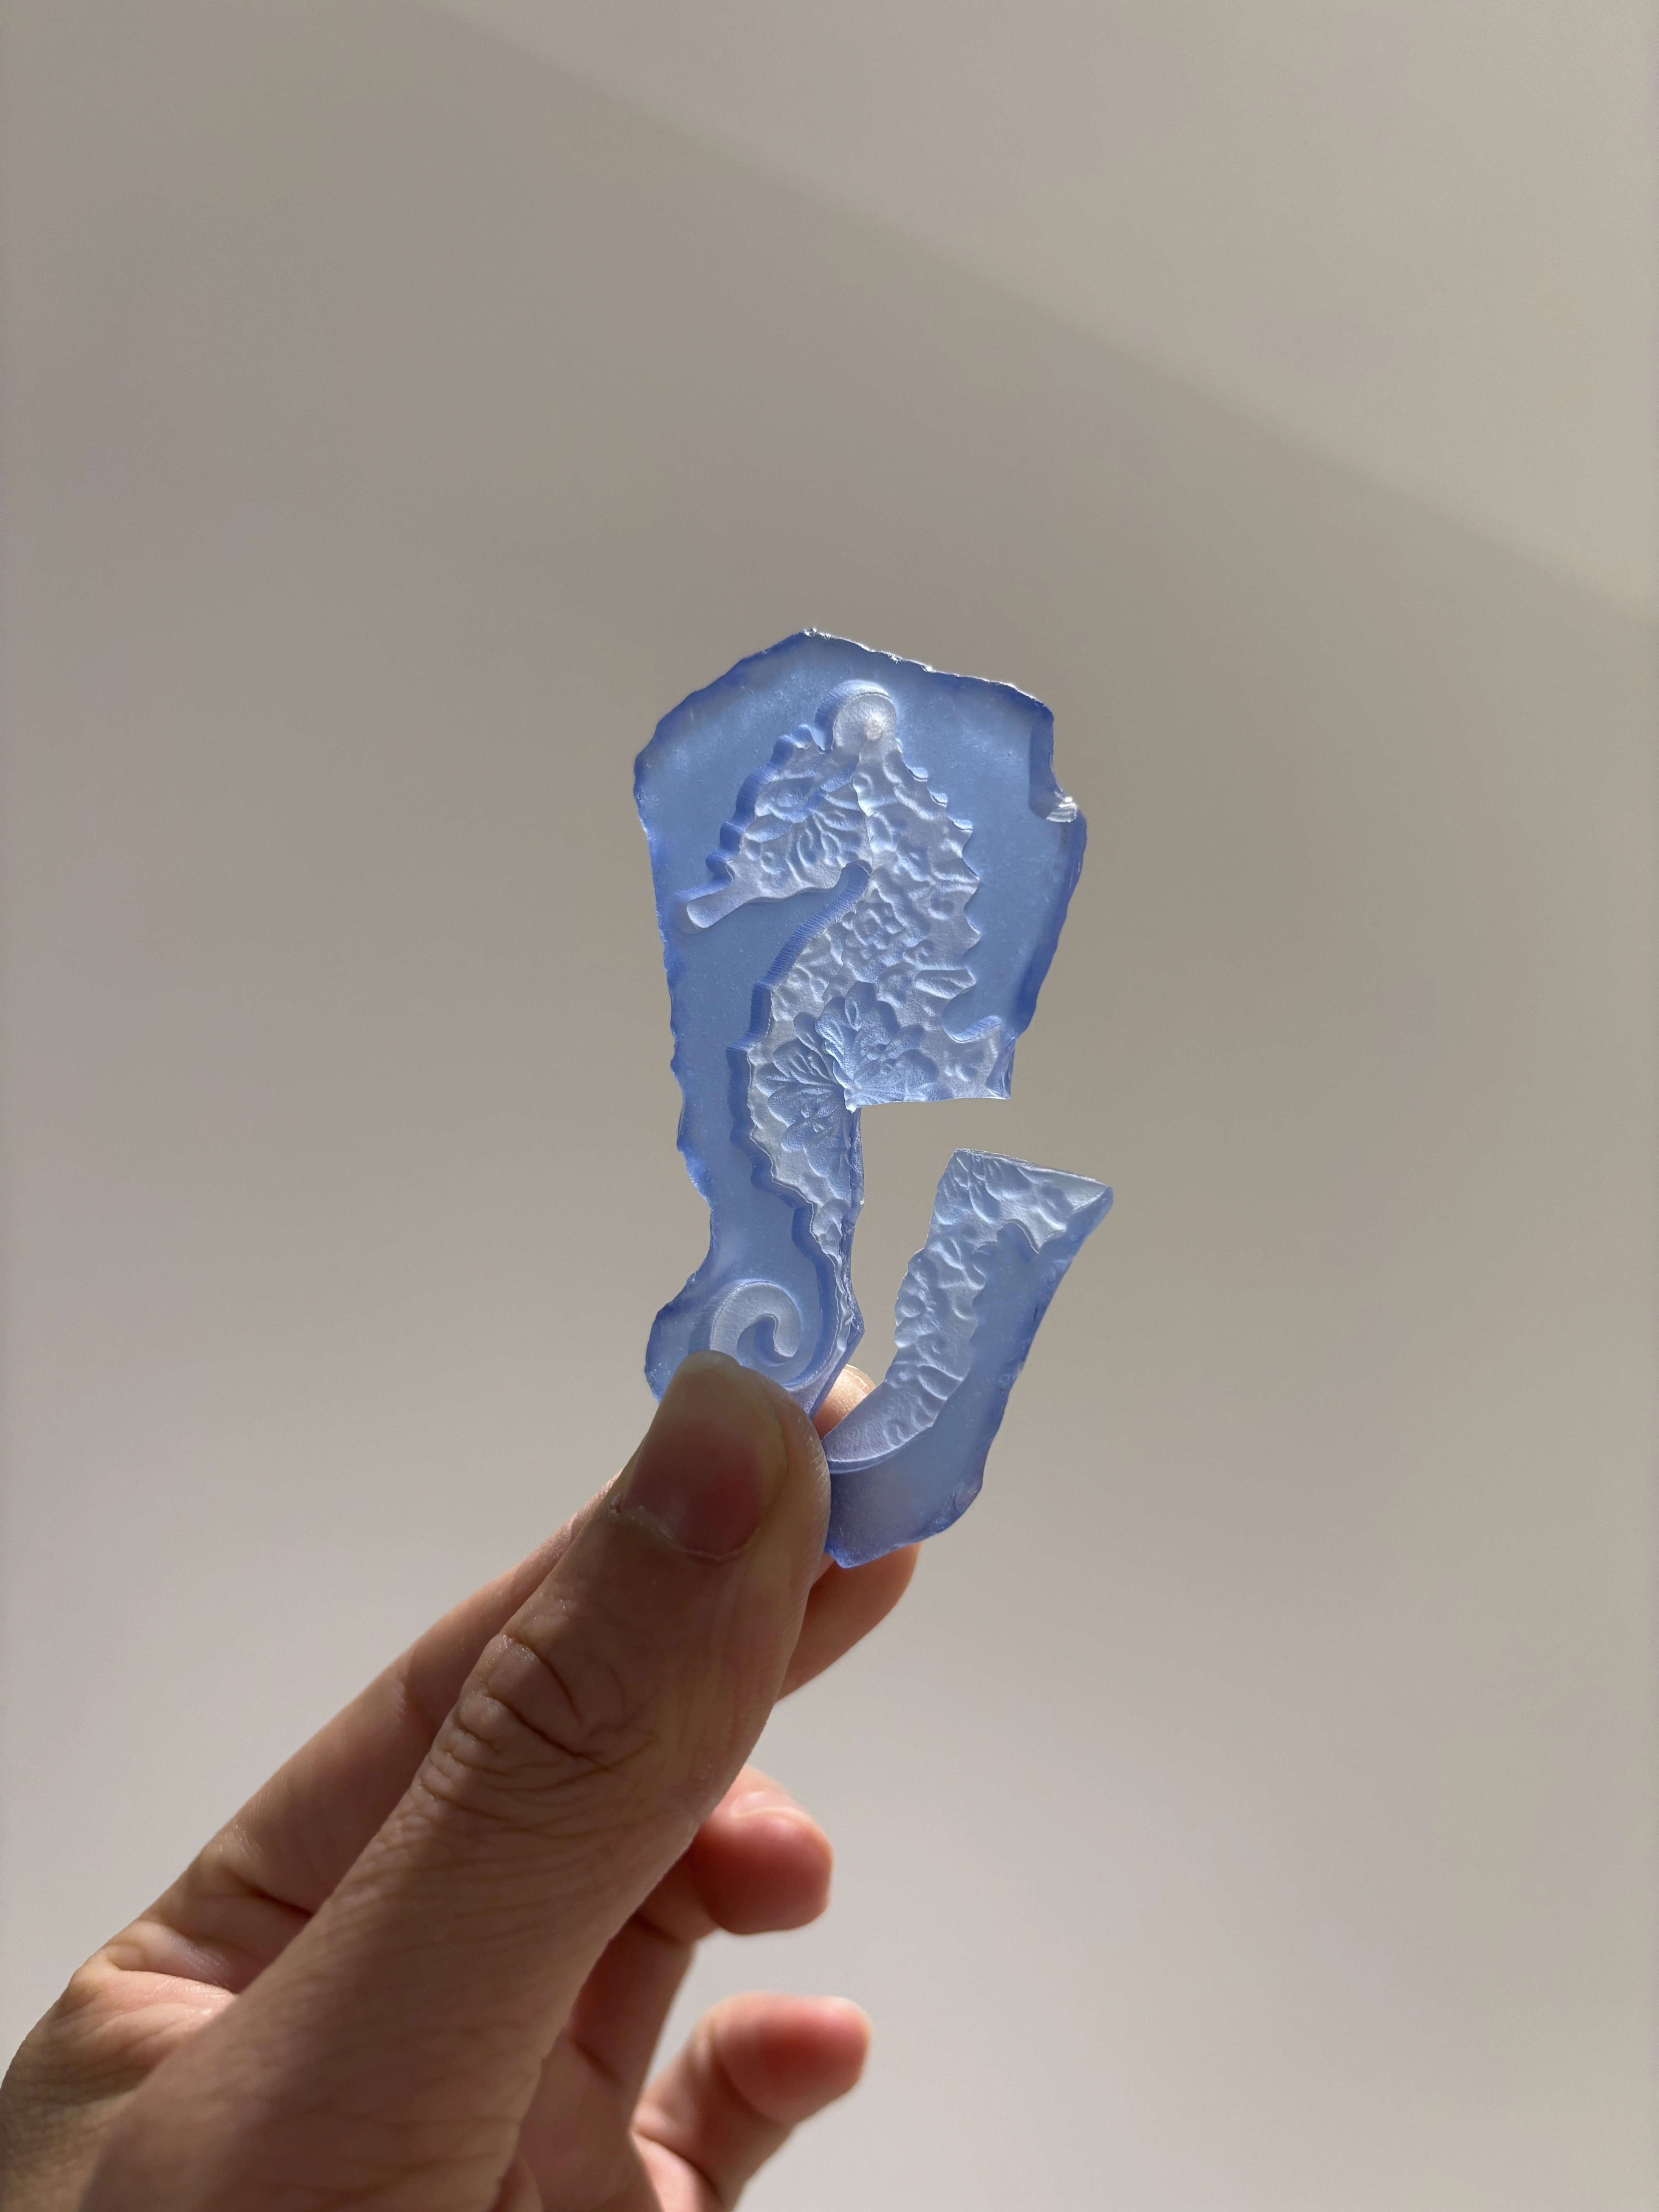
Step1: Laser Cut Glass Relief Seahorse Pendant
![[How To] Laser Cut Glass Relief Seahorse Pendant instruction: step 1 - Laser Cut Glass Relief Seahorse Pendant](https://storage-us.atomm.com/resource/xtool/community/attachment/xtool-community/fc3bd745-2dcc-4a34-83ac-ea3e33cadf42.jpg?x-oss-process=image/resize,m_fill,w_1500,h_1125,limit_0/interlace,1/format,webp/auto-orient,1)
Hi everyone, this is the result I achieved. Now let me show you how to get the result step-by-step.😄
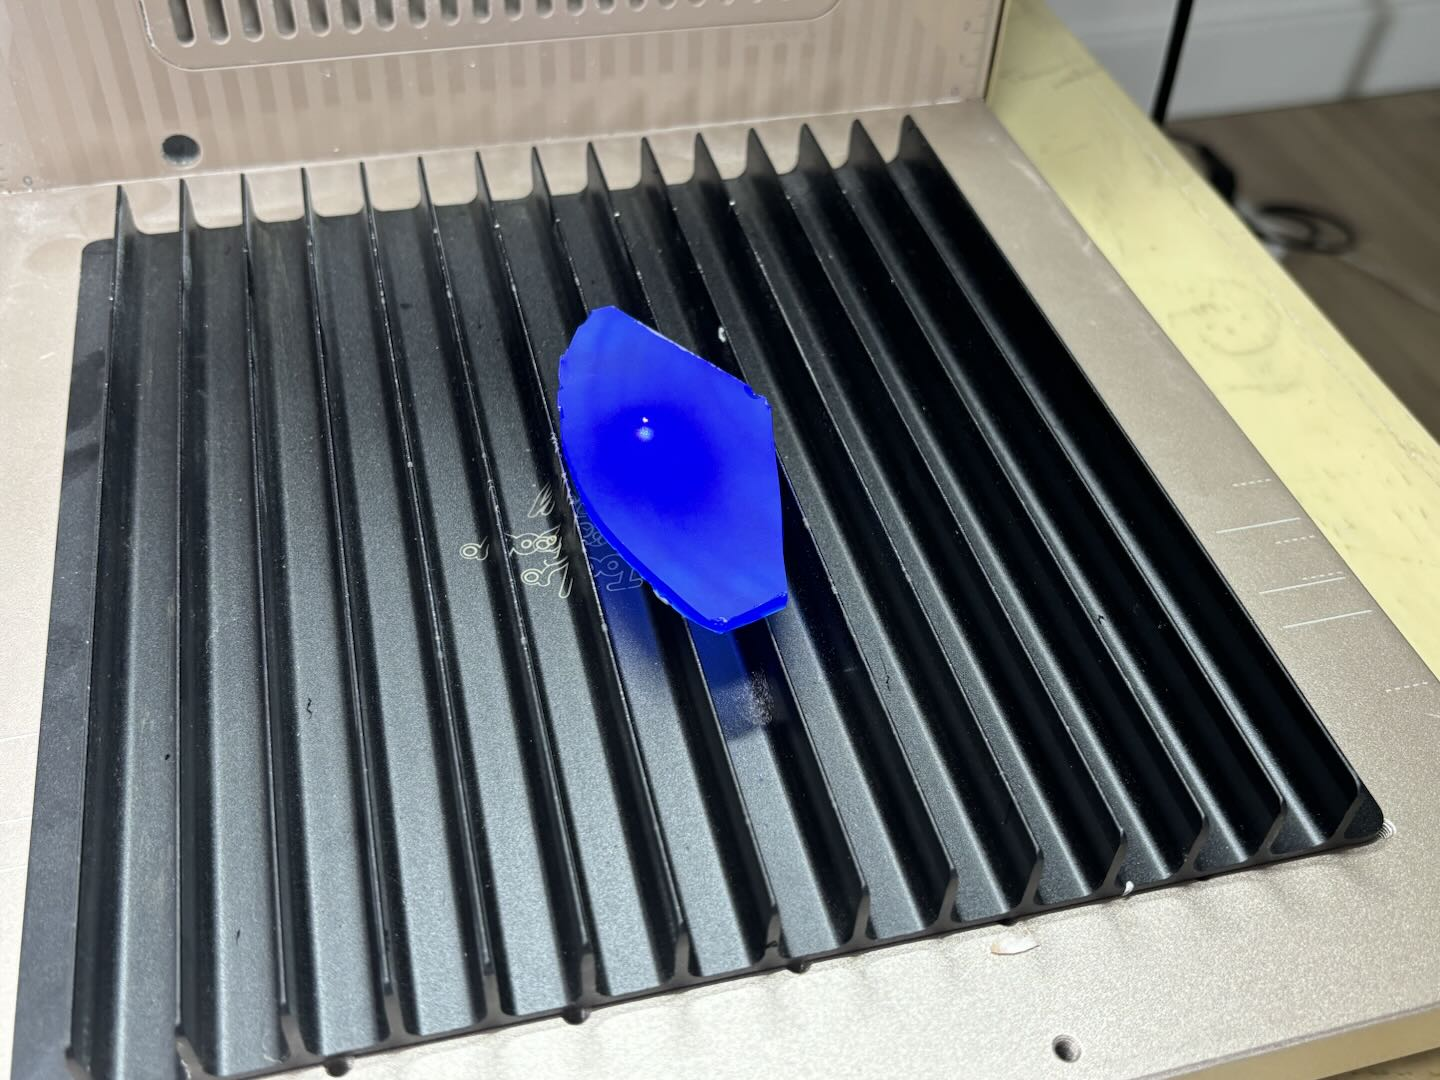
Step2: Material preparation
![[How To] Laser Cut Glass Relief Seahorse Pendant instruction: step 2 - Material preparation](https://storage-us.atomm.com/resource/xtool/community/attachment/xtool-community/9d053ba3-2018-4d0d-8ea6-40cfd9b9e444.jpg?x-oss-process=image/resize,m_fill,w_1500,h_1125,limit_0/interlace,1/format,webp/auto-orient,1)
Scenario setting:
- Pick a regular, flat glass shard about 5mm thick (✅ soda-lime glass, ultra-clear glass, lead-free glass) (❌ tempered glass, borosilicate glass).
- Replace the surface engraving field lens.
- Prepare the blade strip board.
- Place the glass at the exact center of the machine, aligning it with the focus assist point. The exact center has minimal deviation—try not to change the focus position while cutting. ⬇️
Step3: Preparations before processing
![[How To] Laser Cut Glass Relief Seahorse Pendant instruction: step 3 - Preparations before processing](https://storage-us.atomm.com/resource/xtool/community/attachment/xtool-community/7fa79446-46bf-4926-b778-40f4fc7d652b.png?x-oss-process=image/resize,m_fill,w_1500,h_1125,limit_0/interlace,1/format,webp/auto-orient,1)
Open xTool Studio and switch to Embossment processing mode.
❗️First emboss and then cut. Do not move the position of the consumables before all processing is completed!!! Do not change the focus position!!! You can use tape to fix the corners to prevent displacement.
1️⃣ Embossment processing
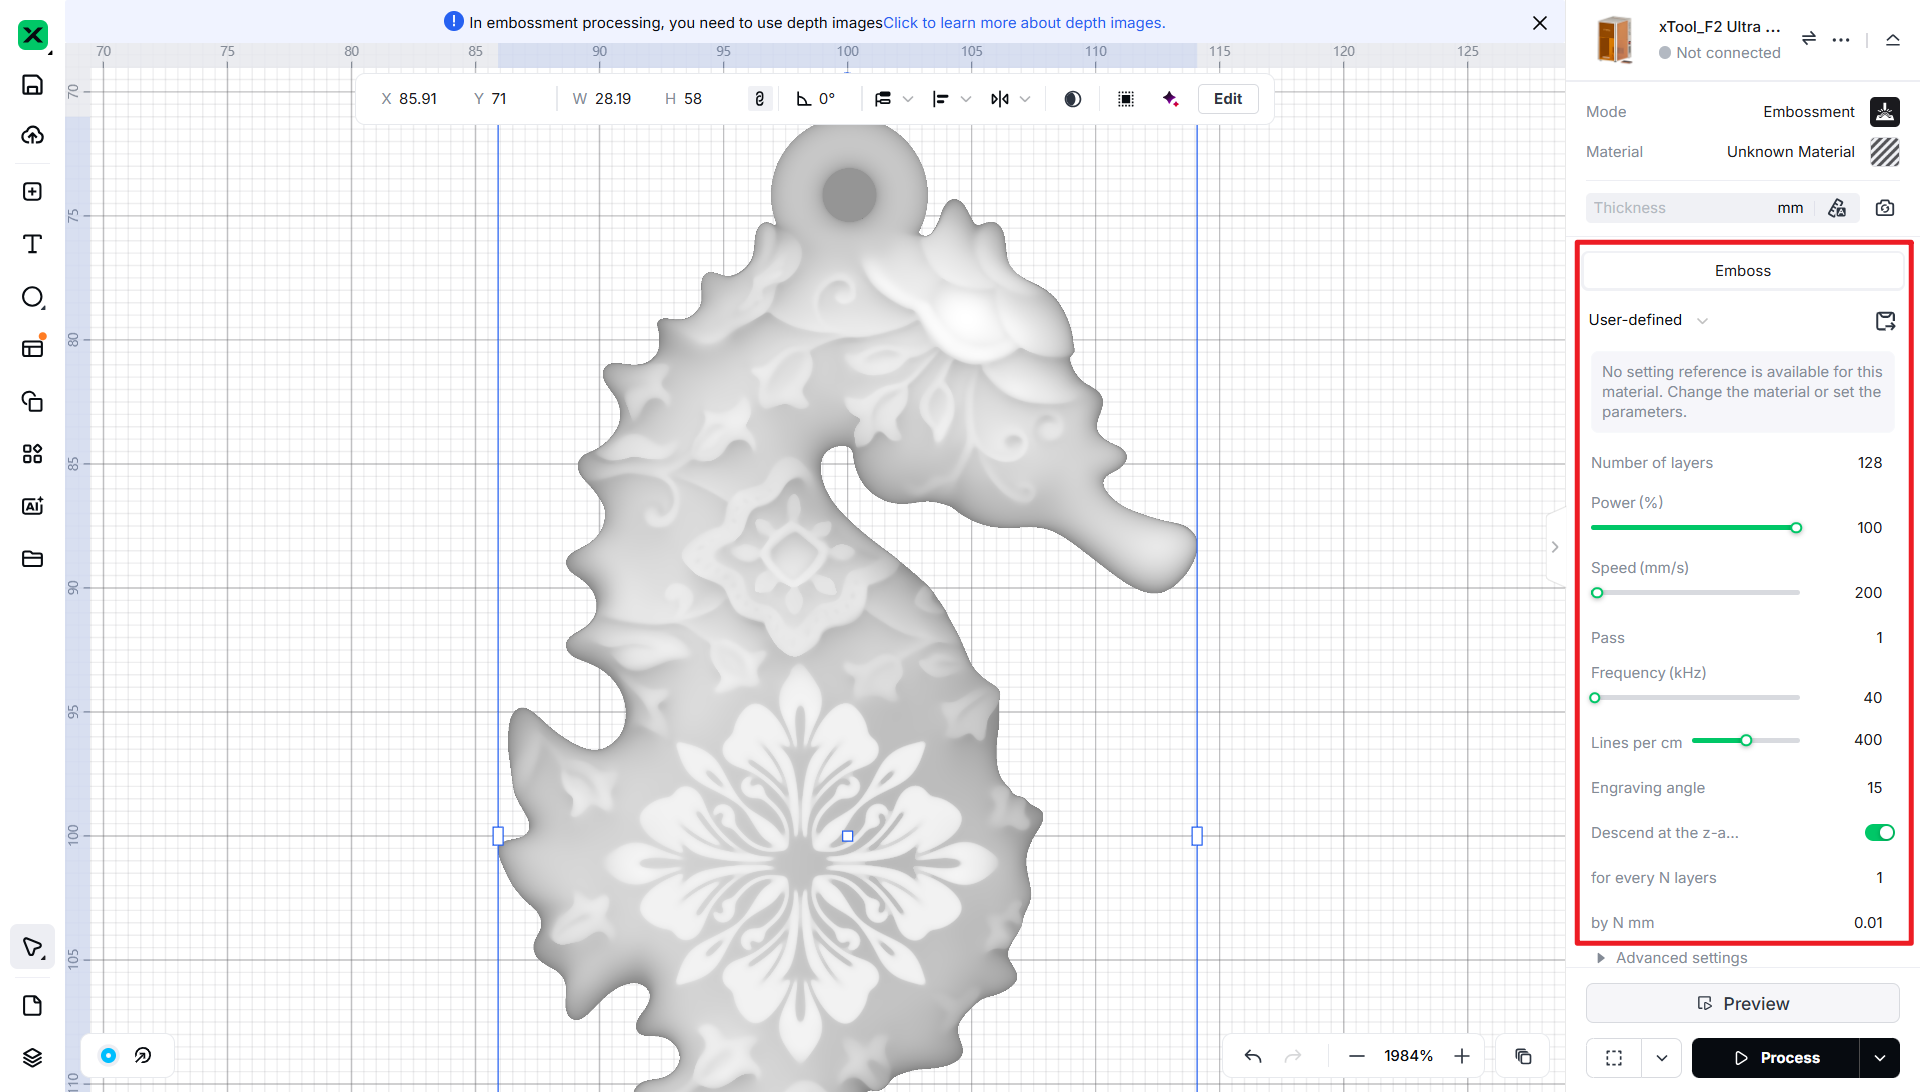
2️⃣ Deep engraving and cutting
1. Select the image and offset it twice: offset it outward by 1mm for the first time.
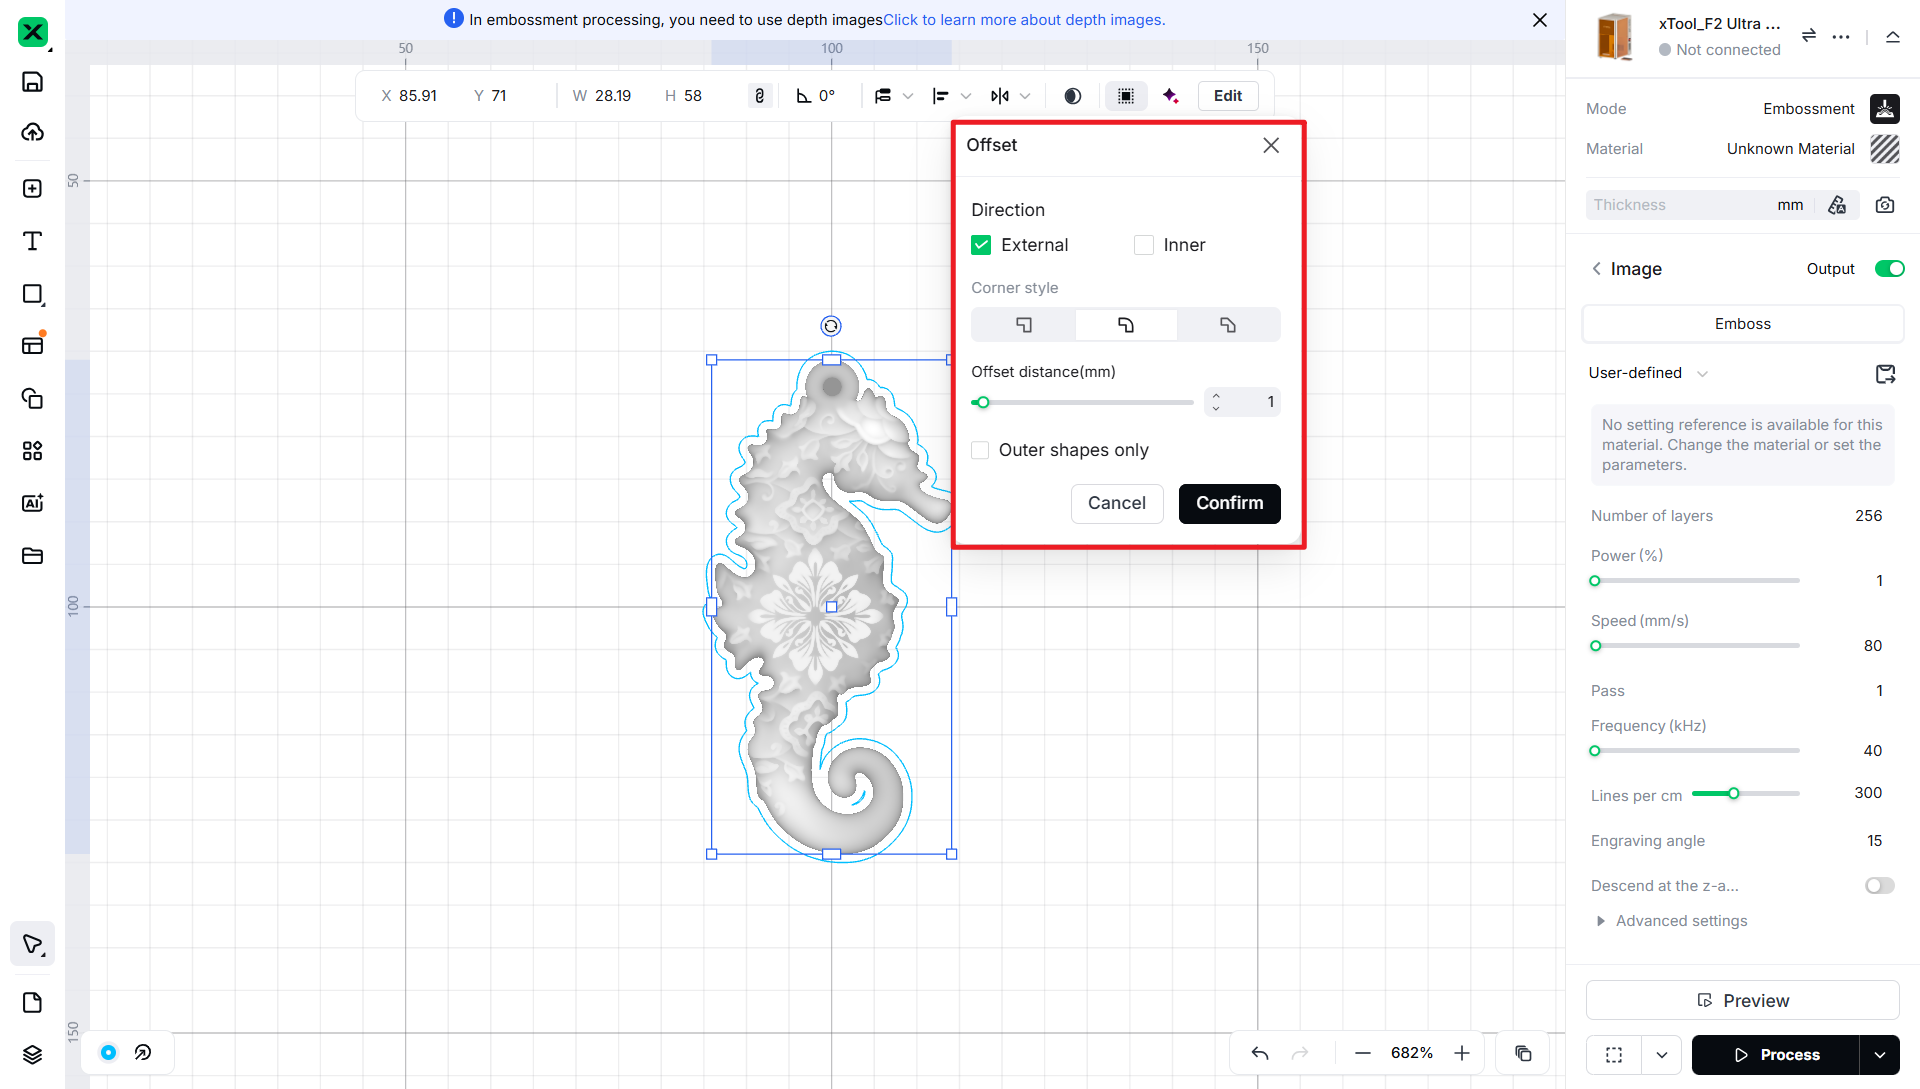
2. Select the image again and offset it inward by 0.2mm for the second time.
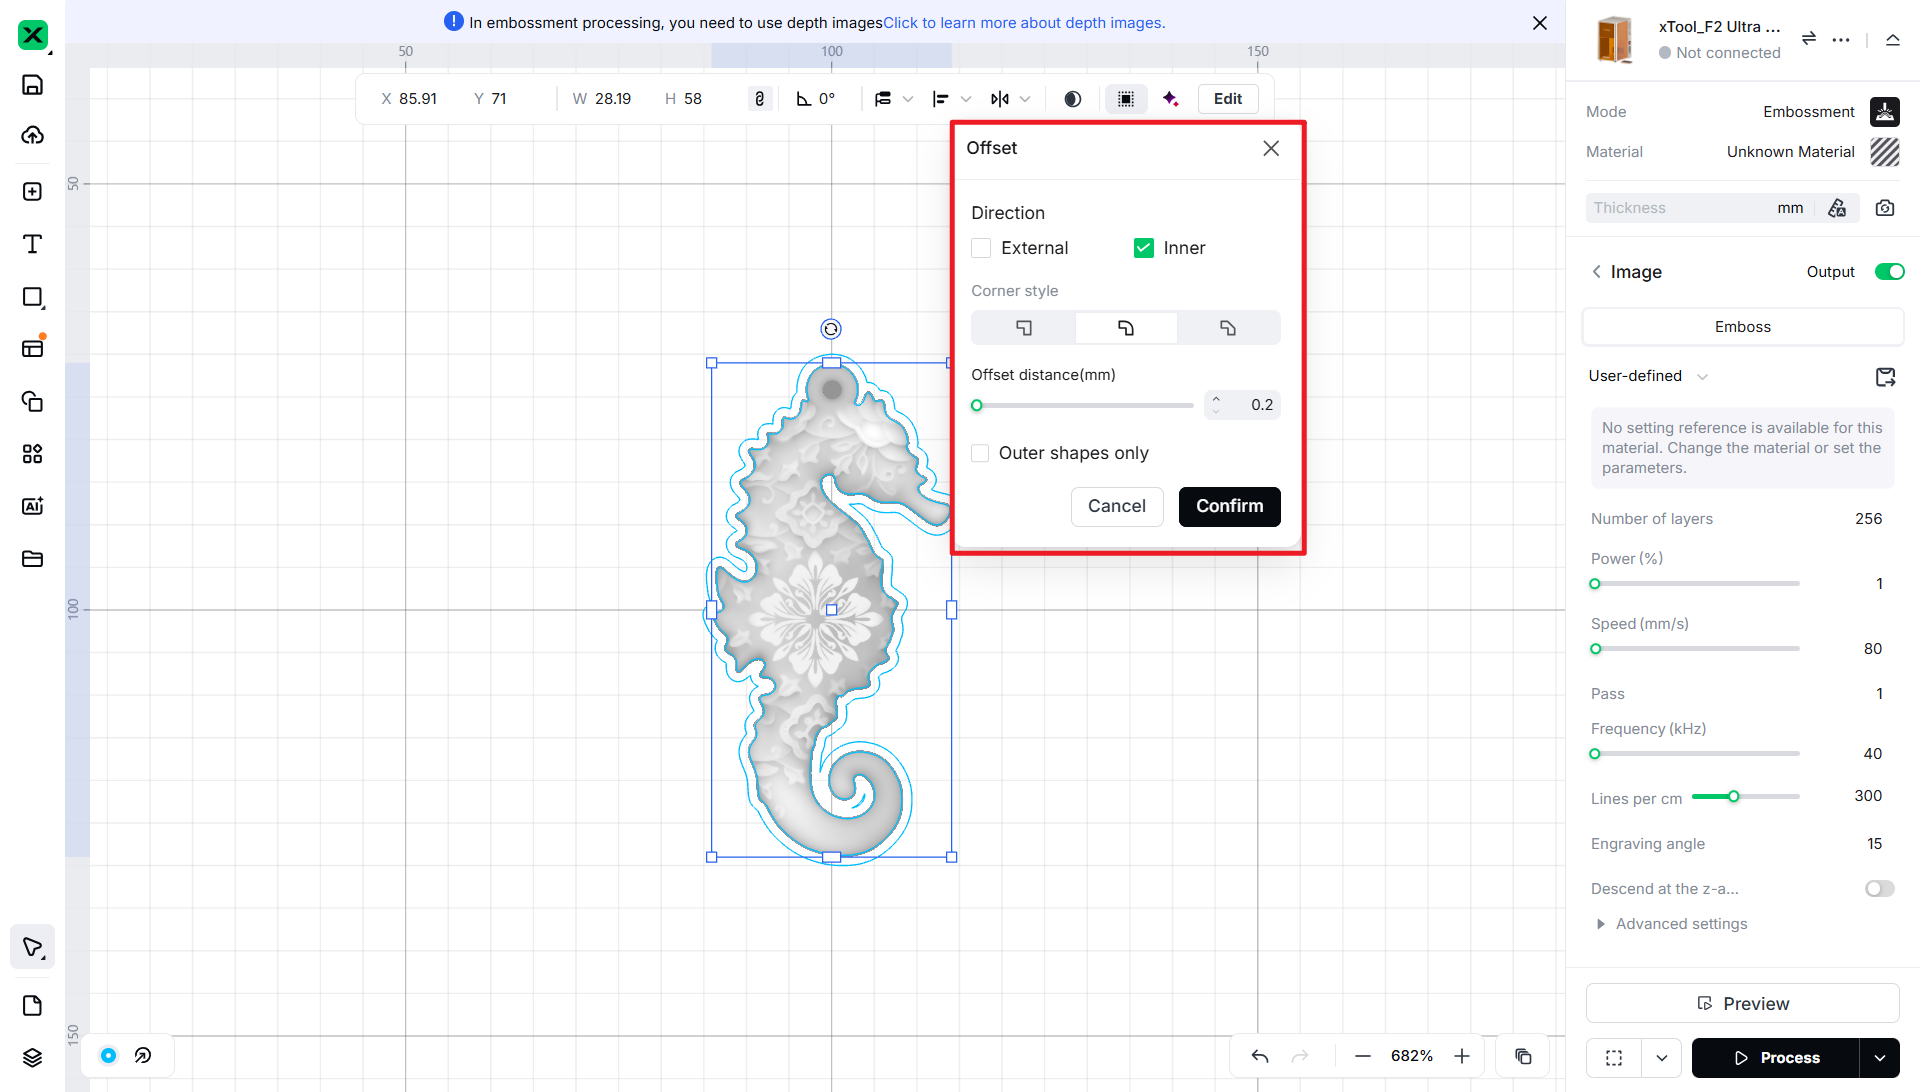
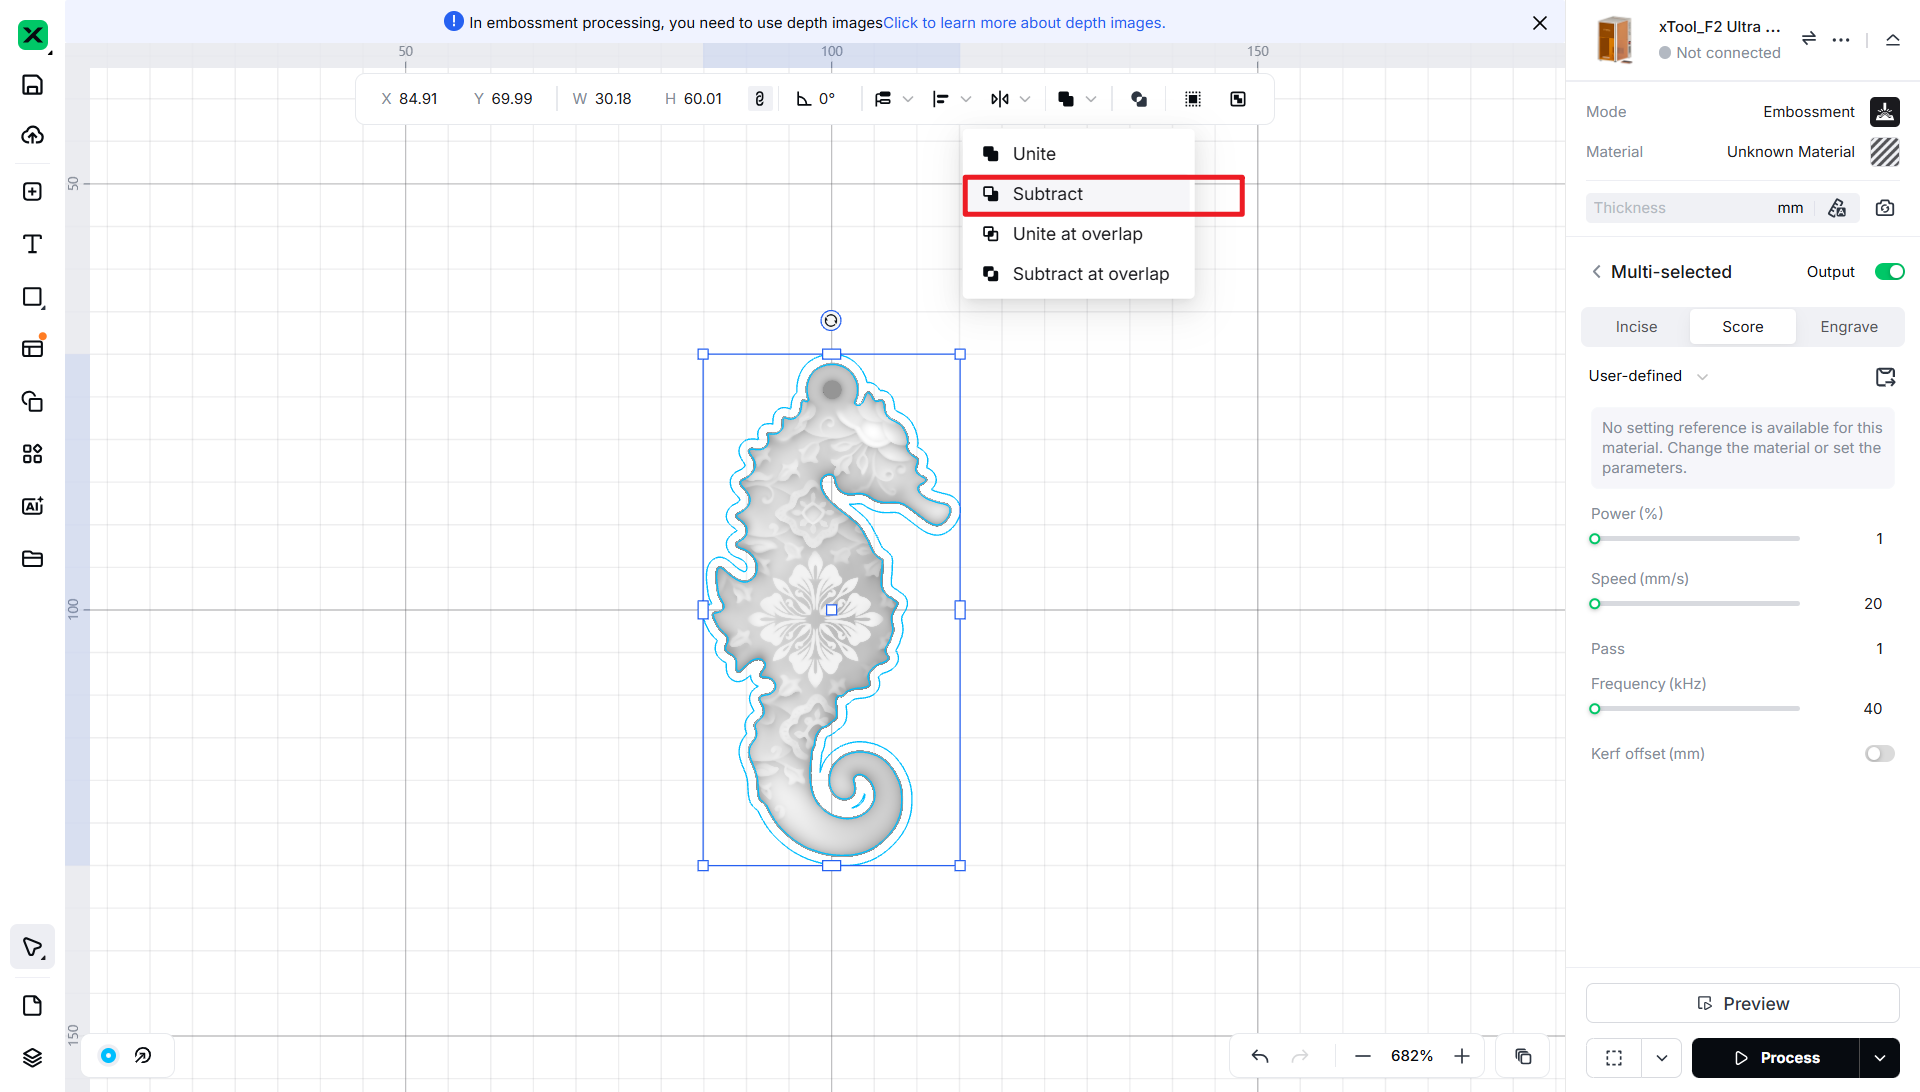
3. Select the vectors from the two offsets and perform a Boolean subtraction (that is, subtract the area of the new shape from the original one).
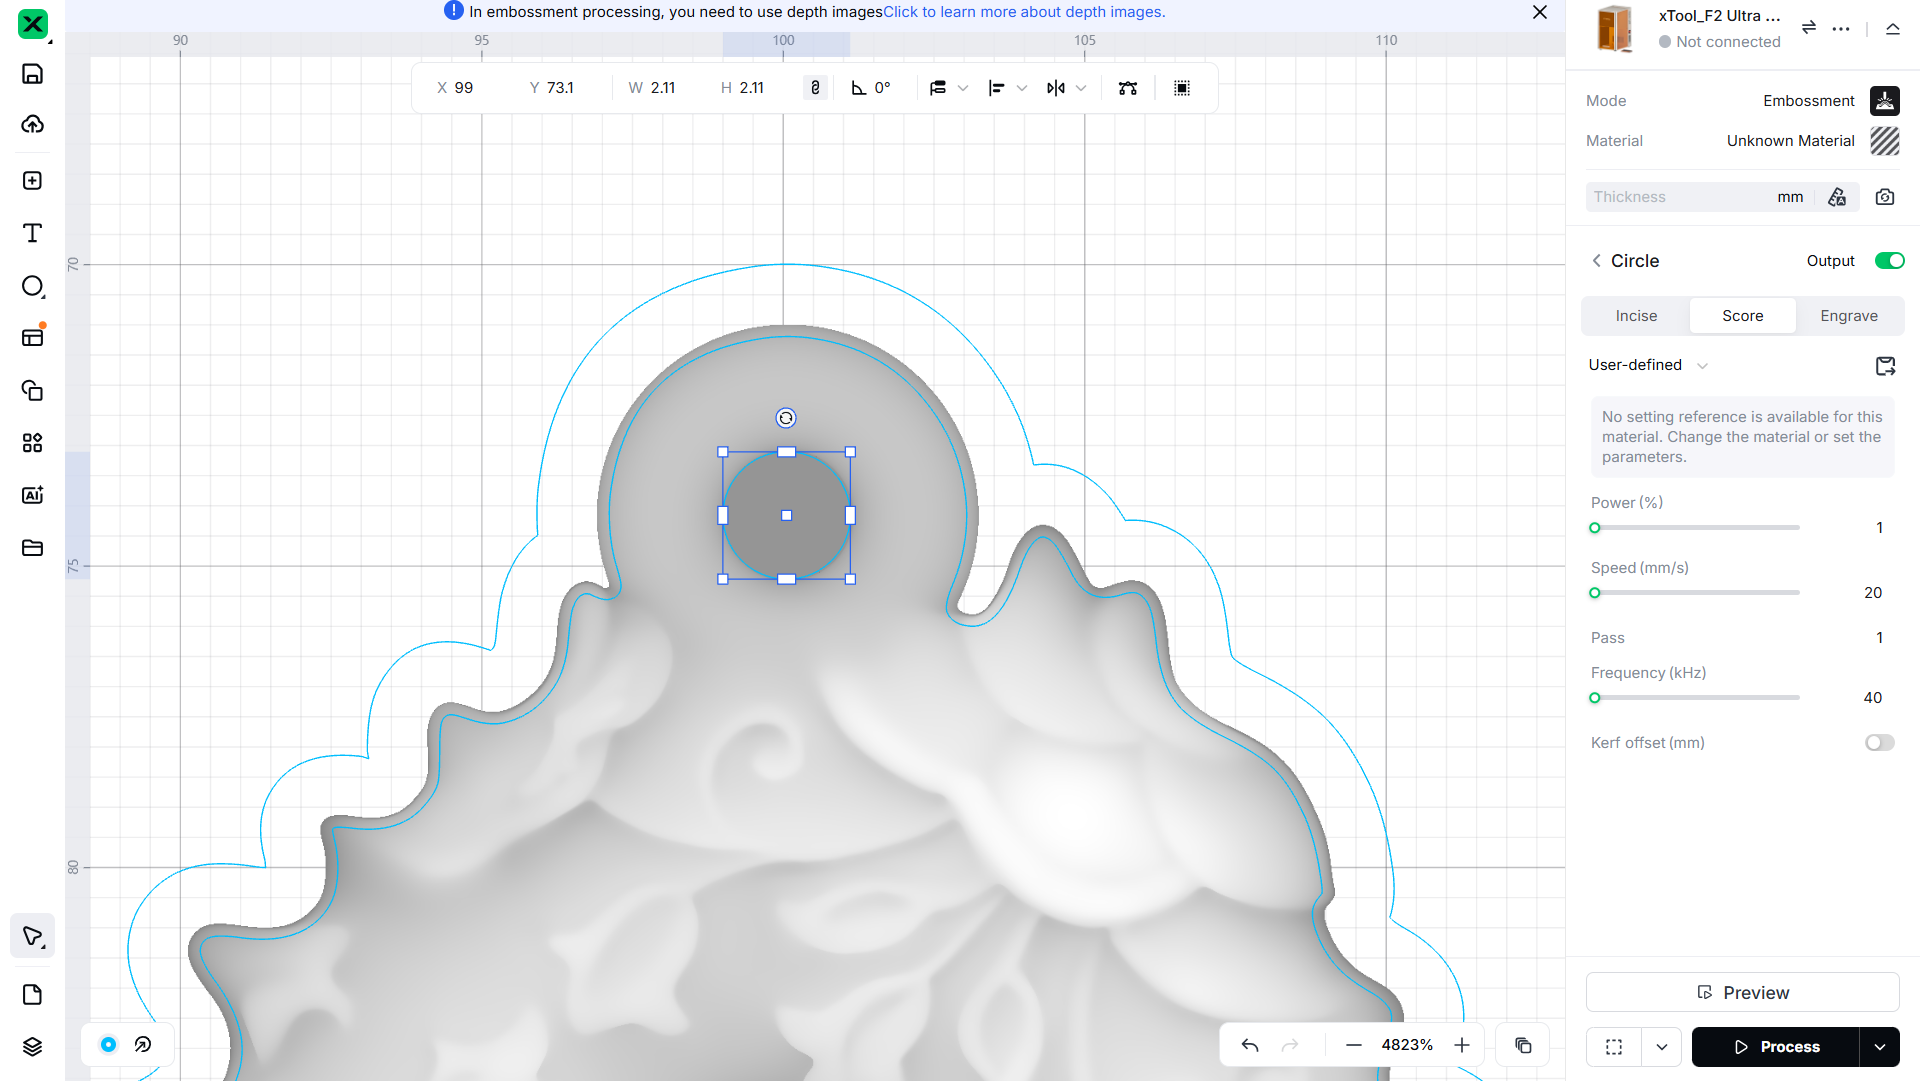
4. Manually add a circle where you want to make the lanyard hole.
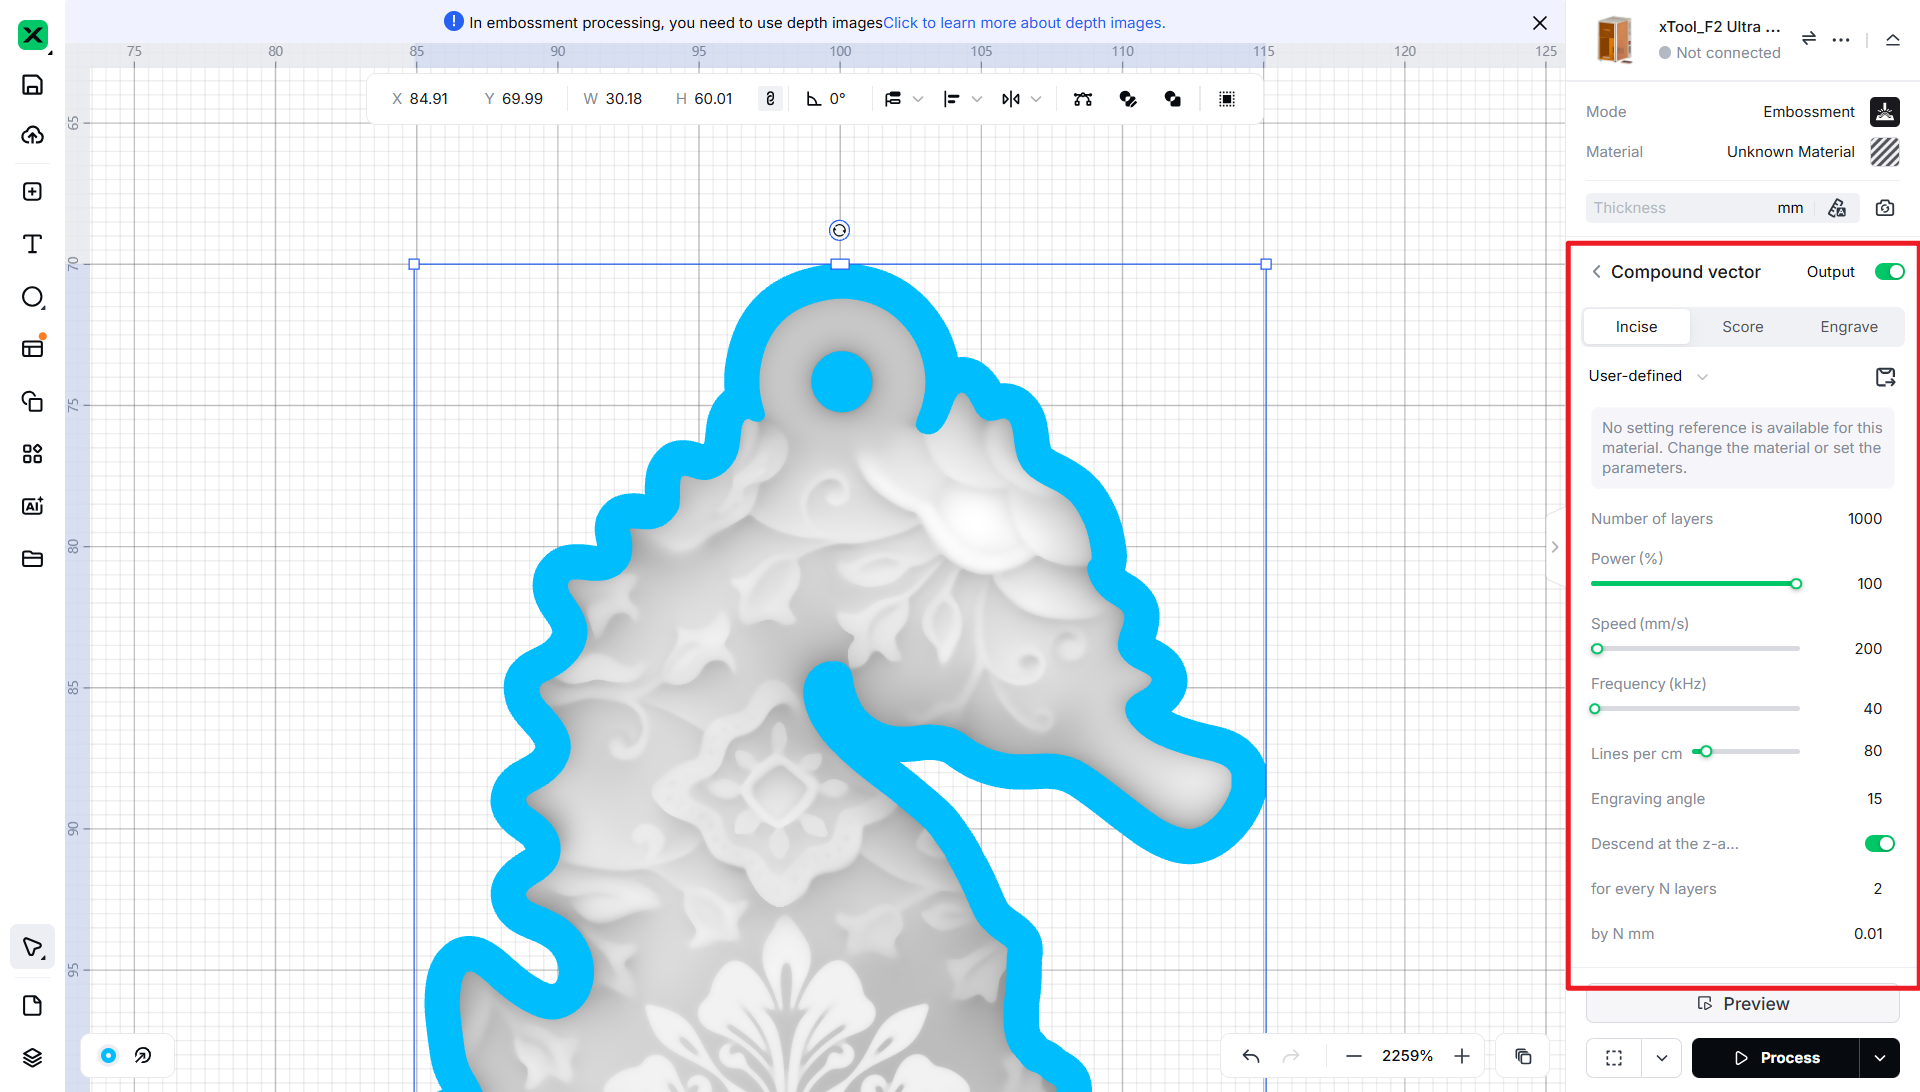
5. Select all vectors and create a compound vector (Make Compound Vector).

6. Change the engraving mode to Incise and set the parameters [1000 layers, focus drops by 0.01mm every 2 layers, with a total drop of 5mm].
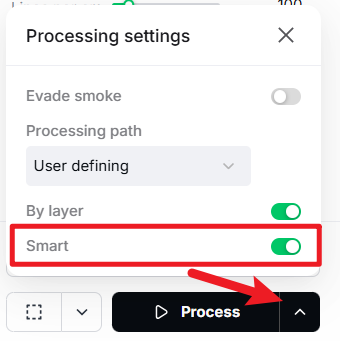
7. In the processing settings, turn on Smart Scan (Smart).
Step4: Start processing
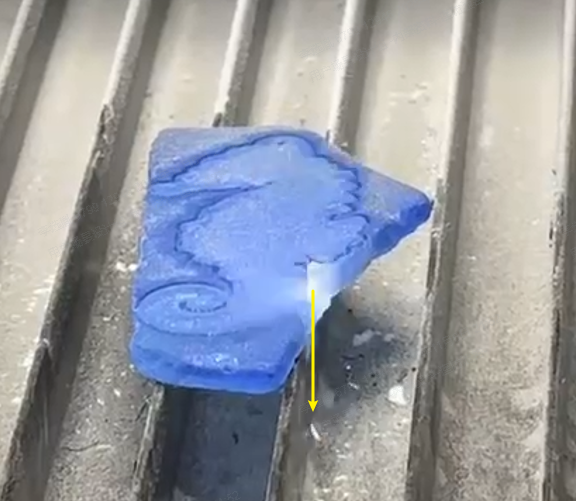
Step5: Notes
![[How To] Laser Cut Glass Relief Seahorse Pendant instruction: step 5 - Notes](https://storage-us.atomm.com/resource/xtool/community/attachment/xtool-community/0c3ec565-ace8-4125-b70c-78e293639e61.jpg?x-oss-process=image/resize,m_fill,w_1500,h_1125,limit_0/interlace,1/format,webp/auto-orient,1)