




Wooden leash hanger with illuminated dog portrait
 Instruction


Information
      Every dog owner knows the moment before a walk: the dog is ready, while the human is still looking for the leash and waste bags. This everyday problem inspired Mars’ Walk Station – a combination of a personalized pet portrait, decorative lighting and a practical walking organizer.

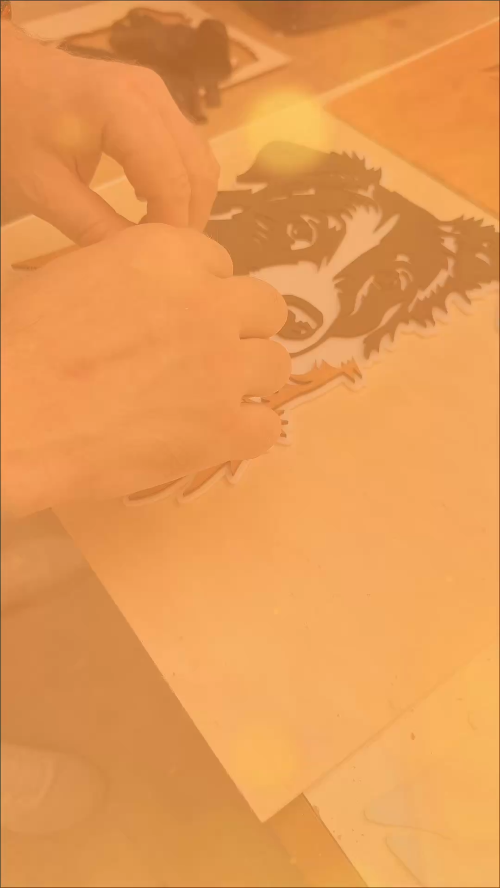
I did not want to create another ordinary board with a metal hook. The main feature is a layered portrait of Mars, made from precisely laser-cut pieces. The individual shapes follow the natural direction of his fur, the distinctive white blaze on his face and his black, brown and white coat. This allows the simplified graphic design to remain recognizable and preserve his individual character.

The layered construction gives the portrait depth, while hidden LED lighting creates a soft halo around his head and separates it from the warm wooden background. The effect makes Mars look as though he is stepping out of the picture to remind us that it is time for a walk.

The separate tail intentionally extends beyond the main portrait. It is not only decorative – it also serves as the leash holder while preserving the movement and natural silhouette of the dog. The bone-shaped lower module stores dog waste bags, keeping the everyday walking essentials together and ready to use. A transparent nameplate completes the personalized design.

Mars’ Walk Station combines portrait art, light and everyday functionality. It is more than a decoration showing a beloved dog – it becomes part of every walk and every shared adventure.

https://www.instagram.com/p/DcdqT78DRxN/?utm_source=ig_web_copy_link&igsi=MzRlODBiNWFlZA==
Instruction
Step1: Walk Station
MARS Walk Station – Build Instructions
Project dimensions
- Main backboard: 48.5 × 35 cm
- Dog’s head: 32 × 23.5 cm
- Tail: 19.5 × 24.5 cm
- Waste-bag container: 10 × 6 × 2.8 cm
- Total container depth including the bone-shaped front: 3 cm
- LED transformer openings: Ø50 mm
Materials
- 15 mm birch plywood – main backboard
- 8 mm plywood – portrait spacer and LED support
- 5 mm plywood – structural tail layer
- 5 mm plywood – waste-bag container
- 3 mm plywood – fur and facial details
- 2 mm plywood – heart and paw decorations
- 5 mm white acrylic – head and tail guide layers
- 5 mm clear acrylic – personalized nameplate
- 3 mm white acrylic – bone-shaped container front
- 12 V LED strip with transformer
- Inline cable switch
- High-tack double-sided adhesive
- Wood screws
- 15 mm nameplate standoffs
- Black paint
- Reddish-brown wood stain
- Suitable adhesive
- Rear wall hanger
Step 1 – Prepare the main backboard
The main backboard measures 48.5 × 35 cm and was cut from 15 mm birch plywood.
I cut a circular opening with a diameter of 50 mm to accommodate the 12 V LED transformer. The visible surface of the board was sanded and finished with wood stain.
A hanger was installed on the rear of the backboard so that the completed organizer could be mounted on a suitable wall plug and screw.
Step 2 – Make the spacer and install the LED lighting
I cut the portrait spacer from 8 mm plywood. This layer separates the illuminated portrait from the main backboard and also provides a mounting surface for the LED strip.
A matching Ø50 mm opening was cut in the spacer and aligned with the transformer opening in the main backboard. I also cut a cable channel running from this opening to the LED strip so that the wiring could remain hidden behind the portrait.
The 12 V LED strip was attached around the outside edge of the spacer. The lighting is controlled by a small inline switch located on the power cable.
The completed spacer was attached to the 15 mm backboard using wood screws. The lighting and switch were tested before the portrait was installed.
Step 3 – Create the dog’s head
The finished head measures 32 × 23.5 cm.
The main head shape was cut from 5 mm white acrylic. Guide markers were added to show the correct positions of the eyes, nose, fur sections and other facial details.
Before cutting the decorative pieces, I covered the back of a 3 mm plywood sheet with strong, high-tack double-sided adhesive. This gave each laser-cut piece its own adhesive backing.
Some pieces were painted black, while the remaining pieces were finished with a reddish-brown wood stain matching Mars’ coat.
Once all the pieces were completely dry, I removed the adhesive backing and attached them to the marked positions on the white acrylic.
The completed layered head was then glued directly to the 8 mm plywood spacer.
Step 4 – Build the three-layer tail and leash holder
The finished tail measures 19.5 × 24.5 cm and consists of three layers.
Layer 1 – Structural plywood core
The load-bearing base of the tail was cut from 5 mm plywood. It was positioned on the main backboard and attached directly to the 15 mm birch plywood using wood screws.
This structural layer makes the tail strong enough to function as a practical leash holder.
Layer 2 – White acrylic guide layer
The second layer was cut from 5 mm white acrylic and includes markers showing where the decorative coat details should be placed.
The acrylic was attached to the plywood core using strong double-sided adhesive. It also conceals the mounting screws beneath the decorative surface.
Layer 3 – Fur details
The decorative fur sections were cut from 3 mm plywood backed with high-tack double-sided adhesive.
The pieces were painted black or stained reddish-brown before being attached to the marked positions on the white acrylic.
Step 5 – Create the personalized nameplate
The name “MARS” was reverse-engraved into the back of a 5 mm clear acrylic plate.
Reverse engraving keeps the front surface smooth while producing a visible depth effect.
The completed nameplate was attached to the main backboard using 15 mm mounting standoffs.
Step 6 – Build the dog waste-bag container
The container was designed using the Atomm Box Generator and adjusted to fit the dog waste-bag rolls.
Its finished dimensions are 10 × 6 × 2.8 cm. The walls were cut from 5 mm plywood and assembled to create the main container.
The bone-shaped front was cut from 3 mm white acrylic, bringing the total depth of the finished container to approximately 3 cm.
The heart and paw-print decorations were cut from 2 mm plywood, painted black and attached to the acrylic bone.
The completed container was permanently mounted to the main backboard using two wood screws.
Step 7 – Final assembly and installation
After all painted, stained and glued components had dried completely, I checked the alignment and stability of every part.
I tested the 12 V LED strip, transformer and inline switch, and made sure that all cables remained hidden inside the prepared opening and cable channel.
I also checked that the three-layer tail was firmly attached and capable of safely supporting a dog leash.
Finally, the completed organizer was hung on the wall using the rear hanger and a wall plug and screw suitable for the total weight of the project and the additional load from the leash.
For safety, all wiring and assembly work should be carried out with the power supply disconnected.
Remixes
License



You may also like

Dog Portrait Multilayer SVG XCS | 4 Layer Rustic Wooden Pet Decor | Animal Lover Laser Cut Design File


Dog Organizer


Border Collie Portrait Wooden Keychain

Personalized wall leash holder in the shape of a dog paw


Collie Wall Art


Dog Art


Wooden earrings with border collie dog portrait


Australian Shepherd Scenic Cut and Engrave


Border Collie Portrait Wooden Keychain V2

Wall Mounted Dog Leash and Collar Organizer with Paw Print Detail


SWIVEL KIT


Gantungan kunci dinding motif anjing lucu untuk rumah


Berger Australia -Australian-shepherd


Laser Cut Personalized Dog Hanging Board


Doggy Plaque


Australian Shepherd Dog Wall Art SVG | Laser Cut File | Geometric Low-Poly Silhouette | Wood Wall Decor | Glowforge xTool LightBurn | Digital Download


Wooden wall leash door with terrier dog pattern


Australian Shepherd Dog Frame on Easel
