
![[Laser cut and engrave] Modern Slatted Wooden Pendant Light Fixture](https://storage-public.atomm.com/xtool/community/attachment/xtool-community/b5b54e06-4e4a-4a88-88b8-6bc3b3e7ceab.jpg?x-oss-process=image/resize,w_1200,h_900,limit_0/interlace,1/format,webp/auto-orient,1)
![[Laser cut and engrave] Modern Slatted Wooden Pendant Light Fixture](data:image/png;base64,iVBORw0KGgoAAAANSUhEUgAAAAoAAAAKCAYAAACNMs+9AAAAAXNSR0IArs4c6QAAABdJREFUKFNjZCASMBKpjmFUId6QIjp4AAppAAuXjCs4AAAAAElFTkSuQmCC)
![[Laser cut and engrave] Modern Slatted Wooden Pendant Light Fixture](https://storage-public.atomm.com/xtool/community/attachment/xtool-community/b5b54e06-4e4a-4a88-88b8-6bc3b3e7ceab.jpg?x-oss-process=image/resize,w_200,h_150,limit_0/interlace,1/format,webp/auto-orient,1)
![[Laser cut and engrave] Modern Slatted Wooden Pendant Light Fixture](https://storage-public.atomm.com/xtool/community/attachment/xtool-community/3c13e0fc-dd19-44a3-bcfe-ad8b1240aad4.webp?x-oss-process=image/resize,w_200,h_150,limit_0/interlace,1/format,webp/auto-orient,1)
โคมไฟแขวนไม้แบบเกลียว DIY
 คำแนะนำ


คำแนะนำ
ขั้นตอน1

บทเรียนโคมไฟแขวนไม้แบบเกลียว DIY
นี่คือโปรเจกต์แรกของฉัน ตอนแรกผมซื้อชุดไฟ DIY xTool และดีไซน์โคมไฟควรจะมีให้ผ่านเครื่องกําเนิดไฟฟ้าใน xTool Studio แต่ผมหาไม่เจอเลย สุดท้ายฉันก็สร้างเวอร์ชั่นของตัวเองขึ้นมา
เฉดสีที่เสร็จสมบูรณ์มีเส้นผ่านศูนย์กลางประมาณ 7" โดยแผ่นไม้จะค่อย ๆ ยาวขึ้นเพื่อสร้างเอฟเฟกต์เกลียว
Materials
- xTool 3mm basswood — ฉันใช้ 3 แผ่น 12"x12" sheets
- xTool DIY ชุดไฟแขวน หรือไฟแขวนที่เข้ากันได้
- กาวไม้, ตัวเลือก< li data-start="566" data-end="721">Ceiling hook
ขนาดที่เสร็จสมบูรณ์โดยประมาณ
ช่อง/รอยบากถูกออกแบบให้กว้างใกล้เคียงกับ
ขั้นตอนที่ 1: จัดเรียงและตัดชิ้นส่วน
จัดแผ่นกลางและแผ่นไม้ทั้งหมดบนแผ่นไม้บาสวูดของคุณ
ผมสามารถตัดโคมไฟทั้งหมดจาก สามแผ่นของ xTool ขนาด 12"x12" 3mm basswood
ตัดชิ้นส่วนทั้งหมดโดยใช้การตั้งค่าที่เหมาะสมกับเครื่องจักรและวัสดุของคุณ
ขั้นตอนที่ 2: ประกอบ Spiral Shade
เริ่มต้นด้วย
เลื่อนรอยบากเข้าไปในช่องบนแผ่นกลาง
เพิ่มแผ่นรอบดิสก์ต่อไปตามลําดับจาก สั้นที่สุดไปยาวที่สุด
การรักษาลําดับขณะทํางานรอบวงกลมคือสิ่งที่สร้างรูปทรงเกลียวอย่างค่อยเป็นค่
อยไปถ้าช่องร่องหลวมเล็กน้อย ให้ทากาวไม้เล็กน้อยตรงจุดที่แผ่นไม้ตัดกับแผ่นกลาง คุณอาจต้องปรับให้แห้งทั้งม่านก่อนจะติดกาวถาวร
ขั้นตอนที่ 3: ติดตั้งไฟแขวน
หากคุณใช้ xTool DIY ชุดไฟ
- แขวน:
- ถอดแหวนยึดออกจากปลั๊กไฟ
- สอดส่วนเกลียวของซ็อกเก็ตผ่านรูกลางของแผ่นไม้
- ขันวงแหวนยึดกลับเข้าที่ซ็อกเก็ต
- ขันให้แน่นเพื่อให้ม่านไม้ถูกยึดแน่นระหว่างซ็อกเก็ตกับวงแหวนยึด
หากคุณใช้ชุดไฟแขวนแบบอื่น ให้ตรวจสอบขนาดของซ็อกเก็ต ตรวจสอบเส้นผ่านศูนย์กลางของซ็อกเก็ตก่อนตัดรูออกจากแผ่นกลางของคุณ รูตรงกลางต้องมีขนาดใหญ่พอที่ส่วนเกลียวของโคมไฟของคุณจะผ่านได้
ขั้นตอนที่ 4: แขวนโคมไฟ
ติดตั้งตะขอเพดานที่เหมาะสมและแขวนเชือกแขวนกับตะขอ
เนื่องจากเป็นไฟแขวนแบบเสียบปลั๊ก ให้วางตะขอให้ม่านแขวนในตําแหน่งที่ต้องการในขณะที่สายสามารถเดินไปยังปลั๊กไฟได้อย่างปลอดภัย
ติดตั้งหลอดไฟของคุณและเพลิดเพลินกับโคมไฟเกลียวใหม่ของคุณ!
A Few Things I Learned
สิ่งสําคัญที่สุดที่ผมจะปรับครั้งหน้าคือการปรับสล็อตให้พอดี แม้ว่าผมจะทําช่องให้ใกล้เคียงกับความหนาวัสดุที่โฆษณาไว้ 3mm แต่ช่องก็ยังหลวมอยู่บ้าง ความหนาของไม้อัดจริงและรอยตัดด้วยเลเซอร์อาจแตกต่างกัน ดังนั้นการทดสอบการใส่ร่องเล็กๆ ก่อนตัดชิ้นงานทั้งหมดจะคุ้มค่า
นอกจากนี้
หมายเหตุความปลอดภัย: ใช้หลอดไฟ LED ที่อุณหภูมิค่อนข้างเย็น และตรวจสอบให้แน่ใจว่าฮาร์ดแวร์แขวนและตะขอเพดานของคุณได้รับการประเมินที่เหมาะสมกับโคมไฟ
ชิ้นงานและชุดอุปกรณ์แต่ละชิ้นที่ระบุไว้ในส่วนวัสดุ
ดัดแปลง



คุณอาจชอบสิ่งนี้ด้วย

โคมไฟตั้งโต๊ะเกลียว Helix - ไฟตั้งโต๊ะสมัยใหม่กลางศตวรรษ


เมล็ดพันธุ์ของแสงโคมไฟจี้ไม้ตัดด้วยเลเซอร์ที่ทันสมัยพร้อมการออกแบบทางเรขาคณิต
.png?x-oss-process=image/resize,m_fill,w_240,h_240,limit_0/interlace,1/format,webp/auto-orient,1)

โคมไฟจี้ไม้ตัดด้วยเลเซอร์พร้อมหลอดไส้หลอด


โคมไฟแขวนดอกบัวโคมไฟแขวน


โคมไฟสะท้อนแสงไม้


จี้แสงการออกแบบรูปแบบเลเซอร์ตัดไฟล์จี้ไฟโคมไฟ Centerpiece โป๊ะโคมไฟตกแต่ง SVG ดาวน์โหลดดิจิตอล |#180|


โคมไฟจี้ไม้ระแนงที่ทันสมัย


โป๊ะโคมไฟไม้ตกแต่ง


โคมไฟตั้งโต๊ะ


โคมไฟจี้ไม้เรขาคณิตพร้อมรูปแบบคัตเอาท์ที่ซับซ้อน Laser Cut Bundle ตกแต่งบ้าน โคมไฟจี้ Laser Cut


'/%3e%3cdefs%3e%3clinearGradient%20id='paint0_linear_1433_15675'%20x1='12'%20y1='3.25'%20x2='16.6891'%20y2='20.75'%20gradientUnits='userSpaceOnUse'%3e%3cstop%20stop-color='%23FF5D80'/%3e%3cstop%20offset='1'%20stop-color='%23FF0035'/%3e%3c/linearGradient%3e%3c/defs%3e%3c/svg%3e)
โคมไฟไม้


โคมไฟ


โคมไฟไม้ไผ่เกลียว


โคมไฟทรงกลมกระดาษลูกฟูกพื้นผิว


โป๊ะโคมไฟไม้อัด


โคมไฟตั้งโต๊ะ

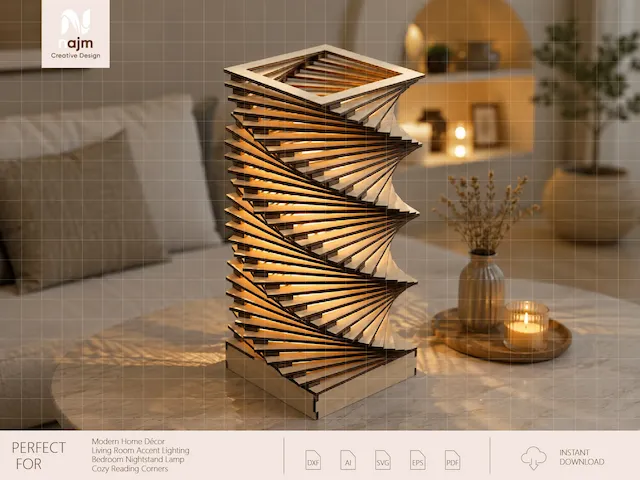
โคมไฟตั้งโต๊ะเกลียวเรขาคณิตที่ทันสมัยพร้อมแสงสว่างโดยรอบที่อบอุ่น

โคมไฟจี้ตัดไม้ lasr ที่ทันสมัยพร้อมการออกแบบที่เป็นเอกลักษณ์
