
Report


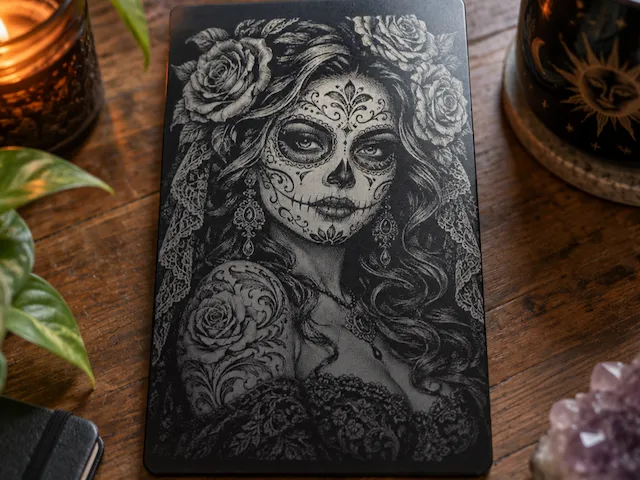
Framed Portrait of a Woman with Floral Hair and Butterflies - PETG Sketch Engraving – Black & Grey Portrait Using IR Laser


Files

Original files
AuthorF2 · 1/8"(3mm) Black PLA
2


Add Make Profile
Same design, different machine, material, or any improvement · Earn 100 Credits
Tips for a great Make Profile →
28
1573
Information
      I wanted to try something different from the usual color engraving, so I went for a minimal black & grey sketch-style engraving on PETG — and honestly, the results came out super clean and premium.

This technique uses only tone variation (grey to deep black) instead of colors, which makes it look like a hand-drawn pencil sketch on plastic. The key is controlling power and speed balance with the IR laser to get smooth gradients.

You can use your own design file, or convert any image into a sketch-style artwork before engraving.

Perfect for:

Wall art
Custom gifts
Premium product inserts
Portrait engravings

🛠️ Materials & Tools
- xTool F2 (IR Laser)
- PETG Sheet (light/white or semi-transparent works best)
- XCS Software
- Soft cloth + isopropyl alcohol (for cleaning)
Instruction
1
Step1: Prepare Your Design
- Use a black & white sketch-style image (very important)
- Convert image to:
- Grayscale
- High contrast sketch (Photoshop / AI / online tools)
- Avoid too many mid-tones — keep it clean and defined
💡 Tip:
The cleaner your input image → the sharper your engraving will look.
2
Step2: Import into XCS
- Import your image into xTool Creative Space (XCS)
- Set processing mode to: Jarvis engraving
- Adjust: Contrast slightly higher Brightness slightly low
3
Step3
Either use the settings that are available on the XCS file or
👉 These are tested-style baseline settings — adjust based on your PETG(Best option is to create and use a swatch for this rather than guessing):
- Laser: IR (1064nm)
- Power: 25–40%
- Speed: 1200–2000 mm/s
- DPI: 600–800
- Passes: 1
💡 For darker blacks:
- Increase power OR reduce speed slightly
💡 For lighter greys:
- Reduce power or increase speed
4
Step4: Do a Test Grid (Highly Recommended)
Before final engraving:
- Run a small test grid with:
- Different power levels (20–50%)
- Different speeds
This helps you find the perfect grey-to-black range for your specific PETG.
5
Step5: Engrave
- Place PETG flat and clean
- Frame your design in XCS
- Run engraving
You’ll notice:
- Light areas → soft grey
- Dark areas → deep black
- No color, just smooth tonal transitions
Comments
Remixes



You may also like


Round Wood Slice with Woodland Woman Portrait

5
6

Wooden stand with fairytale forest fairy and forest animals

0
6

Geisha Sensuel

4
6

Portrait of a woman

0
1

Woman in Evening Gown with Casino and Floral Motif Illustration

0
0

Engraved mirror

16
44

Mountain Lake Cabin Landscape Art Print with Floral Wreath Frame

13
61

She Is Power Purpose Unstoppable Inspirational Slate Plaque Coaster
4
13


Women & Peonies – Laser cutting and engraving on linden wood

94
483

Engraving on tiles 15x15cm 3D effect little Fairy

21
92

Laser Engraved Asian Landscape Wall Art with Woman on Bridge

4
21

Circular wall art featuring a woman with flowers, moon, and butterflies
3
18

Laser Engraved Japanese Geisha
4
22

Wall painting depicting a profile of a woman with hibiscus flowers
2
7
Sugar Skull Beauty

12
50

Peony Flower Illustration

1
5

Beauty is the Beast

4
19

Witch with Raven and Skull Square Wooden Coaster
5
37