Signaler
![[Laser cut and engrave] Maternal Love Animal Magnet Bundle – 13 Cute Laser Cut Designs + Bonus Deer ( version FR & EN included)](https://image-res.atomm.com/resource/xart/result/720520/1d7e940f-20d6-42cb-b85b-a65323b6feb8.png?x-oss-process=image/resize,m_fill,w_1280,h_960,limit_0/interlace,1/format,webp/auto-orient,1)
![[Laser cut and engrave] Maternal Love Animal Magnet Bundle – 13 Cute Laser Cut Designs + Bonus Deer ( version FR & EN included)](data:image/png;base64,iVBORw0KGgoAAAANSUhEUgAAAAoAAAAKCAYAAACNMs+9AAAAAXNSR0IArs4c6QAAABdJREFUKFNjZCASMBKpjmFUId6QIjp4AAppAAuXjCs4AAAAAElFTkSuQmCC)
![[Laser cut and engrave] Maternal Love Animal Magnet Bundle – 13 Cute Laser Cut Designs + Bonus Deer ( version FR & EN included)](https://image-res.atomm.com/resource/xart/result/720520/1d7e940f-20d6-42cb-b85b-a65323b6feb8.png?x-oss-process=image/resize,m_fill,w_160,h_120,limit_0/interlace,1/format,webp/auto-orient,1)
![[Laser cut and engrave] Maternal Love Animal Magnet Bundle – 13 Cute Laser Cut Designs + Bonus Deer ( version FR & EN included)](https://image-res.atomm.com/resource/xtool/community/attachment/xtool-community/05331704-6cba-4e16-8f98-727424d2a729.jpg?x-oss-process=image/resize,m_fill,w_160,h_120,limit_0/interlace,1/format,webp/auto-orient,1)
![[Laser cut and engrave] Maternal Love Animal Magnet Bundle – 13 Cute Laser Cut Designs + Bonus Deer ( version FR & EN included)](https://image-res.atomm.com/resource/xtool/community/attachment/xtool-community/47ffd674-47c8-407a-a559-bd7758f5ba8c.jpg?x-oss-process=image/resize,m_fill,w_160,h_120,limit_0/interlace,1/format,webp/auto-orient,1)
![[Laser cut and engrave] Maternal Love Animal Magnet Bundle – 13 Cute Laser Cut Designs + Bonus Deer ( version FR & EN included)](https://image-res.atomm.com/resource/xtool/community/attachment/xtool-community/97a618c9-95d6-469c-b341-abfb0b0f82fc.jpg?x-oss-process=image/resize,m_fill,w_160,h_120,limit_0/interlace,1/format,webp/auto-orient,1)
![[Laser cut and engrave] Maternal Love Animal Magnet Bundle – 13 Cute Laser Cut Designs + Bonus Deer ( version FR & EN included)](https://image-res.atomm.com/resource/xtool/community/attachment/xtool-community/03a2e390-3b55-4a82-9822-d6ae5b6a3616.jpg?x-oss-process=image/resize,m_fill,w_160,h_120,limit_0/interlace,1/format,webp/auto-orient,1)
![[Laser cut and engrave] Maternal Love Animal Magnet Bundle – 13 Cute Laser Cut Designs + Bonus Deer ( version FR & EN included)](https://image-res.atomm.com/resource/xtool/community/attachment/xtool-community/d11456b4-8d04-4d11-b43f-2fe8de834750.jpg?x-oss-process=image/resize,m_fill,w_160,h_120,limit_0/interlace,1/format,webp/auto-orient,1)
Ensemble Aimant Animal Maternal Love – 13 designs découpés au laser mignons + Cerf bonus (versions FR et EN incluses)
 Instruction
magnets maternal love fr et en
.xcs
Scénario d'application
Traitement au laser (20min)
Machine et module

xTool S1
20WMachine xTool compatible
M2
10W, 20WF2 Ultra UV
5WF2
15WP3
80WF2 Ultra
40WF1 Ultra
20WM1
5W, 10WD1
5W, 10W, 20WD1 Pro
5W, 10W, 20W, 40WP2
55WF1
10WS1
10W, 40WM1 Ultra
10W, 20WP2S
55WMatériau utilisé

Contreplaqué de tilleul de 3 mm d’épaisseur

288
3744
Information
      Célébrez le lien le plus doux avec ce adorable ensemble 💕 aimant animal d’amour maternel

Cette collection comprend 13 motifs réconfortants d’animaux parents et bébés, ainsi qu’un motif exclusif de cerf en bonus.

Parfait pour créer des aimants faits main significatifs afin de :

Décorez votre frigo avec amour et pensées positives
Offrez des cadeaux sincères pour la fête des mères
Ajoutez de la chaleur à la décoration de la chambre de bébé
Créez des souvenirs attentionnés pour vos proches

Chaque design présente un duo d’animaux affectueux associé à des messages tendres et inspirants, ce qui fait de ce pack un cadeau idéal pour illuminer les espaces du quotidien.

✨ Conçu pour la découpe et la gravure au laser :

Des contours propres adaptés au laser
Compositions compactes et cohésives
Optimisé pour les projets en petit format
Parfait pour la gravure sur bois et la découpe

Une belle collection conçue pour remplir les maisons d’amour, de tendresse et d’énergie positive.
https://www.facebook.com/share/p/1cKkxZ3mY5/

#2026mothersdaycontes
Instruction
1
Étape1: Téléchargez le fichier
Téléchargez le fichier XCF sur votre ordinateur.
2
Étape2: Ouvrir dans xTool Studio
Lance xTool Studio et importe le fichier XCF.
3
Étape3: Ajustez vos réglages
Réglez votre matériau, votre puissance et votre vitesse selon votre machine et le type de bois.
(Faites toujours un petit test d’abord !).
Ajustez les réglages selon votre machine et votre matériau.
Les réglages inclus sont optimisés pour un xTool S1 10W utilisant du contreplaqué de 3 mm.
Assurez-vous de régler la bonne hauteur du matériau (focus).
Cadre la zone de travail et déplace la conception si nécessaire.
4
Étape4: Démarre le laser
Placez votre matériau, encadrez le dessin, puis commencez à découper/graver. Bon jeu ! ✨
5
Étape5: Assemblie

Aperçu
Collez la partie magnétique au bas de l’aimant
Commentaires
Remixes
Licence

Cette œuvre contient du contenu généré par l’IA.
Projet associé

Aimant à maman mignonne et bébé ours | Décoration de réfrigérateur Kawaii | Animaux en bois gravés au laser | Clipart Mère Bébé (version anglaise et française)

8
65

$2.20
$2.20
Crédits220
Ensemble d’aimants 3D pour animaux de ferme. Dossiers découpés au laser pour aimants de cuisine et frigo. Animaux mignons SVG. Ferme. Décoration intérieure. Rustique. Les enfants. Enfants

2
Vous pourriez aussi aimer
Love Bundle
Boucle d’oreille à design
Conception des montagnes russes
Coupe sur bois de cerf de Noël
Aimant photo

Ensemble d’aimants de réfrigérateur Kawaii Ocean Friends SVG XCS | Ensemble d’aimants en bois pour animaux marins mignons | Téléchargement de fichier de conception Laser Cut

8
87

Magnets en bois de cerisier avec illustrations d'animaux mignons

2
18

GIF
Faisceau d’aimants pour chiens

124
1053

Magnets en bois

6
33

Aimant en bois mignon pour un ours en bois

8
59

Friends ronds et douillets de la forêt : Bundle de 6 caractères découpés au laser pour aimants et porte-clés

1
10

3 Figurines de chat kawaii en bois (magnet)

5
7

Aimant de réfrigérateur en bois en rose à couches | Aimant en tilleul découpé au laser | Tilleul de 3 mm et feuille magnétique de 1 mm

5
17

Aimant à ratons laveurs et bébé maman | Décoration de réfrigérateur Kawaii | Animaux en bois gravés au laser | Clipart Mère Bébé (version anglaise et française)
5
83

$5.00
$5.00
Crédits500
Ensemble d’aimants drôles, fichiers découpés au laser, animaux 3D SVG, aimants 3D découpés au laser, fichiers laser, aimants de réfrigérateur

1

Pack XCS Forest Animals Fridge Magnet SVG | Designs mignons d’aimants d’animaux forestiers | Fichiers de dessins animés en bois Téléchargement
50
547

Magnets illustrés représentant une petite fille faisant un câlin à des animaux
4
11

Aimant à drôles. Lime découpé au laser par aimant de réfrigérateur. Insigne en bois. Aimant de frigo drôle qui jette des coups d’œil. Décoration de la cuisine
8
80
GIF
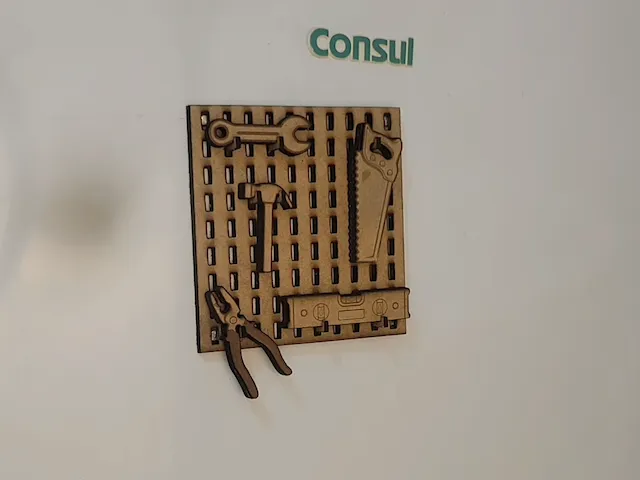
Aimants organisateurs d’outils
8
42

Arbre en bois découpé au laser Garçon et femme Dzień Babci Journée de la mère polonaise Inscription PL

17
80

Cozy & Chunky Critters : Bundle de 6 caractères découpés au laser pour aimants et porte-clés
1
4

Aimant au gin tonic pour réfrigérateur

23
95

Aimant en bois en forme de raton laveur mignon

2
9