
![[Laser cut and engrave] Layered Easter Bunny Decoration with Floral Pattern](https://image-res.atomm.com/resource/xtool/community/attachment/xtool-community/9e2441b7-c126-4f1a-a1d5-18fd0fec216f.jpeg?x-oss-process=image/resize,w_1200,h_900,limit_0/interlace,1/format,webp/auto-orient,1)
![[Laser cut and engrave] Layered Easter Bunny Decoration with Floral Pattern](data:image/png;base64,iVBORw0KGgoAAAANSUhEUgAAAAoAAAAKCAYAAACNMs+9AAAAAXNSR0IArs4c6QAAABdJREFUKFNjZCASMBKpjmFUId6QIjp4AAppAAuXjCs4AAAAAElFTkSuQmCC)
![[Laser cut and engrave] Layered Easter Bunny Decoration with Floral Pattern](https://image-res.atomm.com/resource/xtool/community/attachment/xtool-community/9e2441b7-c126-4f1a-a1d5-18fd0fec216f.jpeg?x-oss-process=image/resize,w_200,h_150,limit_0/interlace,1/format,webp/auto-orient,1)
![[Laser cut and engrave] Layered Easter Bunny Decoration with Floral Pattern](https://image-res.atomm.com/resource/xtool/community/attachment/xtool-community/d629f76a-fb69-4127-82f1-d424e82550ed.jpeg?x-oss-process=image/resize,w_200,h_150,limit_0/interlace,1/format,webp/auto-orient,1)
![[Laser cut and engrave] Layered Easter Bunny Decoration with Floral Pattern](https://image-res.atomm.com/resource/xtool/community/attachment/xtool-community/c526a85a-cbd7-4ef8-84f3-e56455f8cf02.png?x-oss-process=image/resize,w_200,h_150,limit_0/interlace,1/format,webp/auto-orient,1)
Многослойное украшение пасхального кролика с цветочным узором
 Инструкция
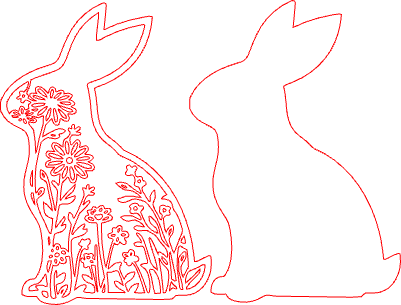

Информация
      Это многослойное украшение в виде пасхального кролика с цветочным узором. Два слоя образуют простой декоративный элемент, который можно использовать на Пасху, например, как небольшой декор для стола, полки или стены. Цветочные вырезы придают кролику лёгкий, весенний вид.

Ссылка: https://www.facebook.com/share/1X9ocmWBEq/?mibextid=wwXIfr
Инструкция
Шаг1: Откройте файл дизайна

Сначала откройте напильник лазерной резки, содержащий форму пасхального кролика и слой цветочного узора.
Шаг2: Выберите материал
Выберите материал, который хотите использовать для украшения. Тонкое дерево, картон или МДФ хорошо подходят, потому что их легко резать и красить.
Шаг3: Лазерная резка дизайна

Поместите материал в лазерный резак и начните процесс резки. Машина вырежет форму кролика и слой цветочного узора.
Шаг4: Аккуратно убирайте кусочки

После завершения лазерной резки аккуратно вынимите детали с машины.
Шаг5: Удалите маленькие внутренние детали

Некоторые маленькие детали всё ещё могут оставаться внутри цветочного узора. Аккуратно выдвиньте или уберите эти небольшие оставшиеся детали, чтобы узор был полностью открыт
Шаг6: Очистите края
Очистите края деталей, чтобы удалить пыль или следы ожогов от лазерной резки. Можно использовать тряпку или слегка отшлифовать края при необходимости.
Шаг7: Покрасьте верхний слой

Покрасьте верхний слой (слой с цветочным узором).
Для этого слоя я использовал белую краску .
Дайте краске полностью высохнуть.
Шаг8: Покрасьте нижний слой

Далее покрасьте нижний слой зайчика.
Для этого слоя я использовала бежево-коричневый цвет .
Дайте ему полностью высохнуть.
Шаг9: Склейте слои вместе

Когда оба слоя высохнут, аккуратно приклейте цветочный узор к основному слою зайчика.
Дайте высохнуть.
Шаг10: Готовое украшение

После того как всё высохнет, ваш многослойный пасхальный кролик будет готов к использованию. Её можно поставить на стол, полку или использовать как часть пасхальных украшений. 🌸🐰
Ремиксы


Вам также может понравиться

Лазерно вырезанная деревянная пасхальная украшение с цветочным узором


Украшение полки для сидящего пасхального кролика лазерно вырезанная (декор пасхального кролика)


Пасхальная украшение «Стоящий кролик»


LasHappy Easter Bunny — многослойная деревянная декорация


'/%3e%3cdefs%3e%3clinearGradient%20id='paint0_linear_1433_15675'%20x1='12'%20y1='3.25'%20x2='16.6891'%20y2='20.75'%20gradientUnits='userSpaceOnUse'%3e%3cstop%20stop-color='%23FF5D80'/%3e%3cstop%20offset='1'%20stop-color='%23FF0035'/%3e%3c/linearGradient%3e%3c/defs%3e%3c/svg%3e)
Лазерно вырезанный окон в виде пасхального кролика


Лазерная вырезаная весёлая пасхальная подвеска с кроликами и яйцами


Файл лазерного разрезания пасхального кролика | Лазерная разрезка подставки для яиц Кролика | Пасхальный венок SVG


Пасхальный кролик


Цветочный деревянный декор пасхального кролика — SVG, DXF, PNG, EPS


'/%3e%3cdefs%3e%3clinearGradient%20id='paint0_linear_1433_15726'%20x1='12'%20y1='5.25'%20x2='12'%20y2='18.75'%20gradientUnits='userSpaceOnUse'%3e%3cstop%20stop-color='%23FFC654'/%3e%3cstop%20offset='1'%20stop-color='%23FF8D12'/%3e%3c/linearGradient%3e%3c/defs%3e%3c/svg%3e)
Лазерная резка в виде пасхального кролика с яркими яйцами и цветами

Пасхальное украшение из деревянного держателя для яиц в виде зайчика

Двусторонний деревянный кролик с очками — мальчик и девочка — домашний декор на Пасху

Вырезки пасхального кролика и цветочных яиц для праздничного декора


Лазерно гравированное деревянное украшение в виде пасхальных яиц с кроликами и цветочными узорами


Лазерная резка в виде пасхальных яиц с кроличьим и цветочным узором


Лазерная разрезка пасхального яйца. Трёхслойное пасхальное украшение. Пасхальный кролик. Подвесное украшение


Держатель для подарка для пасхального кролика — многослойный карман денег и угощений


Пасхальные цветы вставляют пару кроликов
