


![[Laser cut and engrave] 🎅 Santa’s Workshop 3025 – Designed by Creative Lab AI](https://storage-us.atomm.com/resource/xtool/community/attachment/xtool-community/e3aef2d1-6406-4988-8284-6920de06dc66.jpeg?x-oss-process=image/resize,w_1200,h_900,limit_0/interlace,1/format,webp/auto-orient,1)
![[Laser cut and engrave] 🎅 Santa’s Workshop 3025 – Designed by Creative Lab AI](data:image/png;base64,iVBORw0KGgoAAAANSUhEUgAAAAoAAAAKCAYAAACNMs+9AAAAAXNSR0IArs4c6QAAABdJREFUKFNjZCASMBKpjmFUId6QIjp4AAppAAuXjCs4AAAAAElFTkSuQmCC)
![[Laser cut and engrave] 🎅 Santa’s Workshop 3025 – Designed by Creative Lab AI](https://storage-us.atomm.com/resource/xtool/community/attachment/xtool-community/e3aef2d1-6406-4988-8284-6920de06dc66.jpeg?x-oss-process=image/resize,w_200,h_150,limit_0/interlace,1/format,webp/auto-orient,1)
![[Laser cut and engrave] 🎅 Santa’s Workshop 3025 – Designed by Creative Lab AI](https://storage-us.atomm.com/resource/xtool/community/attachment/xtool-community/5edddae8-033f-4811-94fe-b5ea712290a7.png)
![[Laser cut and engrave] 🎅 Santa’s Workshop 3025 – Designed by Creative Lab AI](https://storage-us.atomm.com/resource/xtool/community/attachment/xtool-community/c5ca9028-411b-4ad9-9940-ccf5dc3e7aa4.jpeg?x-oss-process=image/resize,w_200,h_150,limit_0/interlace,1/format,webp/auto-orient,1)
![[Laser cut and engrave] 🎅 Santa’s Workshop 3025 – Designed by Creative Lab AI](https://storage-us.atomm.com/resource/xtool/community/attachment/xtool-community/53cd2506-fc35-4829-877e-6c5ce7550a38.jpeg?x-oss-process=image/resize,w_200,h_150,limit_0/interlace,1/format,webp/auto-orient,1)
![[Laser cut and engrave] 🎅 Santa’s Workshop 3025 – Designed by Creative Lab AI](https://storage-us.atomm.com/resource/xtool/community/attachment/xtool-community/ea3fac61-e176-4452-a7fd-cf1f65b88434.jpeg?x-oss-process=image/resize,w_200,h_150,limit_0/interlace,1/format,webp/auto-orient,1)
![[Laser cut and engrave] 🎅 Santa’s Workshop 3025 – Designed by Creative Lab AI](https://storage-us.atomm.com/resource/xtool/community/attachment/xtool-community/67ad02b2-1d7d-4a29-ae38-4db501f51e9f.jpeg?x-oss-process=image/resize,w_200,h_150,limit_0/interlace,1/format,webp/auto-orient,1)
![[Laser cut and engrave] 🎅 Santa’s Workshop 3025 – Designed by Creative Lab AI](https://storage-us.atomm.com/resource/xtool/community/attachment/xtool-community/b232426f-d670-48ec-98d3-c244e656026b.jpeg?x-oss-process=image/resize,w_200,h_150,limit_0/interlace,1/format,webp/auto-orient,1)
![[Laser cut and engrave] 🎅 Santa’s Workshop 3025 – Designed by Creative Lab AI](https://storage-us.atomm.com/resource/xtool/community/attachment/xtool-community/3fa8eb11-b169-4c19-a83c-0dbdcdfd4714.png?x-oss-process=image/resize,w_200,h_150,limit_0/interlace,1/format,webp/auto-orient,1)
🎅 聖誕老人工作坊 3025 – 由 Creative Lab AI 設計
 教程
教程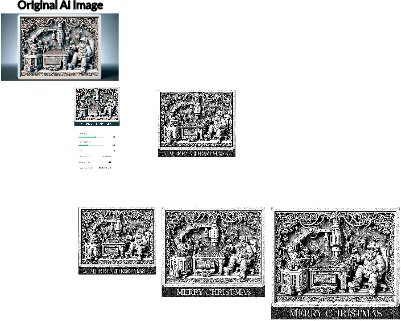
教程
步驟1: 選擇並準備你的木材

• 選擇尺寸與木材:裁切一 塊6“ x 7” x 1.5“的實心糖楓木。 此檔案包含三種尺寸(小、中、大),均為雕刻優化。它們也內建了速度和功率設定。
• 打磨表面:用400號砂紙手工打磨表面,確保表面光滑如絲。
• 銑邊:使用1/8吋圓刀切割前後邊,讓完成作品時觸感柔和。
請注意:如果需要,你可以使用自己的流程來挑選和準備木材。
步驟2: 準備影像


- 下載的檔案包含三張專為木雕雷射雕刻設計的預先優化影像。這些影像已使用 Imag-R 軟體處理,以確保最佳效果。
- 開始時,選擇你想雕刻的圖片大小:包含小、中、大檔案,可以移到雕刻畫布上。小尺寸(6" x 7")預設已放置在畫布上。無需任何調整——每個檔案都預先設定並有量身打造的雕刻設定,帶來無縫的體驗。
- 此外,下載版還附有原始 PNG 檔案,您可以自行自訂並套用雕刻設定。
重要:提供的雕刻設定是針對我專案中使用的木材而設。你可能需要調整這些設定,才能達到你選擇木材的最佳效果。
步驟3: 調整與檔案運行


• 調整雷射高度:將雷射設定為適合雕刻的高度。
• 標記你的區域:使用 xTool 的功能來標記你的雕刻區域。
• 載入檔案:在 xTool 的創意空間中開啟雕刻檔案。
• 對齊圖像:將圖像放置在你打算雕刻的標記區域上。
• 調整設定:根據你選擇的木材種類,可能需要調整雕刻設定。
• 測試雕刻:建議在開始完整專案前,先對廢木頭進行測試雕刻。
• 最終執行:當你對影像位置滿意且確信設定能產生高品質雕刻後,執行檔案。
小提示:雕刻時,我比較喜歡關閉空氣輔助。雖然空氣輔助對切割很重要,但我在雕刻時沒發現什麼明顯的好處。事實上,我在雕刻時不使用,反而能達到更好的效果,包括更明確的燒痕。
步驟4: 最後修飾


• 移除專案:雕刻完成後,小心地將專案從雷射中取出。
• 準備清潔:使用裝有清潔劑的噴瓶和刷子進行清潔。
• 噴霧與提起:將作品帶到水槽,用清潔劑噴灑雕刻區域。讓清潔劑將殘留物從雕刻處清除。
• 沖洗:用自來水快速沖洗雕刻表面。
• 針對特定區域:如果你發現想淡化或去除較重殘留物的區域,可以在那些區域多噴一點清潔劑。輕輕用刷毛刷到你想雕刻的區域。不要太過頭!只要施加足夠的壓力,達到想要的效果即可。
• 留一些殘留物:我喜歡在雕刻的口袋裡留一些殘留物,以增強3D效果。
• 乾燥你的作品:清潔完成後,快速將作品烘乾。我會用熱風槍把水分吸走,或者你也可以放在炎熱晴天的直射陽光下,達到同樣的效果。
💥 專業提示:有人好奇我用什麼來清潔雕刻?看看附圖,我的❤️ 🔥秘密!❤️🔥
步驟5: 期末準備


• 檢查表面:確保雕刻表面沒有任何你不想在最終作品中出現的痕跡或殘留物。
• 塗層:當你檢查完作品並符合標準後,對木材施以淡色塗層。此步驟有助於保存並強化雕刻。
• 展示並享受:您的專案現已完成!找個特別的地方展示你美麗的作品,享受工藝。


