
Secure safe piggy bank
'/%3e%3cpath%20d='M7.99985%2010.6665L4.6665%206.6665H6.6665L7.99985%209.33317L9.33317%206.6665H11.3332L7.99985%2010.6665Z'%20fill='white'/%3e%3cdefs%3e%3clinearGradient%20id='paint0_linear_2869_78399'%20x1='8'%20y1='1.3335'%20x2='8'%20y2='14.6668'%20gradientUnits='userSpaceOnUse'%3e%3cstop%20stop-color='%23FFA15F'/%3e%3cstop%20offset='1'%20stop-color='%23E37C32'/%3e%3c/linearGradient%3e%3c/defs%3e%3c/svg%3e) Atomm Exclusive
Atomm Exclusive Instruction


Information
      A piggy bank secured by a 3-digit code Made using the https://boxes.hackerspace-bamberg.de/ box generator
On the canva 1 you will find the version for 3mm thick
on the Canva 2 the version for 3.5mm
Instruction
Step1: Cutting

Cut out all the pieces and be careful to keep all the cuts round. Place them as in the photo so as not to make a mistake in the assembly, the two smallest in their housings. Then from top to bottom, crenellated, numbered, small, medium, cut.
Step2: Create the buttons


With a touch of glue, assemble at the end of the pin the crenellated round, the engraved and the small one.
Step3: taquet de porte

Assemble the door cleat, which will determine whether your door will be on the right or left
Step4: Preparing the door


coller les deux plus petits ronds en haut et en bas de la porte
Step5: Assemble the bottom and the 3 sides


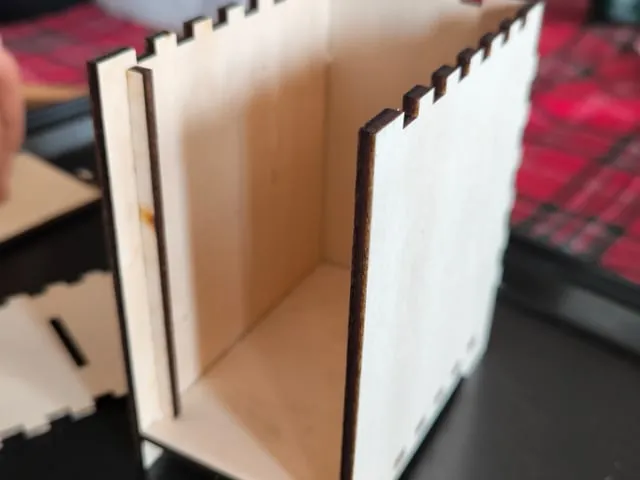
No complexity here
Step6: Ajoutez la porte et le dessus


With a little caution it can be done well
Step7

Add the buttons. From behind, first put the medium circle which will allow the knob to be fixed to the door and finally the cut circle which will allow the door to be opened when it is vertical. Do not stick it if you want to be able to change the combination.
Remixes



You may also like

Laser Cut Wooden Combination Lock Money Box - Safe Box


Money box safe with combination lock


Wooden Combination Lock Money Box


'/%3e%3cpath%20d='M15.9997%2019.3335L11.833%2014.3335H14.333L15.9997%2017.6668L17.6663%2014.3335H20.1663L15.9997%2019.3335Z'%20fill='white'/%3e%3c/g%3e%3cdefs%3e%3clinearGradient%20id='paint0_linear_1412_57140'%20x1='16'%20y1='7.6665'%20x2='16'%20y2='24.3332'%20gradientUnits='userSpaceOnUse'%3e%3cstop%20stop-color='%23FFA15F'/%3e%3cstop%20offset='1'%20stop-color='%23E37C32'/%3e%3c/linearGradient%3e%3c/defs%3e%3c/svg%3e)
Wooden piggy bank with numerical combination lock


Money BOx

Gears strongbox


Square wooden money box with money slot


Piggy Bank


SecureSafe Piggybank


Safe box


Wooden Money Box with Rotating Combination Lock Dials


Mini Gear box


Laser Engraved Toaster for Play Kitchen with Knob and Sound

Portagioie in legno a forma di libro con motivo geometrico


Wooden Money Saving Box with Password Lock | Puzzle Piggy Bankk | Kids & Adults Saving Box | Unique Gift & Desk Decor


Rock Collection Box


Steampunk Lightbox


Laser Cut Wooden Storage Box with Interlocking Edges