
![[Laser cut and engrave,Inkjet printing] Academic Clock](https://storage-public.atomm.com/xtool/community/attachment/xtool-community/9d994548-714a-4f00-a734-778177f54049.jpg?x-oss-process=image/resize,m_fill,w_1280,h_960,limit_0/interlace,1/format,webp/auto-orient,1)
![[Laser cut and engrave,Inkjet printing] Academic Clock](data:image/png;base64,iVBORw0KGgoAAAANSUhEUgAAAAoAAAAKCAYAAACNMs+9AAAAAXNSR0IArs4c6QAAABdJREFUKFNjZCASMBKpjmFUId6QIjp4AAppAAuXjCs4AAAAAElFTkSuQmCC)
![[Laser cut and engrave,Inkjet printing] Academic Clock](https://storage-public.atomm.com/xtool/community/attachment/xtool-community/9d994548-714a-4f00-a734-778177f54049.jpg?x-oss-process=image/resize,m_fill,w_160,h_120,limit_0/interlace,1/format,webp/auto-orient,1)
![[Laser cut and engrave,Inkjet printing] Academic Clock](https://storage-public.atomm.com/xtool/community/attachment/xtool-community/e68b656d-f9d6-4037-86f0-519f0e202aa4.jpg?x-oss-process=image/resize,m_fill,w_160,h_120,limit_0/interlace,1/format,webp/auto-orient,1)
![[Laser cut and engrave,Inkjet printing] Academic Clock](https://storage-public.atomm.com/xtool/community/attachment/xtool-community/bd94e729-4be0-4dd0-be7f-7b6b1a6325ce.jpg?x-oss-process=image/resize,m_fill,w_160,h_120,limit_0/interlace,1/format,webp/auto-orient,1)
![[Laser cut and engrave,Inkjet printing] Academic Clock](https://storage-public.atomm.com/xtool/community/attachment/xtool-community/c6014f41-02b0-4e1e-a1a2-d3d4a498ceb7.jpg?x-oss-process=image/resize,m_fill,w_160,h_120,limit_0/interlace,1/format,webp/auto-orient,1)
![[Laser cut and engrave,Inkjet printing] Academic Clock](https://storage-public.atomm.com/xtool/community/attachment/xtool-community/4a2835af-bdd1-4865-996b-457721cac7fe.jpg?x-oss-process=image/resize,m_fill,w_160,h_120,limit_0/interlace,1/format,webp/auto-orient,1)
![[Laser cut and engrave,Inkjet printing] Academic Clock](https://storage-public.atomm.com/xtool/community/attachment/xtool-community/049929ab-2878-4966-9697-535b2289f213.jpg?x-oss-process=image/resize,m_fill,w_160,h_120,limit_0/interlace,1/format,webp/auto-orient,1)
Academic Clock
 Back to School 2026 Contest
 Instruction


Information
I wanted to create a tribute to the classroom that would include all of the elements of teaching, so I created a wall clock for the classroom. The elements include a 12-sided dodecahedron representing math, the first 12 elements for science, the social studies emblem and the English emblem. It not only provides a piece of art it also teaches the memorization of the elements. A great addition to the classroom decor for a primary teacher or science teacher.
Instruction
Step1: Cut clock base

Place 12 X 12 Basswood into laser base. Set power to 100% for 10Watt laser. Speed should be set at 4 and 1 pass. Remove Base and move to step 2.
Social reddit https://www.reddit.com/r/xToolOfficial/s/6EuNRvMsF2
Facebook https://www.facebook.com/share/p/1CBMyoRHfX/
Step2: Print and cut elements
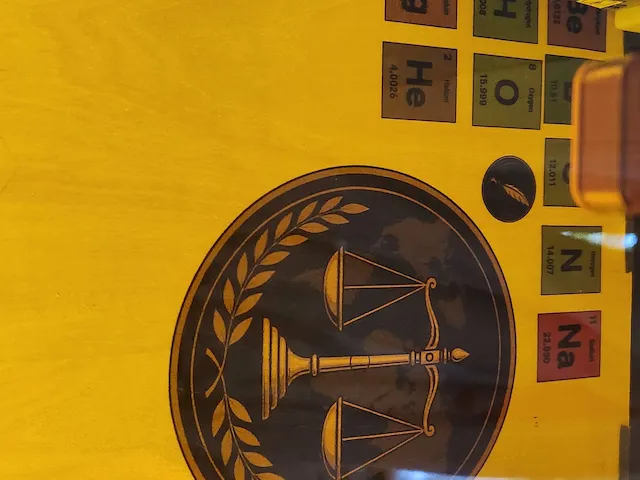

Print elements and then cut. This process takes approximately 12 minutes for completion.
Step3: Cut craft paper (optional)

If you would like to have a paper backing on your clock face you can use #65 cardstock. set the power to 30 and 15speed for 1 pass. Remove paper and align with clock base. I found this a little tricky and takes a bit of turning (well for me it did). Once it is lined up you can glue it down or use double sided tape to adhere it to the base.
Step4: Assemble the elements


Once you have your base either painted or cardstock background you can begin assembling the face.
Step 1 add the clock mechanism to the base. I purchased my clock mechanism on Amazon.
Step 2 add the Social studies emblem to the center of the base aligning the center to the center.
Step 3 tighten the nut onto the mechanism
Step 4 attach the elements around the clock with Tacky Glue or double sided tape.
Step 5 attach the English emblem on the bottom of the social studies emblem with your choice of adhesive.
Step 6 attach the hands on the clock mechanism
add battery to clock mechanism and Viola you have a clock
you can find my posting on Social reddit https://www.reddit.com/r/xToolOfficial/s/6EuNRvMsF2
Remixes



You may also like

Colorful Laser Cut Kids Themed Wooden Wall Clock


Instructional clock for learning the time


Wall clock in axolotl design for children's room


Laser Cut Apple Clock


Earth Globe World Map Clock SVG Laser Cut Geography Wall Clock Digital SVG


Clock for Princess


Laser Cut Wooden Clock Children's Toy Education


Sheep Clock


Wooden clock learning tool with hour and minute hands


Laser Engraved Wooden Math Clock With Custom Portrait For Accountant


Retro Clock


table clock


Small Desk Clock


3D Animal wall clock bundle. Decorative clock laser cut. Kids room decor. Cute animal shaped clock. Wooden children's clock. Animals svg


Flower Wall Clock SVG | Laser Cut Clock File | Floral Wall Decor SVG | Wooden Clock Design | CNC Laser Cut File

Clock


Laser Engraved Jungle Animal Kids Wall Clock with Colorful Numbers

Clock