
Using heat transfer vinyl with a Cricut is six steps, and two of them are where almost every failed shirt comes from: forgetting to mirror the design, and peeling the carrier at the wrong temperature.
This guide walks the whole sequence — design, mirror, cut, weed, press, peel — with the settings that actually matter and the mistakes worth knowing before you cut anything.
Browse HTV designsFree downloadable cut files from the Atomm community, ready to weed and press.See the designsKey Takeaways
- Mirror the design before cutting. HTV is pressed face down, so unmirrored text comes out backwards.
- Load the vinyl shiny carrier side down on the mat, so the blade cuts the vinyl and not the carrier.
- Check whether your vinyl is hot or cold peel — getting it wrong pulls the design off the shirt.
What You Need

A Cricut and a standard grip mat
Any current model cuts HTV. The green standard grip mat is the right one; a strong grip mat can make thin vinyl hard to release.
Heat transfer vinyl
Standard vinyl to begin with. Glitter and holographic weed far worse and are not the material to learn on.
A weeding tool
A hooked pick. Tweezers help on small counters, the enclosed middles of letters like A and O.
A heat press
An EasyPress or any flat press. An iron cannot hold temperature or apply even pressure, and shirts done with one start lifting within a few washes.
How to Use HTV With a Cricut, Step by Step
Step 1: Size the design to the garment
A typical adult chest print is about 10–11 inches wide; a left-chest logo about 3–4 inches. Set this before anything else, because piece size determines whether fine details survive weeding.
Step 2: Mirror it
Turn on Mirror for every mat carrying iron-on. Design Space asks about this when the material is set to iron-on, and it is per-mat rather than per-project — a multi-colour design needs it enabled on each one.
Step 3: Load the vinyl shiny side down
The glossy clear carrier goes face down against the mat, so the blade cuts through the dull coloured vinyl and stops at the carrier. Loading it the wrong way cuts the carrier and ruins the sheet.
The fingernail test
If you cannot tell which side is the carrier, drag a fingernail across a corner. The carrier side is smooth and slick; the vinyl side has a faint matte drag to it. Checking takes two seconds and saves a sheet.
Step 4: Cut, then check before unloading
Select the matching iron-on material setting so blade depth and pressure are set for you. Before unloading the mat, lift one corner of the excess vinyl: if it does not release cleanly, increase pressure and cut again while the mat is still registered.
Step 5: Weed away the excess
Remove everything that is not the design, including the counters inside letters. Working from the outside in, and against a light, makes the cut lines far easier to see.
Step 6: Press, then peel correctly

Preheat the garment for a few seconds to drive off moisture, position the design carrier side up, and press at the temperature the vinyl specifies. Siser EasyWeed, for example, is 305°F (150°C) for 10–15 seconds at medium pressure, and EasyPress users add roughly 30 degrees.
Then peel exactly as the packaging says. EasyWeed tolerates hot or cold; many others do not, and peeling a cold-peel vinyl while hot lifts the design straight off the shirt.
Cricut Settings and Press Figures
Vinyl brands set their own numbers, so these are starting points rather than universal values.
| Stage | Setting | Why |
|---|---|---|
| Mat | Standard grip (green) | Strong grip can stretch thin vinyl on release |
| Material | Iron-on / the matching preset | Sets blade depth to cut vinyl but not carrier |
| Mirror | On, every mat | Design is pressed face down |
| Vinyl placement | Shiny carrier side down | Blade must reach the coloured layer |
| Press temperature | Per brand — EasyWeed 305°F | Garment type can lower the ceiling |
| Press time | 10–15 s, medium pressure | Under-pressing is the usual failure |
| Peel | Check hot or cold on the packaging | Wrong peel temperature lifts the design |

Layering More Than One Colour
Multi-colour designs are built by pressing one layer at a time, and there are two rules that stop it going wrong.
Press each layer briefly, then the last one fully
A few seconds tacks a layer in place; a full press on every layer over-cooks the bottom ones and stiffens the stack.
Put speciality vinyl on top
Glitter, holographic, and metallic are mostly not rated to have anything pressed over them. If one is in the design, it goes last.
Three layers is a sensible maximum on a t-shirt. Beyond that the patch becomes stiff enough that it cracks where the fabric folds, regardless of how well each layer bonded.
Cricut Alternatives for HTV
Nothing in the workflow above is Cricut-specific except the software. Mirror, shiny side down, weed, press — every cutting machine and every press does the same job, so it is worth knowing what else buys you the same result.
On the cutting side, the alternatives are other blade cutters. Brother's ScanNCut line and Silhouette's Cameo both cut HTV from their own software, and Silhouette Studio in particular is the usual landing place for people who dislike Design Space.
On the pressing side, the alternative is any press that holds its temperature. This is the half worth switching, because the EasyPress runs cool enough against its stated figure that Cricut users routinely add 30 degrees to a vinyl's number. A press that is accurate needs no correction.
1. Brother ScanNCut DX SDX125
Cutter alternative to a Cricut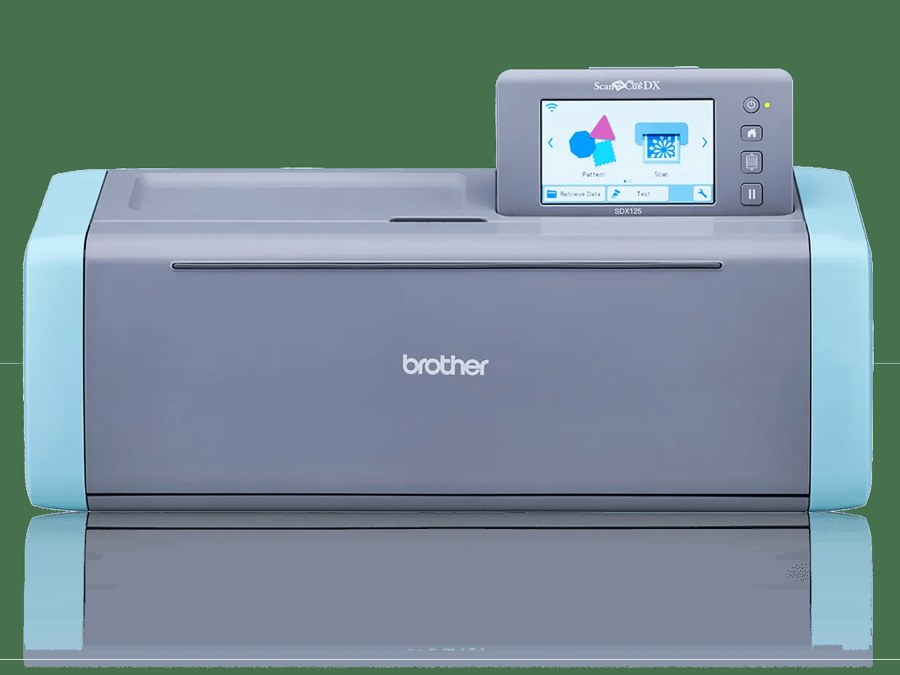
The difference that matters for HTV is the auto-blade sensor: the machine reads material thickness itself rather than relying on you picking the right preset. Loading vinyl the wrong way up is still your problem, but blade depth is not.
The built-in scanner is the other departure from the Cricut way of working. A hand-drawn design goes on the mat and comes back as a cut line, with no phone photo and no upload step.
Pros
- Auto-blade sensor sets depth from the material itself
- Scanner turns drawn artwork into cut lines
- Cuts thicker material than vinyl needs
- Works without a Design Space subscription
Cons
- Costs more than most Cricut models
- Smaller design library ecosystem
Brother ScanNCut DX SDX125: the closest like-for-like alternative if the cutter itself is what you want to replace.
2. xTool Heat Press
Alternative to a Cricut EasyPress
This sits at Step 6 of the workflow above and nowhere else. The Cricut has already cut and you have already weeded; all that is left is holding an accurate temperature for the time the vinyl specifies.
The Mini Press covers the placements a Cricut can happily cut for but a full platen cannot press — sleeve prints, pocket logos, the back of a cap. Cutting those is the easy part.
Pros
- Set the temperature the vinyl states, with no correction
- Mini Press for sleeves, pockets, and caps
- Range spans every iron-on preset in Design Space
- Costs less than most machine upgrades
Cons
- You supply the pressure by hand
- Small platen for full-back prints
xTool Heat Press: the low-cost way to stop an iron ruining well-cut vinyl.
3. HTVRONT Auto Heat Press
Alternative with a full-size platen
An EasyPress is pushed down by hand over an area smaller than a chest print, which is why the instructions tell you to press in sections. A 15-inch platen does an adult chest design in one closing, with no seam where two presses met.
Automatic pressure removes the other EasyPress variable. There is no correct amount of force to lean with, which is the part no tutorial can actually teach you.
Pros
- Full chest print in one press, no sectioning
- Automatic pressure instead of body weight
- Costs less than a full-size press usually does
Cons
- Takes real bench space
- No small plate for sleeves or caps
HTVRONT Auto Heat Press: the straightforward upgrade if you are pressing shirt fronts and nothing else.
4. xTool WonderPress
When one shirt becomes twenty
Layering is the case that makes this worth it. A three-colour design means three trips to the press per shirt, and hand pressure that drifts between them is how one layer ends up tacked and another over-cooked.
Automatic pressure also makes the short tack presses repeatable, which is the step most people get wrong when they first try more than one colour.
Pros
- Repeatable pressure across layered presses
- Clearance for hoodies, not just tees
- Handles sublimation and DTF as well
Cons
- Much more than a first press needs to be
- Takes real bench space
xTool WonderPress: the press to move to once layered or batched work starts.
Common Mistakes
Mistake 1: Not mirroring
The most common wasted sheet in the craft. Text comes out backwards and there is no recovery — the vinyl is already cut.
Mistake 2: Loading the vinyl upside down
The blade cuts the carrier instead of the vinyl, so the design falls apart at weeding rather than staying put.
Mistake 3: Using an iron
No stable temperature, uneven pressure, and steam holes that leave unbonded circles. Designs applied this way lift within a few washes.
Mistake 4: Peeling at the wrong temperature
Check the packaging every time you change vinyl. Hot peel and cold peel are properties of the material, not preferences.
Mistake 5: Skipping the garment preheat
A few seconds of press on the bare shirt removes moisture and creases. Both stop the adhesive making even contact.
Conclusion
The Cricut half of this is straightforward: mirror, load shiny side down, use the iron-on preset, weed. The machine does what you tell it.
The press half is where results are won or lost, and the numbers come from the vinyl packaging rather than from any general rule. Temperature, time, and peel type are all material properties.
For choosing the vinyl itself, see the best HTV for shirts, and for how the material works, what HTV is.
Frequently Asked Questions about HTV and Cricut
Do I have to mirror HTV on a Cricut?
Yes, always. The design is pressed face down with the clear carrier on top, so an unmirrored cut produces backwards text. Mirror is set per mat, not per project.
Which side of HTV goes down on the mat?
The shiny clear carrier faces down against the mat, so the blade cuts through the dull coloured vinyl and stops at the carrier. Loading it the other way ruins the sheet.
What Cricut setting should I use for HTV?
The iron-on material preset, matched to the specific type if your vinyl is glitter or holographic. That sets blade depth and pressure to cut the vinyl without cutting through the carrier.
What temperature do I press HTV at?
It depends on the brand. Siser EasyWeed specifies 305°F (150°C) for 10 to 15 seconds at medium pressure, with about 30 degrees added for EasyPress users. Follow the packaging.
Can I layer HTV colours?
Yes. Tack each layer with a short press and give only the final layer a full press. Speciality vinyls such as glitter must be the top layer, as most cannot have anything pressed over them.
Why is my HTV peeling off after washing?
Almost always application: too cool, too short, too little pressure, or an iron instead of a press. Wash inside out and avoid the tumble dryer, but fix the press settings first.
Find a design to cut and press
Browse free community cut files ready to weed and heat press.
