


![[Laser cut and engrave] Laser Cut Wooden Minion Figurine Holding Merry Christmas Sign](https://storage-us.atomm.com/resource/xtool/community/attachment/xtool-community/67be58e9-fe88-4332-9e4d-8958dd767b4b.png?x-oss-process=image/resize,w_1200,h_900,limit_0/interlace,1/format,webp/auto-orient,1)
Laser Cut Wooden Minion Figurine Holding A Sign
 Instruction
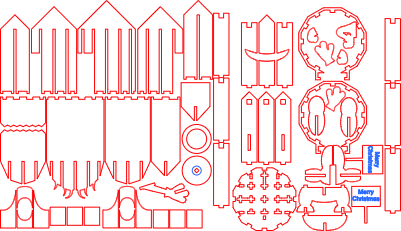

Information
      I have another Minion with two eyes! He needed a friend..
You can change the sign to say anything!
Instruction
Step1: Cut all pieces out

I cut my plans in half to fit 12 x 12 inches
Step2: Assemble Head/Body


Depending on how tight your slot cuts are, you might not need glue for this part.
I put a few drops here and there.
The upper front piece might need a little glue.
Step3: Attach Bottom


Line up the slots with the head piece tabs and press together.
I have a small rubber mallet that helped to get the two sections together.
Once you have done that put the lower teeth in the base and fix in place.
Step4: Goggle Holder


There are 3 pieces that have a square cut out. Two of these have the long rectangular slits for the arms.
the two with the arm slits go on the sides and the one without the slit goes on the back.
When the goggle holder goes on, you will put the holder in the square holes.
Step5: Feet base and arms


Glue the feet and lower base section together.
Glue the glove pieces to the hands. Don't get glue in the sign handle slot.
glue the base to the bottom of the head assembly. there are 4 slots for the base to go into. Glue the arms into the side body slots. They are reversible so if you put the sign hand on the other side its ok.
Step6: You're Done!

If you've followed the steps you should have a new Minion friend!
If you have any issues please leave a message in the comments and I'll do my best to help you.
Don't forget you can change the text to say anything… I have put kids named on the signs and they loved them!


