


報告
![[Laser cut and engrave] Laser Cut Wooden Perpetual Calendar with Nativity Scene](https://storage-us.atomm.com/resource/xtool/community/attachment/xtool-community/ac9ded35-ab42-4caa-81e2-4315086a3450.jpg?x-oss-process=image/resize,w_1200,h_900,limit_0/interlace,1/format,webp/auto-orient,1)
![[Laser cut and engrave] Laser Cut Wooden Perpetual Calendar with Nativity Scene](data:image/png;base64,iVBORw0KGgoAAAANSUhEUgAAAAoAAAAKCAYAAACNMs+9AAAAAXNSR0IArs4c6QAAABdJREFUKFNjZCASMBKpjmFUId6QIjp4AAppAAuXjCs4AAAAAElFTkSuQmCC)
![[Laser cut and engrave] Laser Cut Wooden Perpetual Calendar with Nativity Scene](https://storage-us.atomm.com/resource/xtool/community/attachment/xtool-community/ac9ded35-ab42-4caa-81e2-4315086a3450.jpg?x-oss-process=image/resize,w_200,h_150,limit_0/interlace,1/format,webp/auto-orient,1)
![[Laser cut and engrave] Laser Cut Wooden Perpetual Calendar with Nativity Scene](https://storage-us.atomm.com/resource/xtool/community/attachment/xtool-community/116b0010-53dc-4079-8185-b79021cfc7cf.jpg?x-oss-process=image/resize,w_200,h_150,limit_0/interlace,1/format,webp/auto-orient,1)
![[Laser cut and engrave] Laser Cut Wooden Perpetual Calendar with Nativity Scene](https://storage-us.atomm.com/resource/xtool/community/attachment/xtool-community/bb66f387-508e-4b3d-89bf-5379fcf45bb5.jpg?x-oss-process=image/resize,w_200,h_150,limit_0/interlace,1/format,webp/auto-orient,1)
![[Laser cut and engrave] Laser Cut Wooden Perpetual Calendar with Nativity Scene](https://storage-us.atomm.com/resource/xtool/community/attachment/xtool-community/4d0bfc50-b061-4f5c-9d63-1ddab1d97c3d.jpg?x-oss-process=image/resize,w_200,h_150,limit_0/interlace,1/format,webp/auto-orient,1)
![[Laser cut and engrave] Laser Cut Wooden Perpetual Calendar with Nativity Scene](https://storage-us.atomm.com/resource/xtool/community/attachment/xtool-community/38f77b32-2377-4ec3-927c-22ed1032f441.jpg?x-oss-process=image/resize,w_200,h_150,limit_0/interlace,1/format,webp/auto-orient,1)
カスタマイズ可能なデスクトップカレンダー
 指示
指示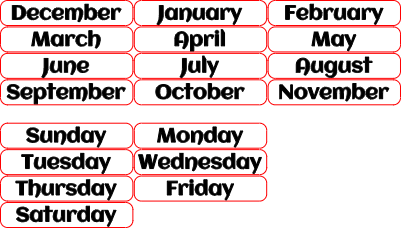
Desktop Calendar
.xcs
アプリケーションシナリオ
レーザー加工
機械とモジュール
xTool S1
20W, 40W互換性のある · 13
使用される材料

3mmポプラ合板
11
313
情報
このカスタマイズ可能なデスクトップカレンダーは、一年の季節に合わせて柔軟に適応できる多用途で創造的なプロジェクトです。付属のxToolファイルには、各月、曜日、数字タイルの切り抜きが含まれており、組み立て可能な完全なセットを提供します。クリスマスシーズンには特別な降誕シーンが用意されており、祝日や季節のテーマに合わせてカレンダーをカスタマイズするために、追加のデザインを簡単に追加・交換できます。
指示
1
ステップ1: 付属のフレクションを使ってパーツを切り抜く

プレビュー
最初のステップは、S1レーザーですべての部品を切り出すことです。 ベース用のパーツを2つカットする必要があることに注意してください。 これによりカレンダーを支えるための厚みが増えます。
2
ステップ2: 接着剤とステイン

プレビュー
次にカレンダー用の上層の裏側に木工用接着剤を塗ります。 ここがタイルの切り抜きがある部分です。 裏地よりもこちら側を接着する方が接着しやすいので、パーツを貼り付けるときに接着剤が露出しないようにします。
ベースを構成する2つのパーツを接着します。
これらのパーツを重い本の下に置いて、パーツが平らになり、接着剤がしっかり接着されるようにしてください。
接着剤が乾いたら、着色したい部分にステインを塗ることができます。
コメント
リミックス
このプロジェクトで使用される xTool の材料

関連コレクション


関連タグ
ライセンス

この作品には人工知能によって生成されたコンテンツが含まれています。