
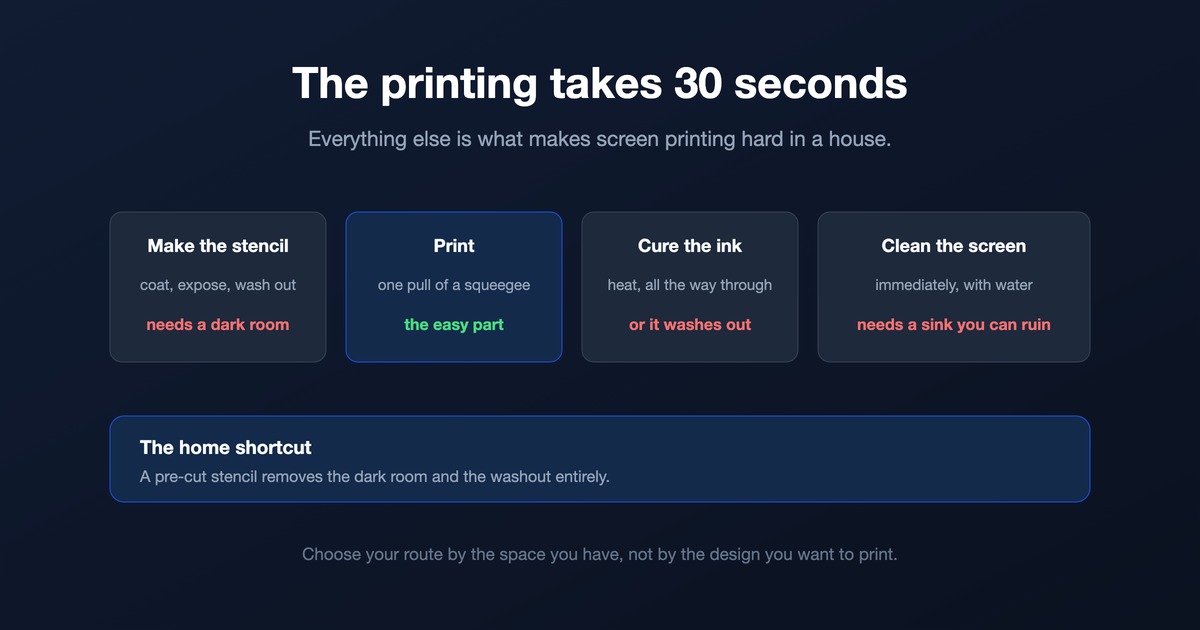
Screen printing at home is not difficult because printing is difficult. Pulling a squeegee takes seconds. It is difficult because of where you expose a screen, where you wash it out, and how you cure the ink.
Solve those three and the rest is straightforward. This guide is about solving them in an ordinary house.
Key Takeaways
- The washout is the step that decides whether this works in your home.
- Pre-cut stencils skip the dark room and the chemistry entirely.
- Ink must be cured with real heat, or the design washes out of the shirt.
Work Out Your Screen Printing Space First
Every other decision follows from this, so be honest about it before buying anything.
Somewhere dark
Emulsion is light-sensitive. A coated screen has to dry in darkness for hours, which in practice means a windowless bathroom, a cupboard, or a room used only at night.
Somewhere you can spray water
Washing out a screen means spraying it until the unexposed emulsion clears. A bath works. A kitchen sink does not, because emulsion and ink should not go anywhere near food surfaces.
Somewhere flat that will not move
Printing needs a firm surface at a comfortable height, and the shirt must not shift mid-pull. A dining table with a board on it is fine; an ironing board is not.
If you cannot answer the water question, choose the stencil route
The washout is the step people underestimate and the one that damages homes. If there is nowhere you would be happy to spray inky water, skip emulsion entirely and use a pre-cut stencil instead. The results are slightly less fine and the process is far more liveable.
Method 1: Photo Emulsion Stencil

Cheapest to get into and capable of the finest detail. You coat a screen, dry it in the dark, expose it under a lamp through a printed transparency, then wash out the areas the light did not harden.
It is also the route with every home constraint attached: darkness, water, drying time and chemicals.
Method 2: Pre-Cut Stencil Film
Cut the design from stencil film or adhesive vinyl, stick it to the screen, and print. No emulsion, no exposure, no washout — the screen cleans with water and a cloth.
Detail is coarser than emulsion and very fine lines are harder, but for text and logos the difference rarely shows.
How to Screen Print at Home, Step by Step
Same sequence whichever stencil you used. If the process itself is new to you, what screen printing is covers how it works and why the economics behave the way they do.
Step 1
Prewash and dry the shirt, then slide a board inside it so ink cannot bleed through to the back.
Step 2
Position the screen and tape off any open mesh around the design.
Step 3
Flood the screen: pull a layer of ink across the design with the squeegee held almost flat, without pressing.
Step 4
Print: one firm pull at roughly 45 degrees, with steady pressure. One pass is usually enough on light fabric, two on dark.
Step 5
Lift the screen straight up, and get it to water before the ink dries in the mesh. Dried ink ruins a screen faster than anything else.
Curing, Where Home Screen Prints Fail
Plastisol and water-based inks do not air-dry into permanence. They need heat all the way through the ink film, and undercured ink washes out of the shirt.

A heat press is the reliable answer
Even heat, a timer, and a temperature you set rather than guess. Use parchment or hover slightly so the platen does not flatten the ink texture.
A heat gun works with care, but the temperature at the fabric is a guess without an infrared thermometer.
An iron is a last resort
No temperature reading and uneven pressure, which is the usual reason a home-printed shirt loses its design in the first wash.
Read the ink's own cure temperature and hold it. More on presses in what a heat press is.
What a Home Screen Printing Setup Costs
Two equipment routes, and one purchase that both need.
1. xTool Screen Printer
Stencils cut by laser, no emulsion
A screen printing setup where the stencil is laser-cut rather than exposed, which removes the dark room, the emulsion and the washout in one go.
The catch is stated plainly on the product page: it needs an xTool laser machine to cut the stencils, and that is a separate purchase. If you already own one, this is an inexpensive way to add screen printing.
If you do not, the emulsion route or a blade-cut stencil will cost far less to try.
Pros
- No emulsion, no exposure, no washout
- Repeatable stencils straight from a digital file
- Inexpensive if you already own the laser
Cons
- Requires an xTool laser, sold separately
- Less fine detail than a good emulsion screen
xTool Screen Printer: the fastest way into screen printing for anyone who already has the laser.
The emulsion route
A screen, a squeegee, emulsion, a light source and ink. Starter kits bundle most of it, and this remains the cheapest way to begin — the cost is in space and time rather than money.
And a press, either way

From $159, and it is the purchase that most improves results across every method here, not just screen printing.
The rest of the setup cost is consumables, and they are easier to buy as a set. Mesh screens, emulsion, ink and squeegees for screen printing are stocked for a home bench.
Is Screen Printing at Home Worth It?
| If you want to... | Screen printing at home | Better alternative |
|---|---|---|
| Print one or two shirts | Poor use of the setup time | Transfer paper or cut vinyl |
| Print 20 of the same design | Ideal — this is what it is for | — |
| Print photographs | Very hard, needs colour separation | DTF transfers |
| Print many different designs | A new screen every time | DTF or cut vinyl |
| Print without a suitable sink | Use pre-cut stencils only | Cut vinyl |
Screen printing rewards repetition. The setup is the cost, and it is the same whether you print one shirt or fifty.
For a handful of shirts, printing a shirt covers cheaper routes, and the full method comparison is in how to make custom shirts.
Screen Printing Mistakes That Cost You a Screen
Letting ink dry in the mesh
The single most expensive mistake. Wash immediately, every time.
Underexposing emulsion
The stencil washes away with the design. Test with a strip exposure before committing a whole screen.
Too much squeegee pressure
Pushes ink under the stencil and blurs the edges. Firm and steady beats hard.
Skipping the board inside the shirt
Ink soaks through to the back and both layers stick together.
Calling it dry when it is only touch-dry
Touch-dry is not cured, and the difference shows in the first wash.
Conclusion
Choose the route that fits your house. If you have a dark space and somewhere to spray water, emulsion is cheap and gives the best detail. If you do not, pre-cut stencils make the whole thing liveable indoors.
Then take curing seriously. Almost every disappointing home-printed shirt is an undercured one, and a press with a real temperature setting fixes it.
And print the same design more than once. Screen printing only pays back the setup when you repeat it.
Frequently Asked Questions about Screen Printing at Home
Can you screen print at home without a dark room?
Yes, by using a pre-cut stencil instead of photo emulsion. Cutting the design from stencil film or vinyl and sticking it to the screen removes the exposure and washout steps, which are the parts that need darkness and water.
Where do you wash out a screen at home?
A bath or an outdoor tap, not a kitchen sink. Washing out means spraying until the unexposed emulsion clears, and neither emulsion nor ink belongs near food surfaces. If there is nowhere suitable, use pre-cut stencils.
How do you cure screen printing ink without a heat tunnel?
A heat press is the reliable home method, because you set the temperature and time rather than guessing. A heat gun works if you check the fabric temperature with an infrared thermometer. An iron is a last resort.
Why did my screen printed shirt wash out?
Almost always undercuring. Screen printing ink does not air-dry into permanence; it needs heat right through the ink film. Touch-dry is not cured, and the difference only shows after the first wash.
Is screen printing worth it for a few shirts?
No. The setup effort is the same for one shirt or fifty, so it only pays back when you repeat a design. For a handful, transfer paper or cut heat transfer vinyl is faster and cheaper.
Can you screen print photographs at home?
Not easily. Photographs need halftone screens and colour separations, which is demanding work at home. A DTF transfer pressed onto the shirt gives a far better result for photographic artwork.
Start with a design
Browse free community shirt designs, or generate artwork ready to cut and print.
