
![[Laser cut and engrave] Our Journey Customizable Map](https://image-res.atomm.com/resource/xtool/community/attachment/xtool-community/e2fa5547-0ac9-4c05-8eeb-ca4fb1f0fb23.jpg?x-oss-process=image/resize,w_1200,h_900,limit_0/interlace,1/format,webp/auto-orient,1)
![[Laser cut and engrave] Our Journey Customizable Map](data:image/png;base64,iVBORw0KGgoAAAANSUhEUgAAAAoAAAAKCAYAAACNMs+9AAAAAXNSR0IArs4c6QAAABdJREFUKFNjZCASMBKpjmFUId6QIjp4AAppAAuXjCs4AAAAAElFTkSuQmCC)
![[Laser cut and engrave] Our Journey Customizable Map](https://image-res.atomm.com/resource/xtool/community/attachment/xtool-community/e2fa5547-0ac9-4c05-8eeb-ca4fb1f0fb23.jpg?x-oss-process=image/resize,w_200,h_150,limit_0/interlace,1/format,webp/auto-orient,1)
![[Laser cut and engrave] Our Journey Customizable Map](https://image-res.atomm.com/resource/xtool/community/attachment/xtool-community/32c34fa9-4c1a-4349-8677-87187b29f573.jpg?x-oss-process=image/resize,w_200,h_150,limit_0/interlace,1/format,webp/auto-orient,1)
![[Laser cut and engrave] Our Journey Customizable Map](https://image-res.atomm.com/resource/xtool/community/attachment/xtool-community/21f8b70f-9e19-4323-9f23-32b740738be5.jpg?x-oss-process=image/resize,w_200,h_150,limit_0/interlace,1/format,webp/auto-orient,1)
![[Laser cut and engrave] Our Journey Customizable Map](https://image-res.atomm.com/resource/xtool/community/attachment/xtool-community/25519a53-ba5d-47fe-b573-7924f91ce484.jpg?x-oss-process=image/resize,w_200,h_150,limit_0/interlace,1/format,webp/auto-orient,1)
Nasza Podróż – Mapa Personalizowana
 Instrukcja
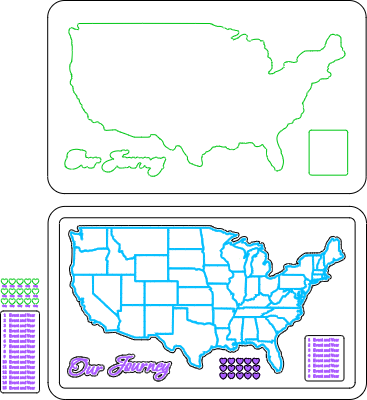


Informacja
Ta spersonalizowana mapa opowiada historię naszej wspólnej podróży, podkreślając najważniejsze chwile życia, które dzieliliśmy z mężem od momentu naszego pierwszego spotkania. Każde serce oznacza znaczące wydarzenie, ponumerowane w kolejności wystąpienia, z nazwą miasta obok niego. Dopasowany klucz mapy wyjaśnia każdy kamień milowy, tworząc piękną wizualną oś czasu naszej relacji. Ten element można spersonalizować, aby pokazać Twoją własną historię miłosną i miejsca, które ją ukształtowały.
Instrukcja
Krok1: Dostosuj plik


dostosować lokalizację i szczegóły wydarzenia w pliku. Po otwarciu pliku przenieś zielone serca do wybranej lokalizacji na mapie. Wybierz etykietę miasta, a następnie kliknij dwukrotnie. Możesz teraz wpisać nazwę miasta, którą chcesz dodać. Zrób to z każdym miastem i przejdź do odpowiedniego serca. Teraz, Będziesz chciał dostosować mapy. Zaznacz pole i rozgrupuj. Teraz możesz wybrać każdą linijkę i zmienić tekst. Są dodatkowe kierka i większy klucz maja, jeśli trzeba je dodać. Możesz je dostosować w razie potrzeby. Jeśli zmienisz rozmiar klucza mapy, koniecznie dostosuj lub usuń odpowiadającą linię punktową.
Krok2: Materiał procesowy

Projekt wykorzystuje sklejkę z drewna lipowego 3 mm. jest cięta, zielona to cięcie, fioletowe i niebieskie to grawer. Niebieska warstwa musi być dość delikatna i upewnij się, że najpierw będzie grawerowana. Przerób materiał.
Krok3: Assemble


Delikatnie przeszlifuj w razie potrzeby. Użyj ciemnej bejcy na podstawie. W tym projekcie użyto ciemnej bejcy orzechowej. Przyklej ramę na miejscu. Użyj linii nacięć, aby przykleić mapę, klucz mapy i "naszą podróż". Teraz przyklej każde serce we właściwym miejscu, korzystając z linii wycięć jako wskazówki. Wykończ lakierem bezbarwnym lub poliuretanem według wyboru.
Remiksy


'/%3e%3cdefs%3e%3clinearGradient%20id='paint0_linear_1433_15726'%20x1='12'%20y1='5.25'%20x2='12'%20y2='18.75'%20gradientUnits='userSpaceOnUse'%3e%3cstop%20stop-color='%23FFC654'/%3e%3cstop%20offset='1'%20stop-color='%23FF8D12'/%3e%3c/linearGradient%3e%3c/defs%3e%3c/svg%3e)


Możesz również polubić

Mapa cięcia laserowego

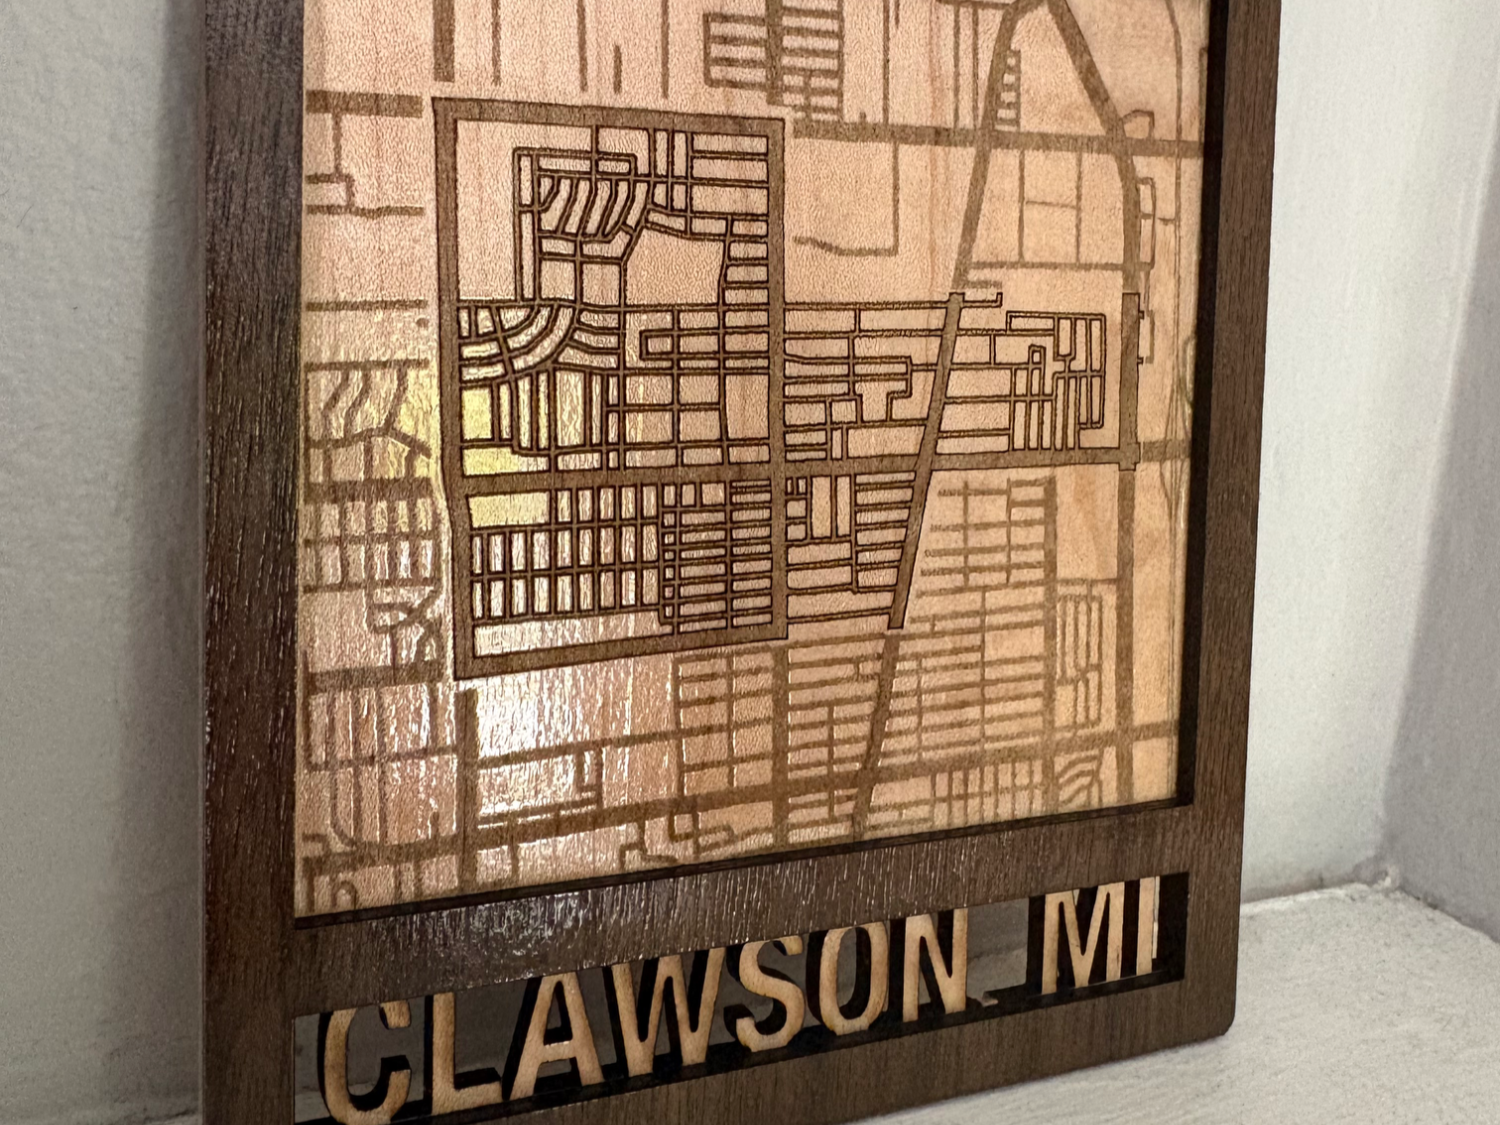
Mapa miasta Clawson


Mapa świata


Mapa świata


Mapa Manhattanu w Nowym Jorku


Mapa rozkładu zamków średniowiecza na 3D konturowej mapie

Światowa mapa topograficzna

Zagadka z mapą świata


Mapa Teksasu do grawerowania na skórze lub skórze


Mapa Dublina, Irlandia – cięcie laserowe


Mapa Baltimore z wycinaniem laserowym w rzeczywistości


Mapa świata


Laserowo wycięta drewniana mapa Włoch z punktami orientacyjnymi i regionami


Mapa Japonii


Mapa Przygodowa USA


Mapa topograficzna 3D Rzeka Czerwona


Mapa kreatywna


To jest mapa świata, którą stworzyłem