Signaler
![[Laser cut and engrave] Pot à crayons chat](https://image-res.atomm.com/resource/xtool/community/attachment/xtool-community/565449d2-7e31-4663-bdf9-88e53b34d6b9.JPG?x-oss-process=image/resize,w_1200,h_900,limit_0/interlace,1/format,webp/auto-orient,1)
![[Laser cut and engrave] Pot à crayons chat](data:image/png;base64,iVBORw0KGgoAAAANSUhEUgAAAAoAAAAKCAYAAACNMs+9AAAAAXNSR0IArs4c6QAAABdJREFUKFNjZCASMBKpjmFUId6QIjp4AAppAAuXjCs4AAAAAElFTkSuQmCC)
![[Laser cut and engrave] Pot à crayons chat](https://image-res.atomm.com/resource/xtool/community/attachment/xtool-community/565449d2-7e31-4663-bdf9-88e53b34d6b9.JPG?x-oss-process=image/resize,w_200,h_150,limit_0/interlace,1/format,webp/auto-orient,1)
![[Laser cut and engrave] Pot à crayons chat](https://image-res.atomm.com/resource/xtool/community/attachment/xtool-community/44b25290-037f-4ab1-b2c8-06f605bba0ea.JPG?x-oss-process=image/resize,w_200,h_150,limit_0/interlace,1/format,webp/auto-orient,1)
![[Laser cut and engrave] Pot à crayons chat](https://image-res.atomm.com/resource/xtool/community/attachment/xtool-community/d384dbdd-cac9-4fed-8bf0-f196925e74cd.JPG?x-oss-process=image/resize,w_200,h_150,limit_0/interlace,1/format,webp/auto-orient,1)
![[Laser cut and engrave] Pot à crayons chat](https://image-res.atomm.com/resource/xtool/community/attachment/xtool-community/636ec7cd-7113-4552-a689-c00a80484717.JPG?x-oss-process=image/resize,w_200,h_150,limit_0/interlace,1/format,webp/auto-orient,1)
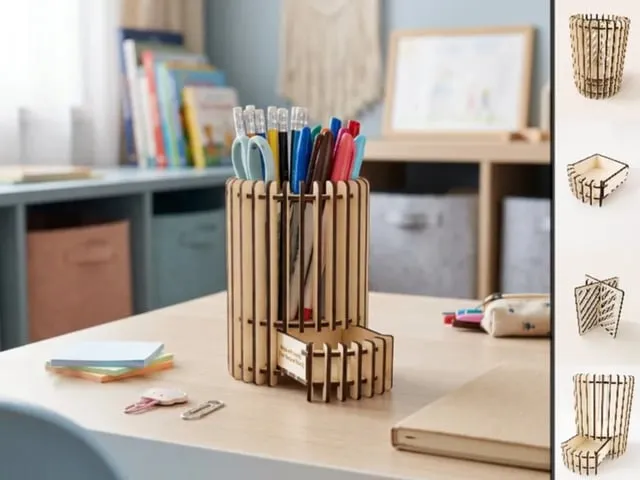
Pot à crayons chat
 Instruction
Pot à crayon chat
.xcs
Scénario d'application
Traitement au laser
Machine et module

xTool S1
20WMachine xTool compatible
Nouveau
M2
10W, 20WF2 Ultra UV
5WF2
15WP3
80WF2 Ultra
40WF1 Ultra
20WM1
5W, 10WD1
5W, 10W, 20WD1 Pro
5W, 10W, 20W, 40WP2
55WF1
10WS1
10W, 40WM1 Ultra
10W, 20WP2S
55WMatériau utilisé

Contreplaqué de tilleul de 3 mm d’épaisseur

31
857
Instruction
1
Étape1: Préparation

Aperçu

Aperçu

Aperçu
Découpez et préparez les différentes pièces.
2
Étape2: Assemblage

Aperçu
Assemblez le fond et le premier coté.
3
Étape3: Assemblage

Aperçu

Aperçu
Assemblez le deuxième et le troisième coté.
4
Étape4: Assemblage

Aperçu

Aperçu
Assemblez le quatrième et dernier coté.
5
Étape5: Collage façade

Aperçu

Aperçu
Collez la façade.
6
Étape6: Assemblage

Aperçu

Aperçu
Votre pot à crayons est maintenant terminé …
Commentaires
Remixes


'/%3e%3cdefs%3e%3clinearGradient%20id='paint0_linear_1433_15726'%20x1='12'%20y1='5.25'%20x2='12'%20y2='18.75'%20gradientUnits='userSpaceOnUse'%3e%3cstop%20stop-color='%23FFC654'/%3e%3cstop%20offset='1'%20stop-color='%23FF8D12'/%3e%3c/linearGradient%3e%3c/defs%3e%3c/svg%3e)

Vous pourriez aussi aimer
Carte de Saint-Valentin au crayon de Saint-Valentin
Carte porte-crayon de Pâques
Carte porte-crayon à coloriage de Pâques

Pot à crayons en bois avec inscription Merci Maîtresse

3
17

Pot à crayon en bois avec motifs photo

5
30
Pot à crayons cylindrique avec tiroir de rangement pour bureau

16
63

banc a crayon

5
13

pot a crayon
0
2

Pot à crayons personnalisé avec prénom Marion et motif cœurs

2
15

Pot à crayons en forme de banc pour bureau

1
11

Porte-crayons 🐱✨🐾 pour tableau noir Kawaii Cat

13
26

Pot à crayons en forme de van rétro

2
3

Pot à crayons en bois avec carte du département de la Loire
0
8

Pot à crayons en bois avec fleurs et inscription Merci

2
12

Support crayon de couleurs
10
32

pot à feutres
2
2

'/%3e%3cdefs%3e%3clinearGradient%20id='paint0_linear_1433_15675'%20x1='12'%20y1='3.25'%20x2='16.6891'%20y2='20.75'%20gradientUnits='userSpaceOnUse'%3e%3cstop%20stop-color='%23FF5D80'/%3e%3cstop%20offset='1'%20stop-color='%23FF0035'/%3e%3c/linearGradient%3e%3c/defs%3e%3c/svg%3e)
Pot à crayons enfant

15
76

boite a courrier et pot a crayon

0
27

pot a crayon

13
140

maitresse

15
55

chien pot a crayon

2
9