Report
![[Laser cut and engrave] Minnie door sign](https://image-res.atomm.com/resource/xart/result/12720/211a1d50-68df-414a-8ecc-97014e61ae3a.png?x-oss-process=image/resize,m_fill,w_1280,h_960,limit_0/interlace,1/format,webp/auto-orient,1)
![[Laser cut and engrave] Minnie door sign](data:image/png;base64,iVBORw0KGgoAAAANSUhEUgAAAAoAAAAKCAYAAACNMs+9AAAAAXNSR0IArs4c6QAAABdJREFUKFNjZCASMBKpjmFUId6QIjp4AAppAAuXjCs4AAAAAElFTkSuQmCC)
![[Laser cut and engrave] Minnie door sign](https://image-res.atomm.com/resource/xart/result/12720/211a1d50-68df-414a-8ecc-97014e61ae3a.png?x-oss-process=image/resize,m_fill,w_160,h_120,limit_0/interlace,1/format,webp/auto-orient,1)
![[Laser cut and engrave] Minnie door sign](https://image-res.atomm.com/resource/xtool/community/attachment/xtool-community/155db2ec-aaf9-48d6-81cc-5faa4cc4684d/Imagen%20de%20WhatsApp%202024-08-05%20a%20las%2012.27.03_0bc09123.jpg?x-oss-process=image/resize,m_fill,w_160,h_120,limit_0/interlace,1/format,webp/auto-orient,1)
![[Laser cut and engrave] Minnie door sign](https://image-res.atomm.com/resource/xtool/community/attachment/xtool-community/8c4772b9-34dc-4849-aae2-5a55a2c80dd7/Imagen%20de%20WhatsApp%202024-08-05%20a%20las%2012.27.04_2eff24b1.jpg?x-oss-process=image/resize,m_fill,w_160,h_120,limit_0/interlace,1/format,webp/auto-orient,1)
Minnie door sign
 Instruction
door sign minnie
.xcs
Application scenario
Laser processing (120min)
Machine & module

xTool D1
5WCompatible xTool Machine
P3
F2
F2 Ultra UV
F2 Ultra(Single)
F2 Ultra
F1 Ultra
F1
F1 Lite
S1
P2S
P2
M1 Ultra
M1
D1 Pro 2.0
D1 Pro
Laserbox
M2
Accessories

xTool Honeycomb Working Panel Set for D1 Pro/D1

xTool D1 Pro/D1 Air Assist Set
Material used

1/8"(3mm) Basswood Plywood

3mm Basswood Plywood

80
1773
Information
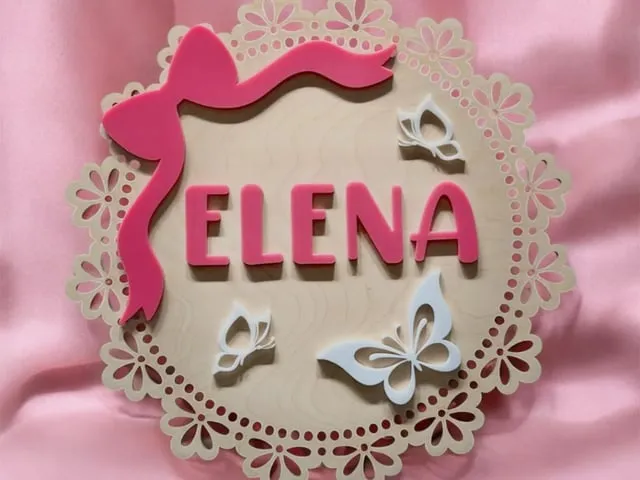
To decorate the wall or door and announce the arrival of a baby...
Instruction
1
Step1: Creating Our Poster
- Create a 250mm x 250mm circle
- Search Google for a vector of a star, bow and Minnie's head, and select the trace image tool, these will be the pieces that we will use to decorate our design.
- I chose a farm minnie without a background and took it to the program to calculate the image size and print it.
- Finally, copy the names separately so I can place them in my design, don't forget to select welding
2
Step2: Cut, paint and print
- We cut all our pieces
- I divided our central circle into 3 parts and painted them with acrylic paint and a brush, so that the edges were straight I used masking tape to cover the divisions.
- We painted stars and names with acrylic spray paint.
- I printed the Minnie on self-adhesive photo paper.
3
Step3: paste and record
- We glue all our pieces together, you can use the glue of your choice, I use Tacky glue
- When the baby was born, I recorded the information about her birth.
Comments
Remixes



You may also like

King baby door sign

37
46

Forest Wall Plaque

63
506

Personalized round wall plaque with name Anna and teddy bear pattern

1
26

Wall Sign for Baby (Teddy bear)
82
236

Cute 🧸 Teddy Bear Name Plate (Easy to Create) | Personalised round wall plaque with teddy bear and flowers for nursery

0
25

mickey name plate

4
38

Animales de la selva

5
35

Children's room decoration

2
18

Baby Pendant

3
37

Personalized round wall plaque with name and fawn pattern

0
3

$2.25
$2.25
Credits225
Name Signs Laser Cut Bundle. Kids Room Door Signs. Wall Decor. Nursery Name Wall Hangings. Wall Signs. Bedroom Decor. Kids Laser. Children's Room

11

$4.99
$4.99
Credits499
Moon and stars sign for the baby's room - baby Name sign - customizable
9

Baby elephant door sign
181
496

Engraved Wooden Birth Plaque with Minnie for Baby

9
44

Minnie keychain
31
58

Teddy bear wall plaque

21
107

Newborn Baby Personalized Stat Sign Lasercut

10
64
Nursery girl sign with Butterflies and Bow

0
11