
![[Laser cut and engrave] Gift Card Holder](https://image-res.atomm.com/resource/xtool/community/attachment/xtool-community/8a602e9e-90be-4413-bce4-0181e57893bc?x-oss-process=image/resize,w_1200,h_900,limit_0/interlace,1/format,webp/auto-orient,1)
![[Laser cut and engrave] Gift Card Holder](data:image/png;base64,iVBORw0KGgoAAAANSUhEUgAAAAoAAAAKCAYAAACNMs+9AAAAAXNSR0IArs4c6QAAABdJREFUKFNjZCASMBKpjmFUId6QIjp4AAppAAuXjCs4AAAAAElFTkSuQmCC)
![[Laser cut and engrave] Gift Card Holder](https://image-res.atomm.com/resource/xtool/community/attachment/xtool-community/8a602e9e-90be-4413-bce4-0181e57893bc?x-oss-process=image/resize,w_200,h_150,limit_0/interlace,1/format,webp/auto-orient,1)
![[Laser cut and engrave] Gift Card Holder](https://image-res.atomm.com/resource/xtool/community/attachment/xtool-community/4e09371a-8aef-40aa-8c04-361e9d748ca6/1000004011.jpg?x-oss-process=image/resize,w_200,h_150,limit_0/interlace,1/format,webp/auto-orient,1)
![[Laser cut and engrave] Gift Card Holder](https://image-res.atomm.com/resource/xtool/community/attachment/xtool-community/947a8b54-5d20-4e6a-bc37-63fcff2c60cc/1000004013.jpg?x-oss-process=image/resize,w_200,h_150,limit_0/interlace,1/format,webp/auto-orient,1)
![[Laser cut and engrave] Gift Card Holder](https://image-res.atomm.com/resource/xtool/community/attachment/xtool-community/5bac53c6-7f01-4865-afee-19fdca385020/1000004014.jpg?x-oss-process=image/resize,w_200,h_150,limit_0/interlace,1/format,webp/auto-orient,1)
Власник подарункової картки
 Інструкція

Інформація
Базовий, тематичний подарунковий власник може використати цю концепцію для створення будь-якої теми. Цей файл призначений спеціально для випуску.
Інструкція
Крок1: Створіть топери/декор


Визначтеся з темою та тим, що ви хочете додати на свій тримач картки. Це можуть бути кульки, серце, зірки, торт — будь-що, що підходить до вашої концепції. З'єднайте її з контуром вашого власника картки (вона має бути трохи більшою за вашу подарункову картку).
Крок2: Спереду і ззаду

Дублюйте зображення, зроблене на попередньому кроці. Додайте будь-які вставки, які можуть знадобитися для верхнього дизайну (отвори для додавання ниток для кульок, оцінки, щоб знати, куди додавати зображення). У моєму випадку я зробив два отвори, щоб просунути китиці.
Встановіть прямокутник всередині одного з дублікатів. Одна з них — це передня частина, через яку ви можете бачити картку. Вам просто потрібно, щоб прямокутник був меншим за карту, яку використовуєте, можна залишити простір для додавання слів за бажанням.
Крок3: Холлоу


Зробіть прямокутник такого ж розміру, як зовнішній кутник першого прямокутника, а всередину покладіть інший прямокутник, більший за розмір картки, але менший за зовнішній прямокутник. Зміщуйте його до верхнього центру зовнішнього прямокутника і використайте функцію віднімання, щоб створити велику форму літери «U».
Крок4: Завершення

Розміщуйте зображення близько одне до одного. Встановіть усі варіанти вирізання або гравіювання за потреби і виберіть тип матеріалу.
Крок5: Збирати та клеїти


Збери деталі і приклеїть дублікати спереду і ззаду, а посередині — порожнину. (Я б рекомендував хороший клей для дерева). Додавайте будь-які прикраси або кольори (фарби та морилки) за бажанням. Коли клей закріпиться, ви можете вставити подарункову картку і подарувати її
.Ремікси


Вам також може сподобатися

3D подарункова картка для власника випускної картки, лазерна різьба. Тримач для дерев'яних подарункових карток. Коробка для карток. Подарунок на випускний


Власник випускної картки


Власник подарункової картки до Дня матері


Власник подарункової картки з нагоди випуску

Вітаю Власника подарункової картки


Власник подарункової картки


'/%3e%3cdefs%3e%3clinearGradient%20id='paint0_linear_1433_15752'%20x1='12.5'%20y1='5'%20x2='12.5'%20y2='19.2596'%20gradientUnits='userSpaceOnUse'%3e%3cstop%20stop-color='%232F7FFF'/%3e%3cstop%20offset='1'%20stop-color='%232661F1'/%3e%3c/linearGradient%3e%3c/defs%3e%3c/svg%3e)
 Шаблон
Власник подарункової картки з нагоди випуску


Власник грошей на випуск

Власник подарункової картки на випускний Laser Cut Bundle, власник подарункової картки, випускник 2025 року SVG


Тримач подарункової картки на день народження серпня — Gladiolus — Королеви народжуються в серпні!

Грошовий тримач у USD для випускників.


Простий тримач подарункової картки для різних випадків
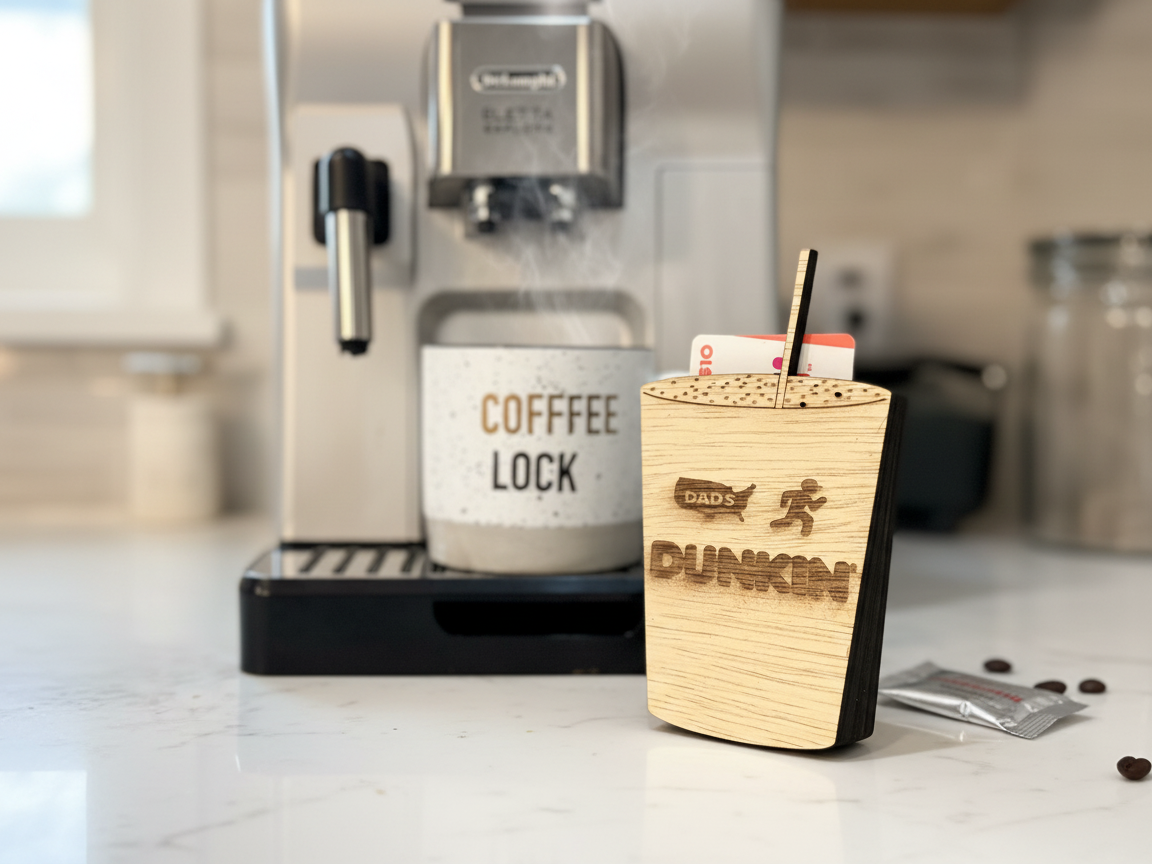
Тримач подарункової картки Dunkin Dads Coffee Cup

Подарункова картка на Різдво з грошима


Власники подарункових карток із двома різними дизайнами включені


Персоналізована подарункова картка

Готівковий подарунок, картка, дерев'яна картка, дерев'яна подарункова картка, подарункова бирка


Власник грошей на випуск 2025 року