


신고
![[Laser cut and engrave] Laser Cut Wooden Monitor Stand Riser with Cable Management](https://storage-us.atomm.com/resource/xtool/community/attachment/xtool-community/6f2bbb36-6944-461a-b935-21ef3336d1a9.jpeg?x-oss-process=image/resize,w_1200,h_900,limit_0/interlace,1/format,webp/auto-orient,1)
![[Laser cut and engrave] Laser Cut Wooden Monitor Stand Riser with Cable Management](data:image/png;base64,iVBORw0KGgoAAAANSUhEUgAAAAoAAAAKCAYAAACNMs+9AAAAAXNSR0IArs4c6QAAABdJREFUKFNjZCASMBKpjmFUId6QIjp4AAppAAuXjCs4AAAAAElFTkSuQmCC)
![[Laser cut and engrave] Laser Cut Wooden Monitor Stand Riser with Cable Management](https://storage-us.atomm.com/resource/xtool/community/attachment/xtool-community/6f2bbb36-6944-461a-b935-21ef3336d1a9.jpeg?x-oss-process=image/resize,w_200,h_150,limit_0/interlace,1/format,webp/auto-orient,1)
![[Laser cut and engrave] Laser Cut Wooden Monitor Stand Riser with Cable Management](https://storage-us.atomm.com/resource/xtool/community/attachment/xtool-community/3aa3347c-4a1e-4ae9-b7c2-cdfbaf75e938.jpeg?x-oss-process=image/resize,w_200,h_150,limit_0/interlace,1/format,webp/auto-orient,1)
S1용 재질 핀홀더
 지침
지침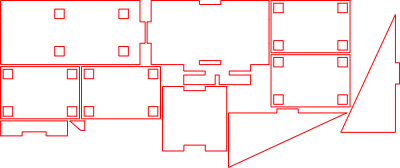
Pinholder S1
.xcs
응용 시나리오
레이저 가공
기계 및 모듈
xTool S1
40W호환되는 · 9
사용된 재료

1/8" (3mm) MDF 보드
10
211
지침
1
단계1: 레이저 절단 모든 부품

미리보기
선택한 재료에서 필요한 모든 부품을 레이저로 절단하세요.
2
단계2: 첫 번째 측면 벽을 부착하세요

미리보기
사진에 보이는 대로 첫 번째 측면 벽을 베이스 플레이트에 접착하세요.
3
단계3: 두 번째 측면 벽을 부착하세요

미리보기
두 번째 측면 벽을 조심스럽게 정렬하여 접착제로 고정하세요.
4
단계4: 뒷벽을 붙이세요

미리보기
이미지에 보이는 대로 뒷벽을 조립체에 접착하세요.
5
단계5: 작은 사이드 요소를 접착하세요

미리보기
작은 사이드 요소를 베이스 플레이트에 접착하세요.
< data-start="1185" data-end="1236">참고: 이미지에 위치가 명확히 표시되어 있습니다.
6
단계6: 작은 보강 부품을 추가하세요

미리보기
이미지에 보이는 대로 작은 보강 부품을 제자리에 접착하세요.
7
단계7: 핀 홀더 블록 조립

미리보기
네 개의 동일한 판을 완벽하게 정렬하고 평평하게
8
단계8: 핀 홀더 블록 장착

미리보기
조립된 블록을 큰 판에 접착하여 구멍과 정확히 일치시킵니다.
9
단계9: 최종 조립

미리보기
완성된 유닛을 이미지에 보이는 대로 베이스 플레이트에 접착하세요.
10
단계10: 사용 준비 완료

미리보기
재료 핀을 지정된 구멍에 꽂으세요 — 홀더는 이제 사용 준비가 완료됩니다.
11
단계11: 핀 홀더를 xTool S1에 장착하세요

미리보기
xTool S1을 살짝 들어 올리고 재료 핀 홀더를 옆에서 아래로 밀어 넣으세요. 기계를 조심스럽게 내려서 홀더가 단단히 고정되도록 하세요.
홀더가 기계 발 사이에 위치해 에 위치해 있는지 확인하세요.
댓글


