


Description
How to Use the Pet ID Tag Maker
Lost your original pet-tag design file? Don’t worry! The Pet ID Tag Maker lets you quickly create a correctly sized, front-and-back vector design for your pet’s tag.
Choose a measured tag shape, add the name and contact information, adjust the layout, and export an SVG ready to open in Atomm or your laser software.
1. Choose Your Tag
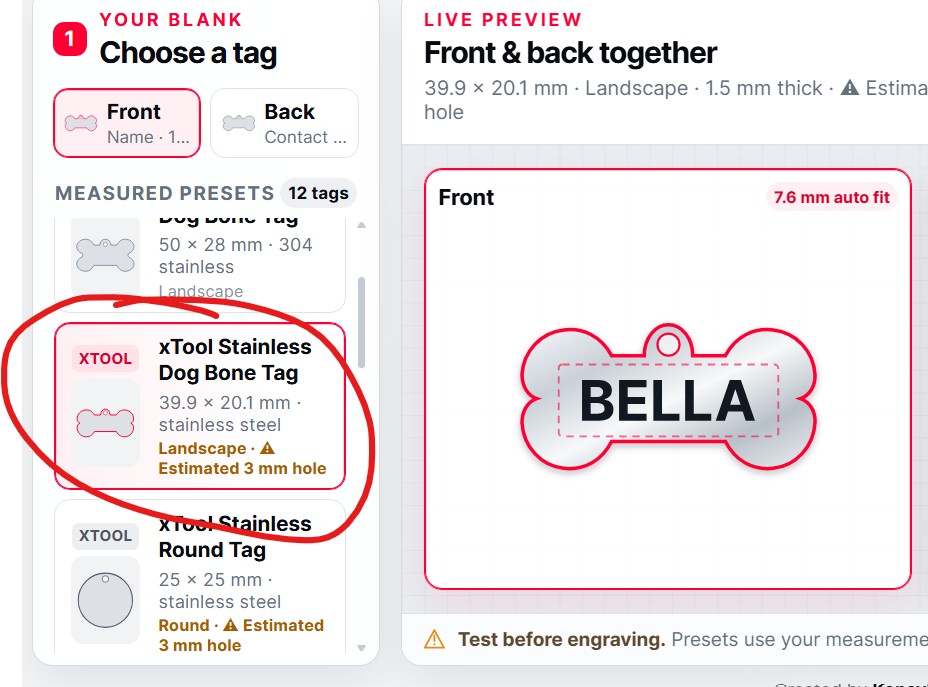
Select the blank that matches the physical tag you plan to engrave.
Each tag card shows its:
Supplier or brand
Shape
Width and height
Material
Orientation
Hole information
For the most accurate result, choose the exact blank you own—not simply one with a similar shape.
Some tags are marked Estimated hole. Their outside dimensions come from the product listing, but the 3 mm hole size and position have been estimated because the physical blank has not yet been measured. Always compare the exported outline with your real tag before engraving.
Manufacturing batches can also vary slightly, even when buying the same product again.
2. Design the Front
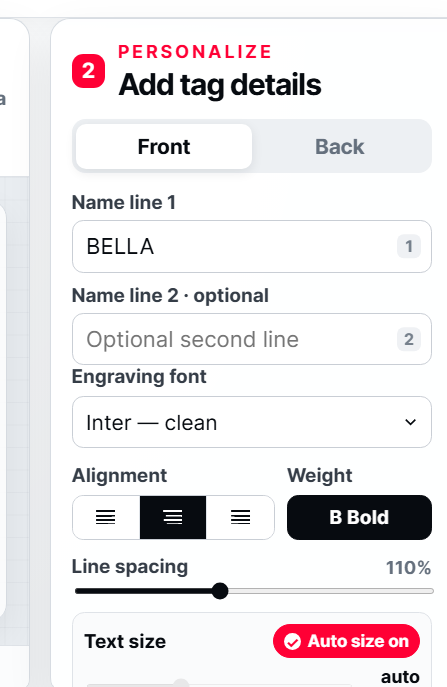
Select Front to personalize the front of the tag.
Enter the pet’s name in Name line 1. You can also add an optional second line for a surname, short message, or other detail.
Then customize the design using:
Engraving font
Left, centre, or right alignment
Regular or bold weight
Line spacing
Automatic or manual text size
The front and back can use different fonts, sizes, alignment, and positioning.
Choosing a Font
The generator includes eight locally bundled vector fonts:
Inter — clean and easy to read
Montserrat — modern and balanced
Oswald — narrow and excellent for numbers
Roboto Slab — strong with a traditional feel
Bebas Neue — bold and space-saving
Pacifico — flowing script
Bubblegum Sans — playful and friendly
Courgette — soft handwritten script
Every letter is converted into a true SVG vector path during export. This preserves the selected font even if it is not installed in xTool Studio.
Because the lettering becomes vector paths, it will not be editable as normal typed text after export. Return to the generator if you need to correct a name or phone number.
3. Design the Back
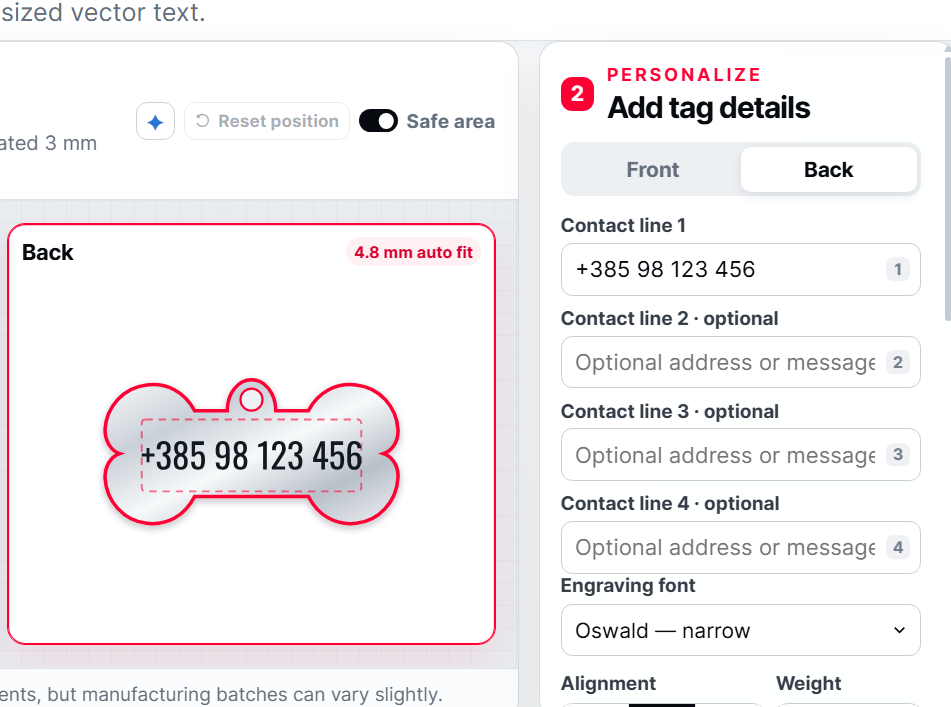
Select Back and add the contact information you want engraved.
You can use up to four lines, for example:
Phone number
Second phone number
Address
“I’m microchipped”
“Call my family”
A short message such as “Small but mighty”
You do not need to fill every line. For the clearest result, include only the information someone would need to return your pet safely.
A large, readable phone number is usually more useful than several lines of very small text.
Understanding Auto Size
Auto Size automatically chooses the largest text size that fits inside the safe engraving area.
This is the easiest option for most designs. The text will automatically resize as you type or add additional lines.
If the fitted lettering becomes smaller than 3 mm, the generator displays a warning. You can still export it, but test it carefully—very small or thin lettering may not engrave clearly.
For small spaces, try a narrow, strong font such as Oswald or Bebas Neue.
Manually Resize and Move the Text
If you want complete control over the layout:
Select the Front or Back you want to edit.
Find the Text size controls.
Turn Auto Size off.
Adjust the text size manually.
Click or press directly on the text in the preview.
Drag it into your preferred position with your mouse or pointer.
Only the selected side is adjusted, so you can position the front and back independently.
If you change your mind, click Reset Position beside the Safe Area control. This returns the selected side to the recommended starting position for that particular tag shape.
The small diamond button opens an additional positioning tip.
 Using the Safe Area
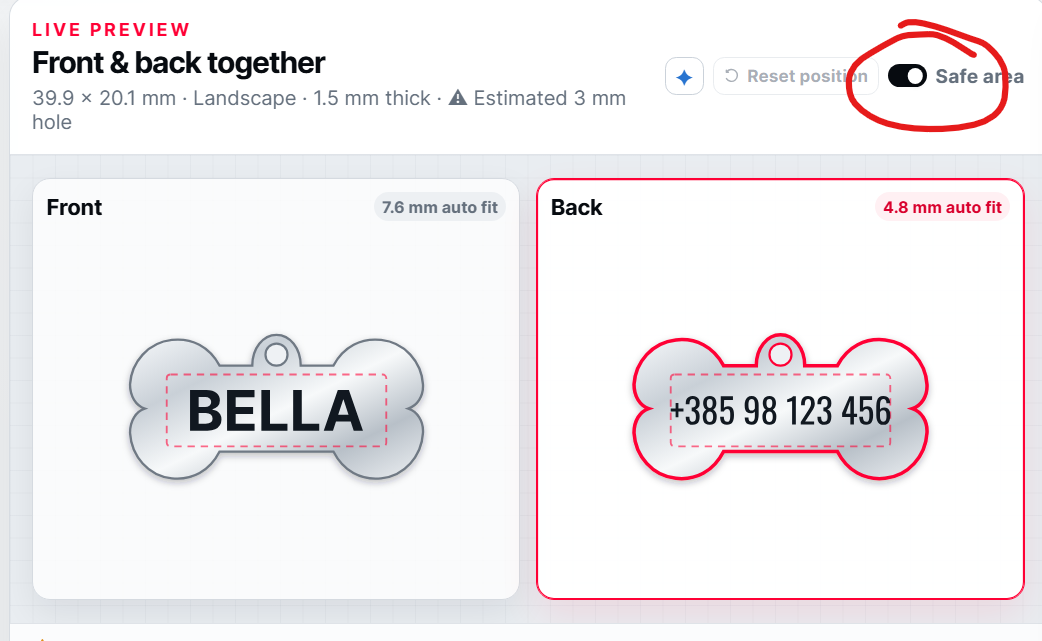
Turn on Safe Area to display the dashed engraving boundary inside the tag.
Keep important lettering inside this guide so it does not sit too close to:
The outside edge
Rounded corners
The attachment hole
Curved or narrow parts of the tag
The safe area is only a positioning guide. It is not part of your engraved lettering.
You can move text outside it, but always check the physical blank carefully before engraving.
Front and Back Preview
The live preview displays the front and back together so you can check the complete tag before exporting.
The currently selected side is highlighted. You can switch sides using the Front and Back controls or by selecting the corresponding preview.
The finished SVG places the front and back beside each other as separate vector groups, making them easier to identify and arrange in your engraving workspace.
 Export Options
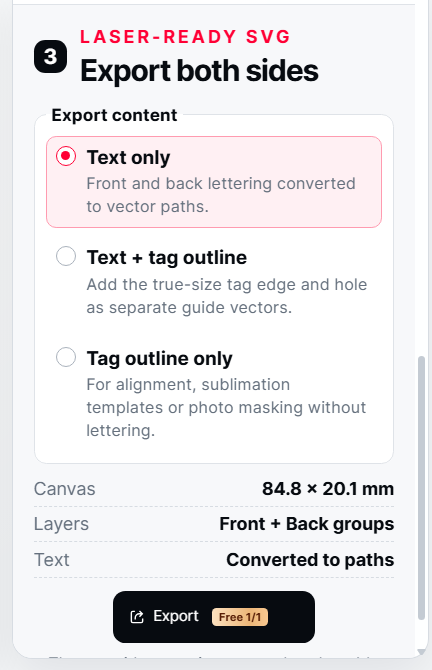
Choose the export mode that matches your project.
Text Only
Exports only the front and back lettering.
This is the best choice for normal engraving when you already position the physical tag using a jig, camera, or framing tool.
Text + Tag Outline
Exports the lettering together with the true-size tag outlines and holes.
Use this option when you need the outline for alignment, visual placement, masking, or template preparation.
If the outline is only being used as a positioning guide, make sure it is set to Ignore or otherwise prevented from engraving in your laser software.
Tag Outline Only
Exports the blank shapes and holes without any personalization.
This can be useful for:
Creating alignment guides
Preparing jigs or masks
Planning layouts
Building sublimation templates
Saving reusable tag outlines
After choosing an option, use the Atomm Export control to prepare the SVG.
 Tips for the Best Result
Measure your real blank before engraving.
Use the exact matching tag preset whenever possible.
Keep phone numbers large and easy to read.
Use fewer lines if the text becomes too small.
Avoid very thin script fonts on tiny tags.
Use Safe Area while arranging important details.
Double-check every name and phone number before exporting.
Choose Text Only for a straightforward engraving file.
Do not accidentally process the tag outline if it is only there for alignment.
Always run a small framing or position test before starting.
Test your laser settings first—metal type, coating, finish, and manufacturing batch can affect the result.
First Release Note
This is the first public release of the Pet ID Tag Maker.
Additional patches are planned to improve the SVG workflow for sublimation projects. More measured tag presets will also be added as I order, photograph, and test additional tag shapes.
If your exact blank is not available yet, choose the closest option only for layout inspiration—do not assume that a similar-looking outline will match your physical tag perfectly.
Make a Simple Jig for Flipping Tags
A built-in jig option is coming soon. For now, you can create a simple reusable jig using the Tag Outline Only export:
Export the tag outline.
Place it inside a rectangle matching the size of your laser baseplate.
Cut the tag opening from a suitable sheet of wood.
Leave the wooden jig securely positioned on the baseplate.
Place the blank inside the opening and engrave the front.
Flip the tag inside the same opening, align the back design, and engrave again.
This keeps the tag in a consistent position and makes front-and-back engraving much easier. Always frame the design and check its orientation before running the laser.
A future update will include a dedicated jig-building option directly inside the generator.
Created and owned by KONAVLE WOLVES, obrt za usluge, vl. Crysta Perak, Croatia. © 2026
KonavleWolves other generators with Atomm: